If you’re beginning work on a new tiling project and it’s your first time working with tiles, you may be a bit unsure of how to proceed. There is a lot to know about laying and placing tiles, from mixing tile adhesive and grout, learning how to tile with the RUBI manual or electric tile cutter, and grouting the final result. However, in this guide, we’re going to take a look at tile spacers, one of the most important elements of any tiling project .
We’ll explore why tile spacers are so important and share our top tips for using them effectively. Let’s get started!

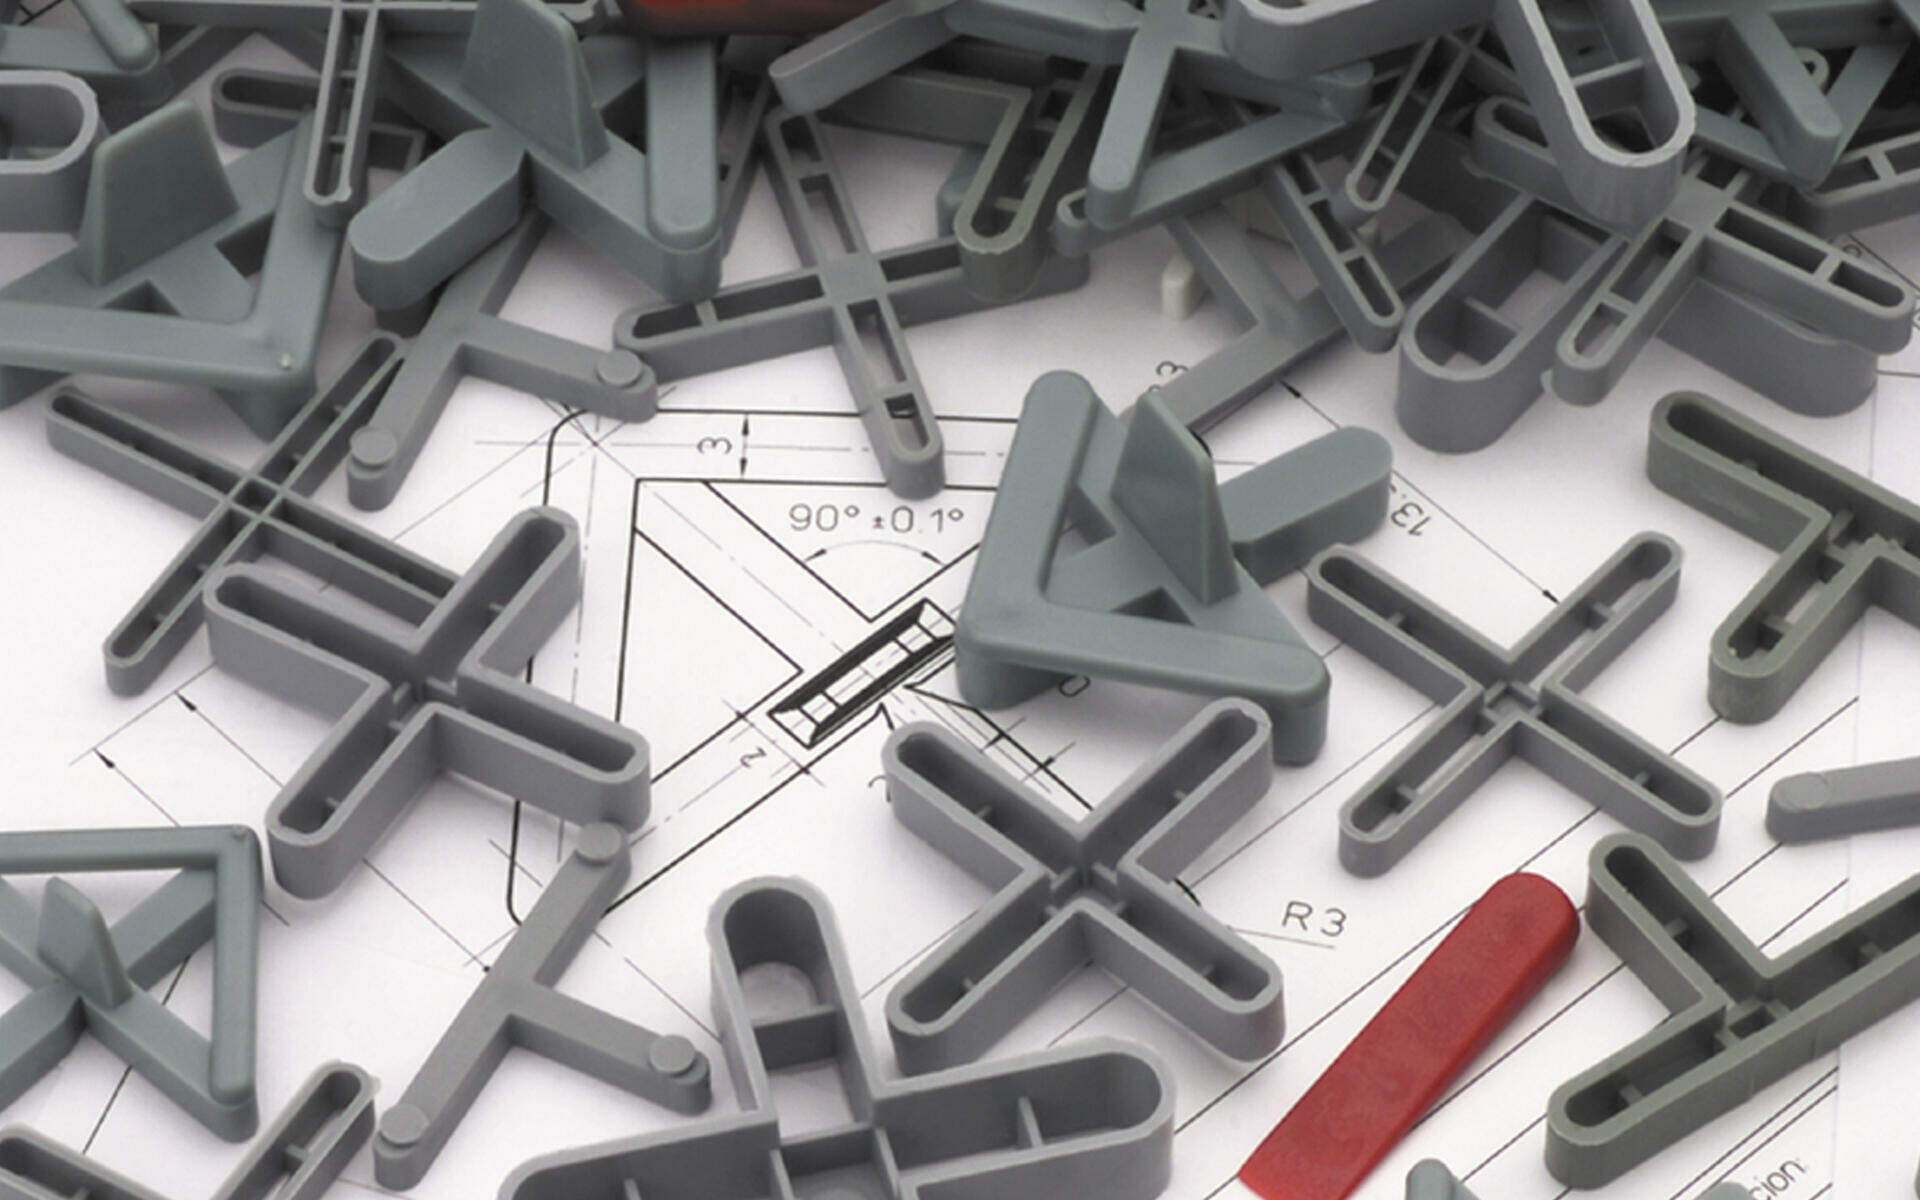
What Are Tile Spacers?
Tile spacers are small, plastic objects that are usually built in either “T” or a cross shape. They come in quite a few sizes, ranging from 1mm to 10mm.
They are used to maintain a consistent space between tiles when installing them on the adhesive. This allows for an even finish when it’s time to grout the tiles.
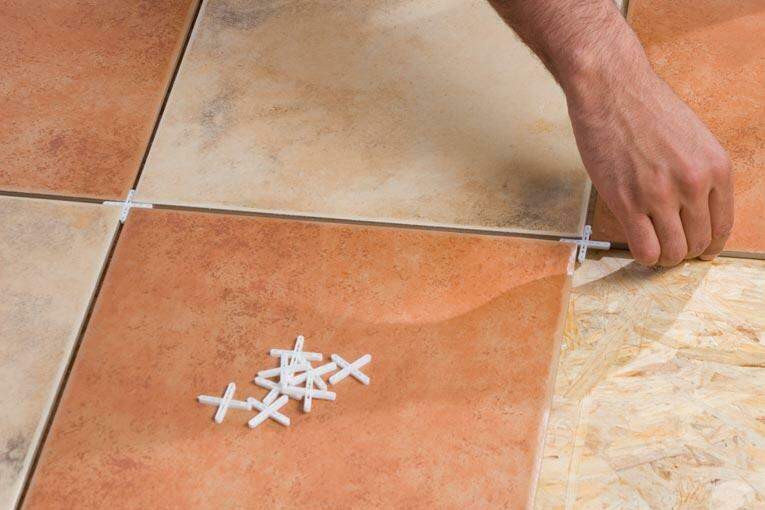
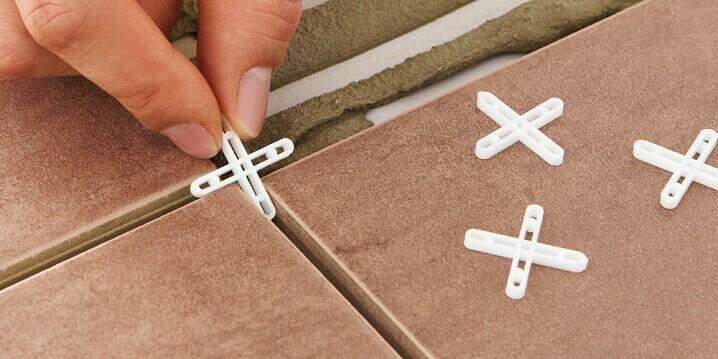
To use them, place spacers at each corner of your tile as you’re laying it. Then push the tiles together until the spacer has contact with each corner. You can remove tile spacers shortly after you finish the tile installation and you can usually reuse them in a future project.
Why Are Tile Spacers Important?
Tile spacers are important for a number of reasons, so let’s take a look at some of these.
You Can Use Multiple Grout Widths
If you are creating an intricate, mosaic-like tile design, it’s very difficult to space your tiles manually. This is especially true if you’re looking to use multiple grout widths.
But by using multiple sizes of grout spacers, you can easily create a tile pattern that uses multiple grout sizes, which can enhance the durability and attractiveness of the finished product.
Consistent Grout Spacing Ensures Tiles Are Straight and Even
If you don’t use tile spacers, you risk having your tiles end up crooked. Because they nestle into the corner of each tile, tile spacers allow for a completely straight, even finish.
Project Planning Is Easier
When you’re laying out your tile and planning your project, tile spacers are very helpful. You’ll know exactly what size gap you need between each tile. This makes it easier to measure tiles when laying them out, labeling them, and cutting them.

You Get a Professional Finish
Using tile spacers is the only way to get a truly professional finish on your project. Without them, your project will look amateurish and will likely have uneven gaps and crooked tiles.
Properly Protect the Integrity of Tile Floors
Tile spacers allow you to keep your floor level and ensure that each tile is properly grouted with the right amount of product.
If your tiles are too close together, you risk damage if they expand. They could also become dislodged or chipped. Spacers provide a more secure, durable surface.
Faster Turnaround Time
Because there is no guesswork when using tile spacers, your project will go much faster, and much more efficient.
You don’t have to take the time to measure each gap in your grout or worry about uneven results. Just use your spacers, lay your tile, and you’re good to go!
How to Use Tile Spacers
1. Start With the Right Products
Make sure to invest in high-quality plastic spacers. If you don’t use the right products, you could end up with cheap, cut-rate spacers that are hard to remove from your finished tile, or that break when you try to remove them.
2. Estimate the Correct Number of Tile Spacers for Your Project

Whatever product you’re using, you need to estimate the proper number of spacers. If you overestimate, you’ll waste money on spacers that you don’t end up using. If you underestimate, you could end up with serious project delays.
To estimate the right number, just multiply the total number of tile sheets or squares that you’re using by 4! This way, you’ll know that you’ve got enough spacers for your project.
However, we also recommend picking up a few extra spacers just in case you misplace any of them or they become damaged.
3. Remove Tile Spacers At The Right Time
Tile spacers should be removed around 20-30 minutes after the adhesive begins to set on your tiling project. You don’t want to remove them too soon because this can cause your tiles to shift.
Conversely, you don’t want to leave them in for too long because this can lead to stuck spacers. We recommend checking the manufacturer’s instructions when removing tile spacers to ensure that you do it properly.
If your spacers are hard to remove or you’re using small, cross-shaped spacers, we recommend using needle-nose pliers for extraction. Grab the side of the spacer firmly and pull it out using a vertical motion. Avoid horizontal movement. Horizontal movement can cause the still-adhering tiles to shift.
4. Never Grout Over Tile Spacers
If you’ve got tile spacers that are hard to remove, you may be tempted to simply grout over them. You should never do this. Grouting over tile spacers will result in a subpar result, and could even damage your floor.
While things may look fine for a few weeks – or even a few months – leaving spacers in place will damage the structural integrity of the grout. Eventually, you’ll see a small “x”-shaped crack over each tile spacer, as their height will cause excessive wear to the grout.
Don’t grout over tile spacers. Even if you have some that are stuck, you should pull them out, or remove them with a chisel and the grout should be then be re-applied. Trust us, this will save you quite a few headaches in the long run.
5. Make Sure to Cut Tiles Properly
Tile spacers are very difficult to use properly if you are cutting your own tiles and they are not completely straight. If you use a spacer on a single crooked tile, it can throw off your entire project.
Because of this, we recommend that you use a high-quality tile cutter, such as RUBI manual or electric Tile Cutter for your project. These products both provide completely straight, reliable cuts. This means you can be sure that a single misshapen tile won’t mess up your project.
6. Thinner Is Usually Better
Thin grout lines require less maintenance, and smaller grout spacers are becoming very popular for both DIY tiling projects and professional ones.
However, bear in mind the British standards which was updated in 2018. It now states that on tiles of up to 600mm, a minimum grout width of 2mm should be used. On larger tiles of 1200mm length, the minimum grout width should be 3mm.
When in doubt about what size of grout spacer to use, simply consult the manufacturer of your tiles and tell them about the particulars of your project. This will ensure that you’re making the right choices.
Follow These Tips For Spectacular Results!
Whether you choose to use RUBI tiling products or other leveling products, these tips are sure to help you. As long as you’ve got the right tools, the proper knowledge, and high-quality spacers, you’re sure to succeed!
For more tips and tricks related to tiling, as well as RUBI products, visit our blog! You’ll learn everything you need to know about DIY projects and you’ll be tiling like a pro in no time at all.

Post a comment