Why Levelling Systems Are Essential
Achieving a flawless tiled surface requires more than just careful placement. One of the biggest challenges in tiling is lippage—uneven tile edges that create ridges, compromise aesthetics, and even pose safety risks. The RUBI Delta Levelling System is engineered to eliminate this problem, ensuring tiles remain perfectly flush during installation. When paired with RUBI Protectors, the system not only guarantees precision but also safeguards delicate tile finishes.

Components of the RUBI Delta System
The system consists of three main parts:
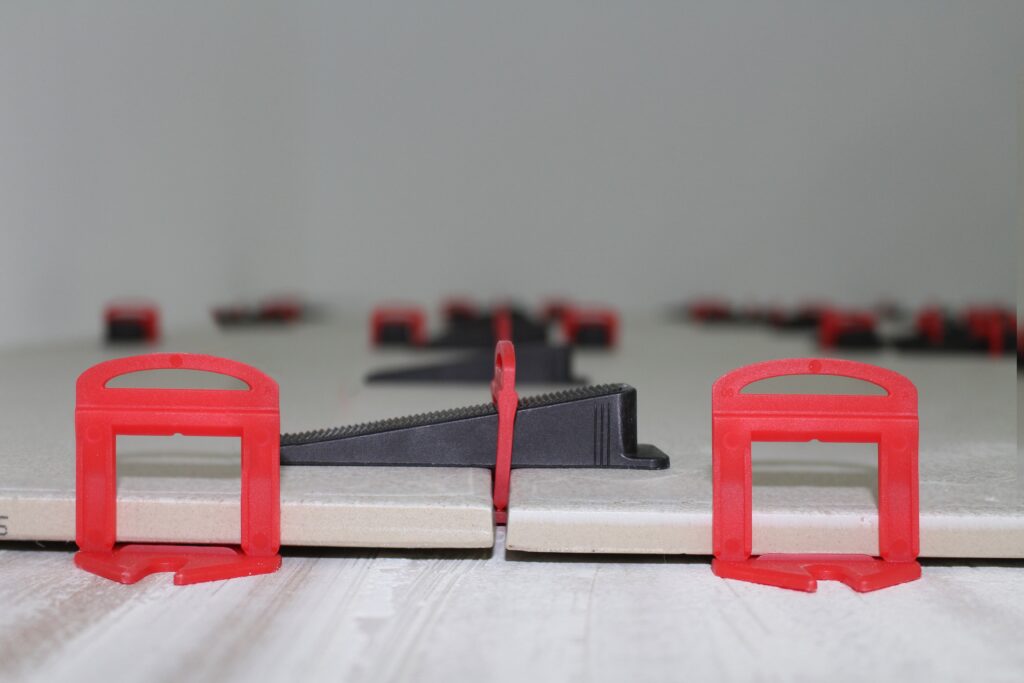
- Clips (strips): Placed beneath tile edges to maintain spacing and alignment.
- Reusable wedges: Inserted into clips to apply pressure and keep tiles level.
- Pliers: Used to tighten wedges securely without damaging tiles.
Tile thickness compatibility ranges from 3mm to 20mm, making it suitable for most wall and floor projects.
Step-by-Step Guide to Using RUBI Delta
1. Prepare the Surface
Ensure the substrate is clean, dry, and level. Apply adhesive evenly with a notched trowel for full coverage.
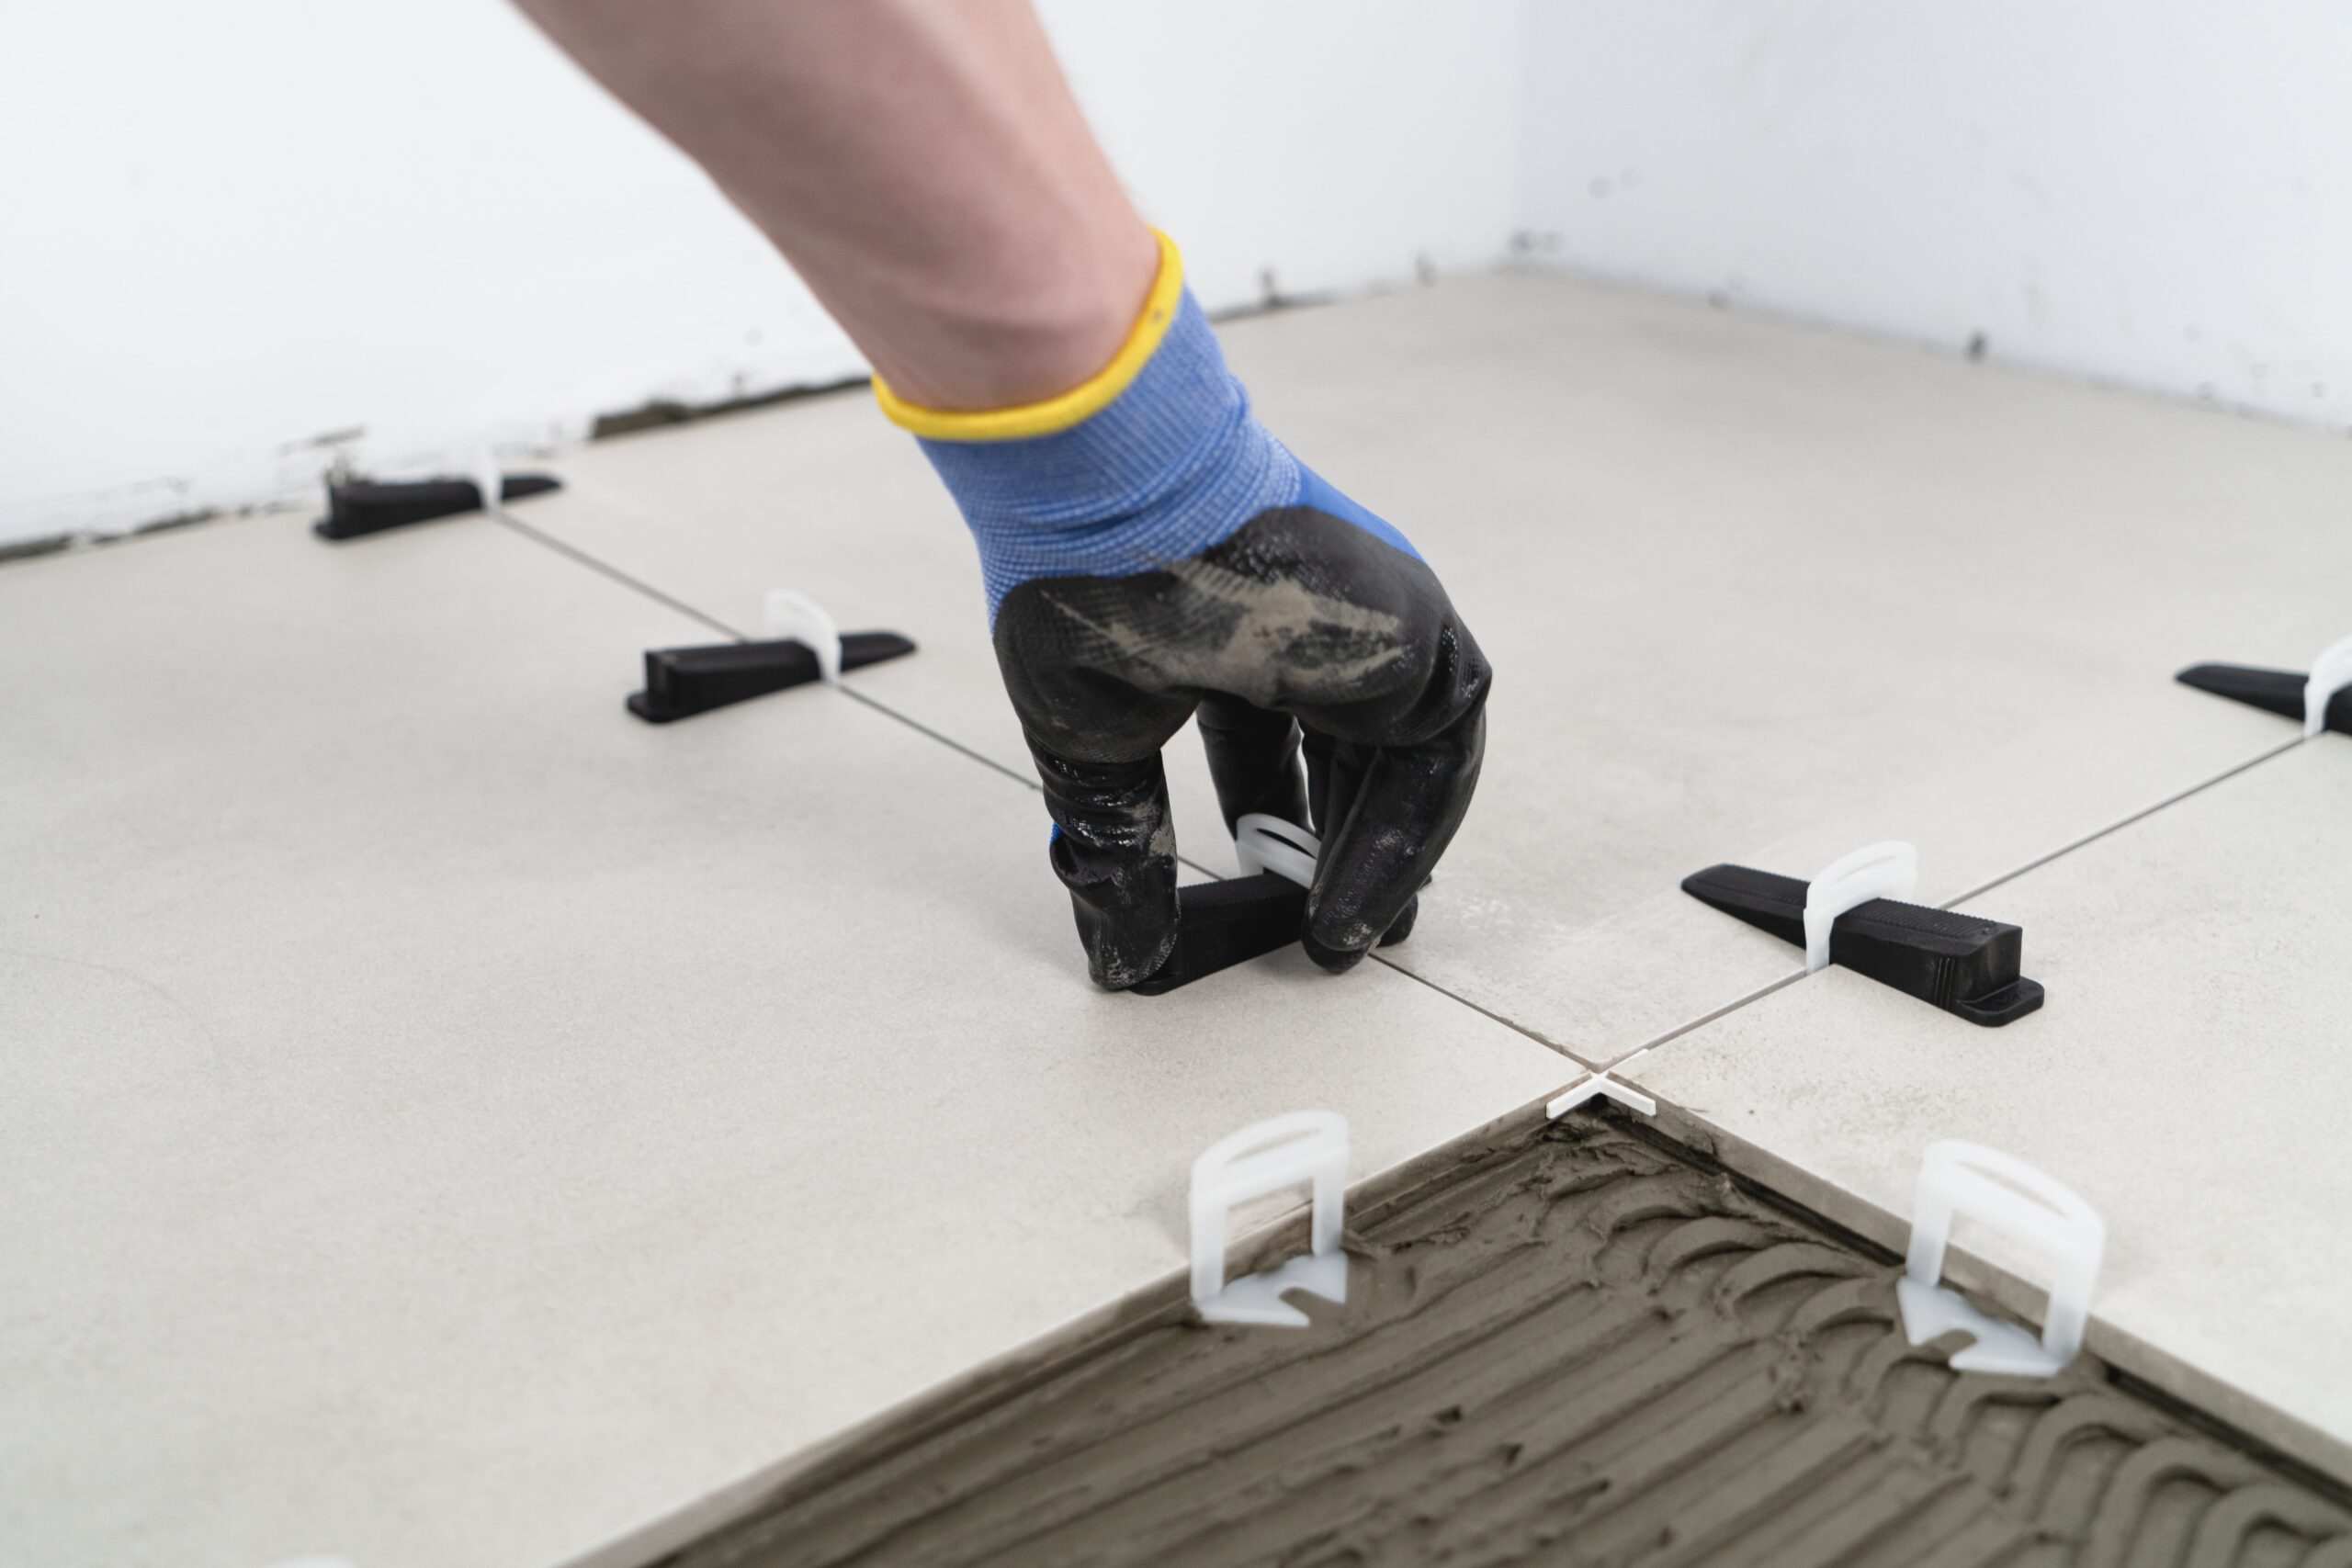
2. Place the Clips
Position clips beneath the edges of the first tile. For larger tiles, use multiple clips per side to prevent movement.
3. Lay the Adjacent Tile
Slide the next tile into place, pressing firmly into the adhesive. The clip acts as both a spacer and levelling guide.
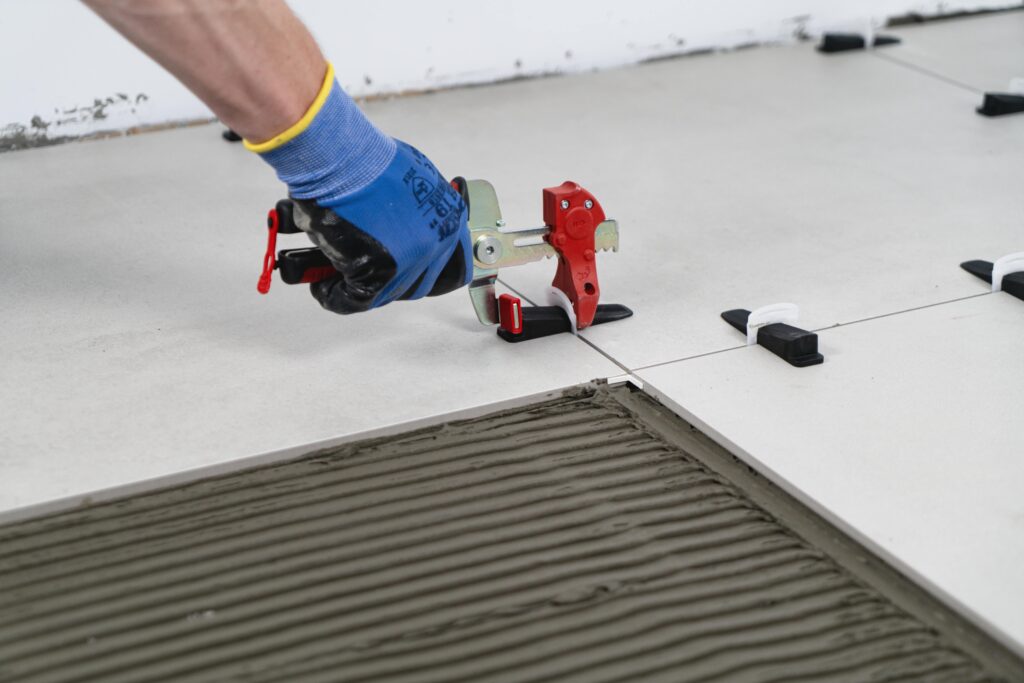
4. Insert the Wedges
Push the wedge into the clip slot until it makes contact with the tile surface. Use the pliers to tighten gently but firmly, applying pressure across tile edges to eliminate lippage.
5. Use RUBI Protectors
This is where RUBI Protectors come in:
- Place a protector between the wedge and the tile surface.
- The protector distributes pressure evenly, preventing scratches, chips, or marks on delicate finishes such as polished porcelain or natural stone.
- They are reusable, making them a cost-effective addition to your toolkit.
By combining wedges with protectors, you achieve both precision and protection.
6. Continue the Process
Repeat across the entire surface. For large-format tiles, increase the number of clips and protectors per side to ensure stability and safety.
7. Allow Adhesive to Cure
Let the adhesive set according to manufacturer instructions. The levelling system holds tiles securely during curing.
8. Remove Clips, Wedges, and Protectors
Once cured:
- Tap clips parallel to the grout line to break them off cleanly.
- Collect wedges and protectors for reuse.
- The clip bases remain under the tiles, invisible once grouted.
Best Practices
- Always use protectors on delicate tiles to avoid surface damage.
- Don’t overtighten wedges—the pliers are designed to apply the correct pressure.
- Use enough clips and protectors—especially with large-format tiles.
- Check alignment visually as you progress.
Advantages of RUBI Delta + Protectors
- Perfect finish: Eliminates lippage and protects tile surfaces.
- Reusable components: Wedges and protectors reduce long-term costs.
- Professional results: Smooth, safe, and durable tiled surfaces.
- Versatility: Suitable for ceramic, porcelain, and natural stone.
Conclusion
The RUBI Delta Levelling System, enhanced with RUBI Protectors, transforms tiling into a precise, efficient, and safe process. By following the step-by-step method—preparing the surface, placing clips, inserting wedges with protectors, and removing them after curing—you’ll achieve a flawless finish every time. Whether you’re a professional tiler or a DIY enthusiast, this combination ensures your tiled surfaces are not only beautiful but also protected and long-lasting.

Post a comment