
Large format tiles are an increasingly popular design choice in residential and commercial spaces. Their sleek, modern aesthetic and minimal grout lines can make rooms appear more spacious. Some even come book-matched for a luxury finish. But do you know how to install large format tiles? Their impressive size means they require professional equipment to cut and install them.
Whether you’re just learning how to tile or a seasoned pro looking to level up, here’s everything you need to know about installing large format tiles successfully.

Step 1: Start with a Solid Plan
Planning your layout is the most crucial part of any tiling project and even more so with large format tiles. Begin by accurately measuring the space. The old saying “measure twice, cut once” is vital here; errors are costly when working with expensive, oversized tiles.
Rooms are rarely perfect squares with 90-degree angles. Start by finding the midpoint of your space and dry-laying tiles outward. Then assess: do you want a full tile in the centre, or should the grout line fall in the middle? Play around to avoid awkward, thin edge cuts. Even a slight miscalculation can throw off the entire layout.
What separates professionals from DIYers is the time spent at this planning stage. It’s worth the effort.
Step 2: Prepare the Substrate
Large tiles magnify imperfections, so your substrate must be clean, flat, dry, and structurally sound. Think of it like the classic “princess and the pea” story. Any bump or dip will be glaringly obvious because tiles don’t flex.
If you’re unsure how to prep the substrate, check out our previous blog post here dedicated to this step.
Step 3: Precision Tools for Precision Cuts
It’s expensive to install large format tiles, so mistakes hit harder. You’ll need high-quality tools for accurate, clean cuts.
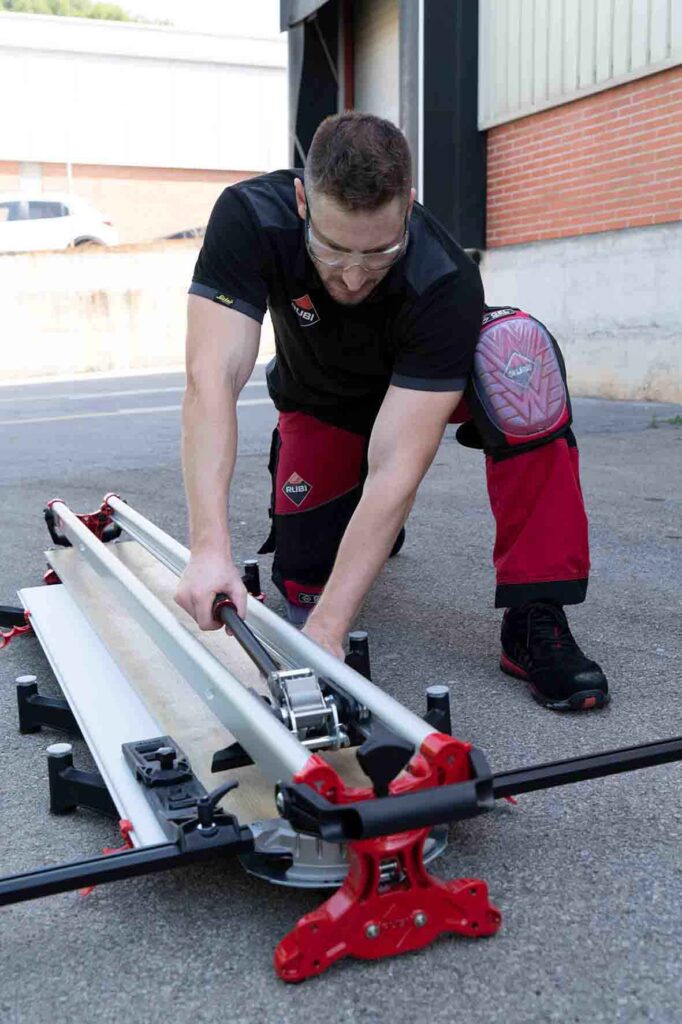
At RUBI, we’ve developed a full range specifically for large format tiles, including:
- Slim Cutter G2 and Slab Cutter G3: precision tools for delicate, oversized tiles.
- TZ-1800: a powerful manual cutter large enough to handle large format tiles.
- TC-125 G2: a circular track saw designed for wet or dry cutting with mitre capability, running on Slim Cutter G2 rails.
Mitre cuts are a game-changer for edge alignment and seamless finishes, especially for high-end jobs. The right cutter not only saves time but reduces waste, protecting your margins.
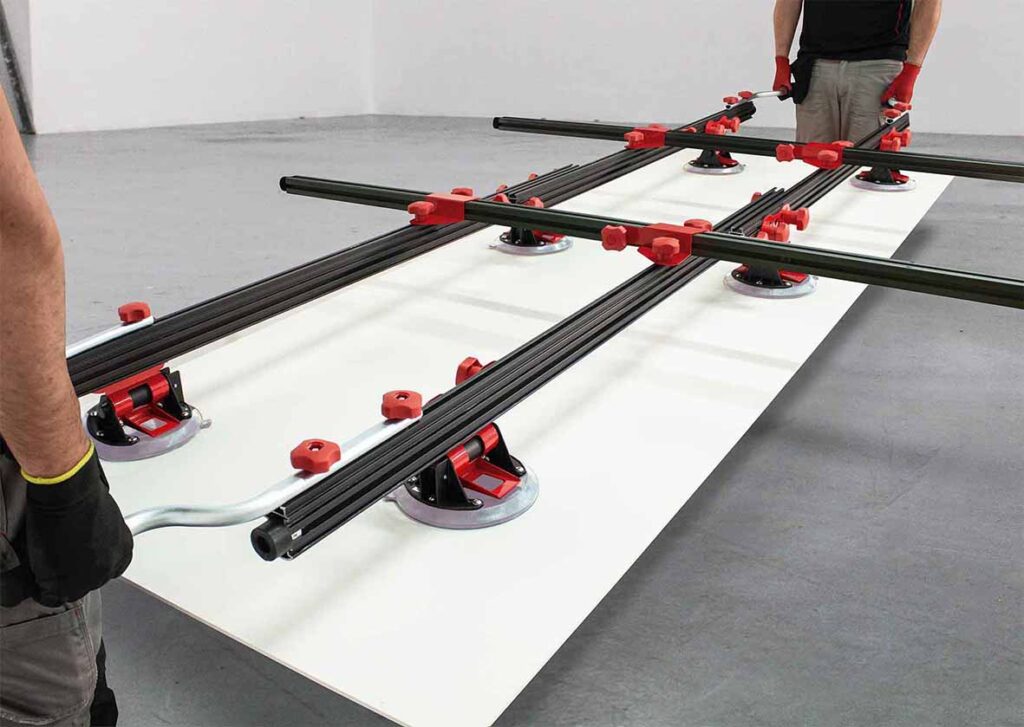
Step 4: Safe Handling and Transport
Cutting is only half the battle. Moving and positioning large format tiles safely is just as challenging. That’s where specialized transport tools come in.
- Rhino Trolley: ideal for moving smaller large format tiles.
- Ergo Tile Trans: lifts up to 80kg, with folding handles for easy manoeuvring.
- Slab Trans Heavy Duty N: handles up to 170kg, perfect for intensive, heavy-duty jobs.
These systems reduce strain, improve safety, and ensure precise placement with minimal breakage.
Step 5: Use the Right Worktables
Proper support is essential when cutting and positioning large tiles. RUBI offers two standout worktable options:
- Retractable Table: this folds out to 120x120cm or 300x120cm. Lightweight, compact, and perfect for regular large format work.
- Versa-Tile Table: which features two working heights and adjustable widths, plus accessory clips for extra clearance when cutting or drilling.


Both provide a stable, ergonomic surface to work on large tiles with confidence.

Step 6: Choose Slow Set Adhesive
When it’s time to install, slow set adhesive gives you more flexibility. It allows extra working time per slab, giving you a chance to reposition and adjust without the stress of the adhesive drying too quickly.
Step 7: Ensure Full Adhesion
One of the most critical but often overlooked steps in large format tile installation is ensuring full contact between the tile and substrate. Gaps or air pockets can lead to cracked tiles or, worse, tiles falling off walls, which is a major safety risk.
That’s where tile vibrators come in. At RUBI, we offer:
- QUAKE: ideal for smaller installations.
- TRILLER: designed for larger surfaces.

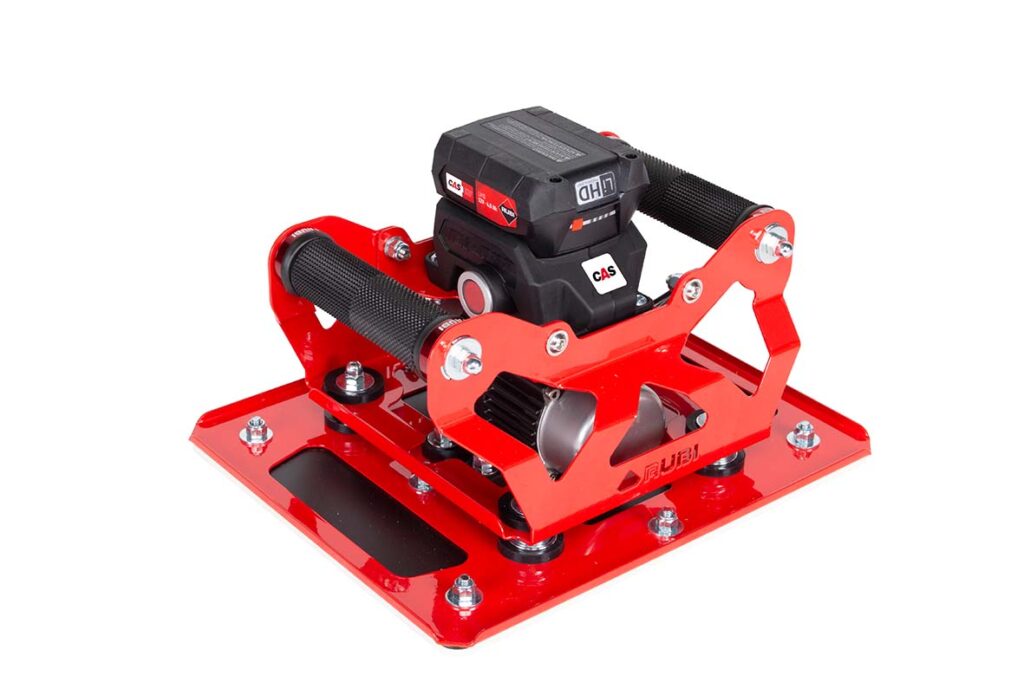
These tools vibrate the tile while the adhesive is still wet, pushing out trapped air and improving the bond strength. Stronger adhesion means longer-lasting, safer installations.
Install Large Format Tiles
Learning how to install large format tiles isn’t easy, but with the right tools, careful planning, and attention to detail, you can become an expert. Using quality equipment and sticking to best practices will not only improve your results but also your reputation.
Quick Recap:
- Plan the layout thoroughly. A few extra minutes now save hours later.
- Prep the substrate, even minor bumps will show.
- Use tools built for large format tile cutting and handling.
- Choose slow set adhesive to give yourself more control.
- Prioritize full coverage and strong bonding with a tile vibrator.
- Work carefully, large format tiles are costly, so accuracy counts.
Installing large format tiles is an investment in skill and precision. Take your time, use the right gear, and make every job your best. Have any large format tile tips or project photos? Share them in the comments, we’d love to see your work!
Post a comment