
So you were able to get your hands on some stunning mosaic-like porcelain tiles for the upcoming tile installation on your balcony, or you got some tiles with the perfect pattern for your jungle-themed balcony. That’s delightful! Sadly though, it’s all fun and games until you have to figure out how to seal porcelain tile. It becomes even more anxiety-inducing if you haven’t sealed anything in your life before.
But no matter how much we like to think we’re simply born with the innate talent of sealing tiles, that’s just our ego speaking.
Once you have some solid instructions about the process and the right tools on hand, you’ll be good to go. Keep on reading to learn all about how to take care of your balcony flooring, and how to seal porcelain tile like a pro.

Sealing Tile 101: Tiles and the Sealing Process
While porcelain can look dainty, you’d be surprised to learn about how tough it can be.
Porcelain tiles, known for their durability and elegant appearance, are composed of fine clay fired at high temperatures.
The result is a dense, low-porosity surface that resists moisture absorption and stains.
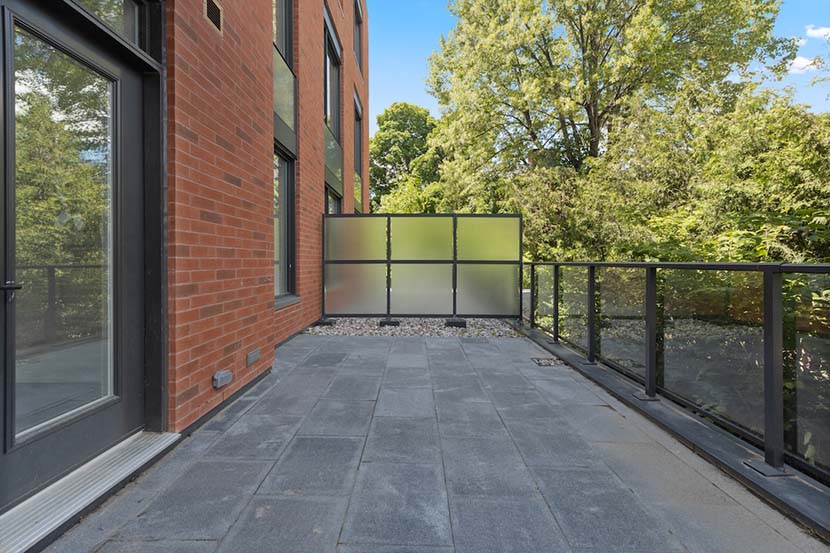
Porcelain tiles come in various designs, mimicking natural stone, wood, and other materials. No wonder they’re a popular choice for balconies due to their aesthetic versatility and weather-resistant properties.
Why Bother Sealing My Balcony Tile?
Sealing porcelain tiles on outdoor balconies is essential for protecting them from harsh weather conditions, moisture, and stains.
Unsealed tiles are vulnerable to cracking, fading, and the infiltration of water and pollutants. Sealing acts as a barrier, preventing moisture penetration and enhancing the tile’s longevity.
It also safeguards against color fading caused by prolonged exposure to sunlight, ensuring that your balcony retains its pristine appearance over time.
In short, sealing your tiles will help you keep their patterns and quality for longer.
Types of Sealers: Penetrating vs. Topical
When considering sealing options for porcelain tiles, two primary types of sealers come into play: penetrating and topical.
Penetrating sealers work beneath the surface, bonding with the tile’s pores to create an invisible barrier. They are fantastic for maintaining the tile’s natural look while offering protection.
Topical sealers, on the other hand, create a protective layer on the surface, providing enhanced resistance to stains and scratches.
The choice between the two depends on the desired level of sheen, maintenance preferences, and the specific needs of your balcony environment.
Preparation Station: Tools and Tips
We totally understand how excited you are to start sealing the tiles. However, without the right tools on hand and some prep work, the end results can suffer in quality.
The first step is gathering essential tools and materials.
You’ll need a clean cloth, mild detergent, scrub brush, water, painter’s tape, a sealer applicator (brush, roller, or sprayer), and the chosen sealer product.
Next, ensure you have protective gear like gloves and goggles. Having these items on hand will streamline the sealing process and help achieve a successful and professional-looking outcome.
Clean and Dry Your Balcony Flooring
Proper preparation is crucial for effective sealing. After all, you don’t want to trap dust or other particles between your sealer and your tiles.
Remove dirt, dust, and debris using a mild detergent and scrub brush. Rinse with water and allow ample drying time. Ensure the surface is entirely clean and dry before proceeding with sealing to prevent trapping any contaminants under the sealer.
Cleaning and drying not only enhance the sealer’s adherence but also contribute to a uniform and long-lasting finish that protects your porcelain tiles.
Pick the Right Weather Conditions
Never underestimate the power of terrible weather sabotaging your hard work.
You’ll want to aim for a day with moderate temperatures, ideally between 50°F to 80°F (10°C to 27°C), to ensure optimal sealer performance. Avoid sealing during extreme heat, cold, or high humidity, as these conditions can hinder proper sealer curing and bonding.
Another weather to avoid would be windy days. They can easily lead to uneven application and premature drying. Check the weather forecast and plan your sealing project for a calm and comfortable day to achieve the best results.
How to Seal Porcelain Tile: One Step at a Time
Alright, so you’ve got your tools and your balcony flooring can blind a passerby due to your aggressive cleaning.
Now comes the fun (and slightly tricky part).
Step 1: Test Your Sealer
If you’re using a new sealer product or are uncertain about its compatibility with your tiles, perform a small test in an inconspicuous area.
Apply the sealer according to the manufacturer’s instructions and allow it to dry. Check for any adverse reactions, discoloration, or unsatisfactory results before proceeding to seal the entire balcony.
Step 2: Apply Painter’s Tape (If You’d Like)
To prevent the sealer from coming into contact with adjacent surfaces like walls or railings, apply painter’s tape along the edges of the tiles.
This will minimize the risk of accidental spills or smudges. Another bonus point is the sheer satisfaction of removing the sealer and seeing the perfect clean lines you’ve made.
Step 3: Let the Sealing Begin
Start the sealing process by mixing the sealer if required, following the manufacturer’s instructions.
Begin in a corner or along the balcony’s edge. You’ll work your way toward the exit. Dip your chosen applicator into the sealer and apply an even coat to the porcelain tiles.
Work in small sections to ensure consistent coverage. Avoid over-applying the sealer, as the excess product can lead to uneven drying and a cloudy finish.
Step 4: Wait for Things to Dry
Once you’ve applied the sealer to the entire balcony, allow it to dry according to the manufacturer’s recommended drying time.
This typically ranges from a few hours to overnight. Avoid foot traffic and exposure to moisture during this period to ensure the sealer cures properly.
Step 5: Apply Additional Coats (If Needed)
Depending on the sealer product and your desired level of protection, you may need to apply multiple coats.
Follow the manufacturer’s instructions for the recommended number of coats and drying time between each application. Additional coats enhance the sealer’s effectiveness and extend its lifespan.
Step 6: Final Checkup
Once the sealer has dried completely, carefully inspect the balcony for any missed spots or uneven coverage. Touch up these areas if needed to achieve a consistent and uniform appearance.
Step 7: Remove Painter’s Tape (If Applied)
If you used painter’s tape to protect adjacent surfaces, gently remove it once the sealer has dried. Peel the tape away at a 45-degree angle to avoid damaging the newly sealed tiles.
Step 8: Enjoy Your Sealed Balcony
With the sealing process complete, you can now enjoy your beautifully sealed porcelain tile balcony. The sealer will provide a protective barrier against moisture, stains, and the effects of weather.
Now, it’s time to do a little victory dance and post pictures to Instagram.

How to Preserve Your Precious Balcony Seal
As with any hardware, the more care and maintenance you show to your balcony tiles and your sealing, the longer it’ll last.
Start with the basics. This includes sweeping or vacuuming the balcony regularly to remove dirt and debris that can wear down the seal.
Still feel like that’s not quite doing it? Check out this blog on how to clean porcelain tiles like a pro.
Always clean spills promptly with a mild detergent and water to prevent staining. Avoid abrasive cleaners that can degrade the sealer.
Regular cleaning not only keeps your balcony looking its best but also ensures the seal continues to provide effective protection.
Red Signs for Emergency Resealing
Over time, even the most durable seal can wear down. Watch for signs indicating it’s time to reapply the sealer.
If water no longer beads on the surface and starts to absorb into the tiles, the seal might have been breached. Stains that are harder to remove or an increase in the tiles’ vulnerability to scratches are also indicators.
A faded or dull appearance and a decrease in the tiles’ resistance to environmental factors suggest that the seal has deteriorated. Regular inspections will help you catch these signs early and take timely action.
Frequency of Resealing
The frequency of resealing your balcony’s porcelain tiles varies depending on factors like usage and weather exposure. High-traffic balconies may require more frequent resealing compared to those with lighter use.
In regions with harsh weather conditions, such as extreme temperatures or heavy rainfall, the seal may degrade faster. As a general guideline, consider resealing every one to three years for optimal protection.
However, monitor the condition of your tiles regularly. You can adjust the resealing schedule as needed to ensure the seal remains effective.
Balcony Tile Sealing Done Right
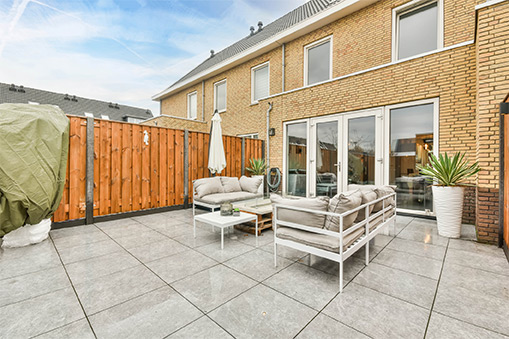
Your balcony is one of those spaces in your home that’s both an interior and an exterior. Once you’ve decided on your balcony flooring tiles, you’ll want to seal them to keep them nice and fresh for as long as possible.
We hope that our guide has taught you how to seal porcelain tile. Now that you have both the physical and mental tools to get your project done, let your imagination run wild.
And if you’re still exploring the different types of tile for balconies, go take a look at our tiling ideas section. While you’re there, download our free Rubi 2023 catalog.

Post a comment