

If you’re beginning work on a new tiling project, and it’s your first time working with tile, you may be a bit confused. There is a lot to know about laying and placing tile. From mixing up mortar, to cutting tiles with the Rubi Tile Cutter or Rubi Tile Saw, and grouting the final result – it can get confusing.
That’s why Rubi is here with our latest post in our Tips and Tricks series! In this guide, we’re going to take a look at one of the most important elements of any tiling project – tile spacers.
We’ll explore why tile spacers are so important, and we’ll also discuss our top tips for using them effectively. Follow this guide, and you’ll be able to grout like a pro in no time! Let’s get started.

What Are Tile Spacers – And Why Are They Important?
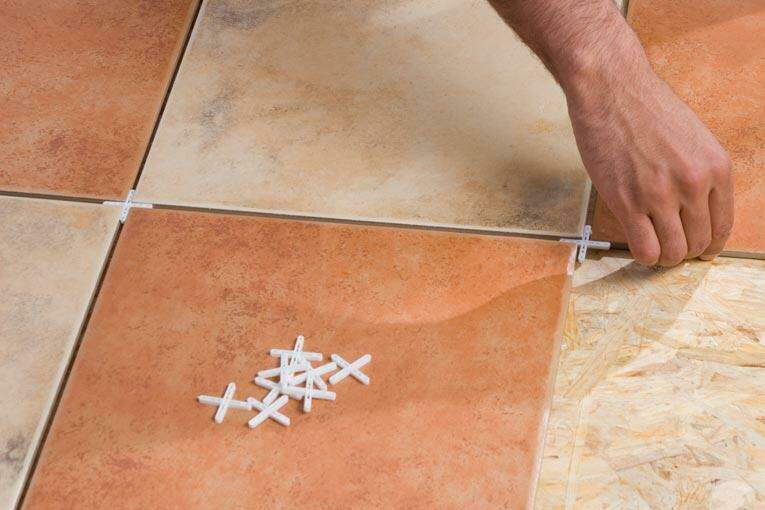
Tile spacers are small, plastic objects that are usually built in either “T” or a cross shape. They come in quite a few sizes, ranging from ¼ to ⅜ of an inch.
They are used to maintain a consistent space or “gap” between your tiles when installing them on the mortar. This allows for an even finish when it’s time to grout your tiles.
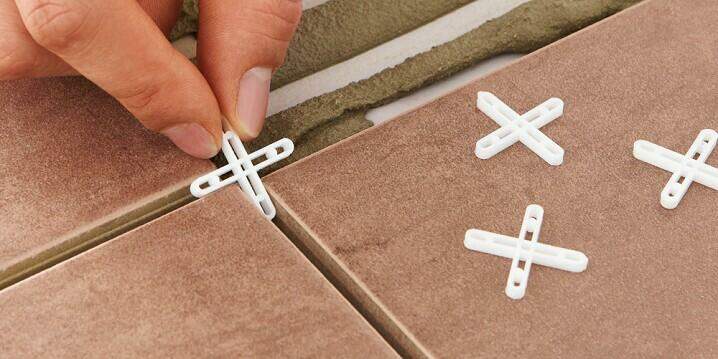
To use them, you place spacers at each corner of your tiles as you’re laying them down, and you push the tiles together until the spacer is contacting each corner. They’re removed shortly after you finish the tile installation and can usually be reused in a future project.
Tile spacers are important for several reasons. Let’s take a look at these reasons now
You can use multiple grout widths
If you are making a tile rug, or creating an intricate, mosaic-like tile design, it’s very difficult to space your tiles manually. This is especially true if you’re looking to use multiple grout widths.
But by using multiple sizes of grout spacers, you can easily create a tile pattern that uses multiple grout sizes, which can enhance the durability and attractiveness of the finished product.
Consistent grout spacing ensures tiles are straight and even
If you don’t use tile spacers, you risk having your tiles end up crooked. Tile spacers, because they nestle into the corner of each tile, allow for a completely straight, even finish.
Easier project planning
When you’re laying out your tile and planning your project, tile spacers are very helpful. You’ll know exactly what size of a gap you want between each tile. This makes it easier to measure tiles when laying them out, labeling them, and cutting them.
Professional, beautiful finish
A tile spacer is the only way to get a truly professional finish on your project. Without tile spacers, your project will look amateurish, with uneven gaps and crooked tiles.
Protects integrity of tile floors
Tile spacers allow you to keep your floor level and ensure that each tile is properly grouted with the right amount of product. If your tiles are too close together, you risk damage if they expand. They could also become dislodged or chipped. Spacers provide a more secure, durable surface.
Faster project turnaround time
Because there is no guesswork when using tile spacers, your project will be much faster, and much more efficient. You don’t have to take the time to measure each gap in your grout, or worry about uneven results. Just use your spacers, and lay down your tile, and you’re good to go!
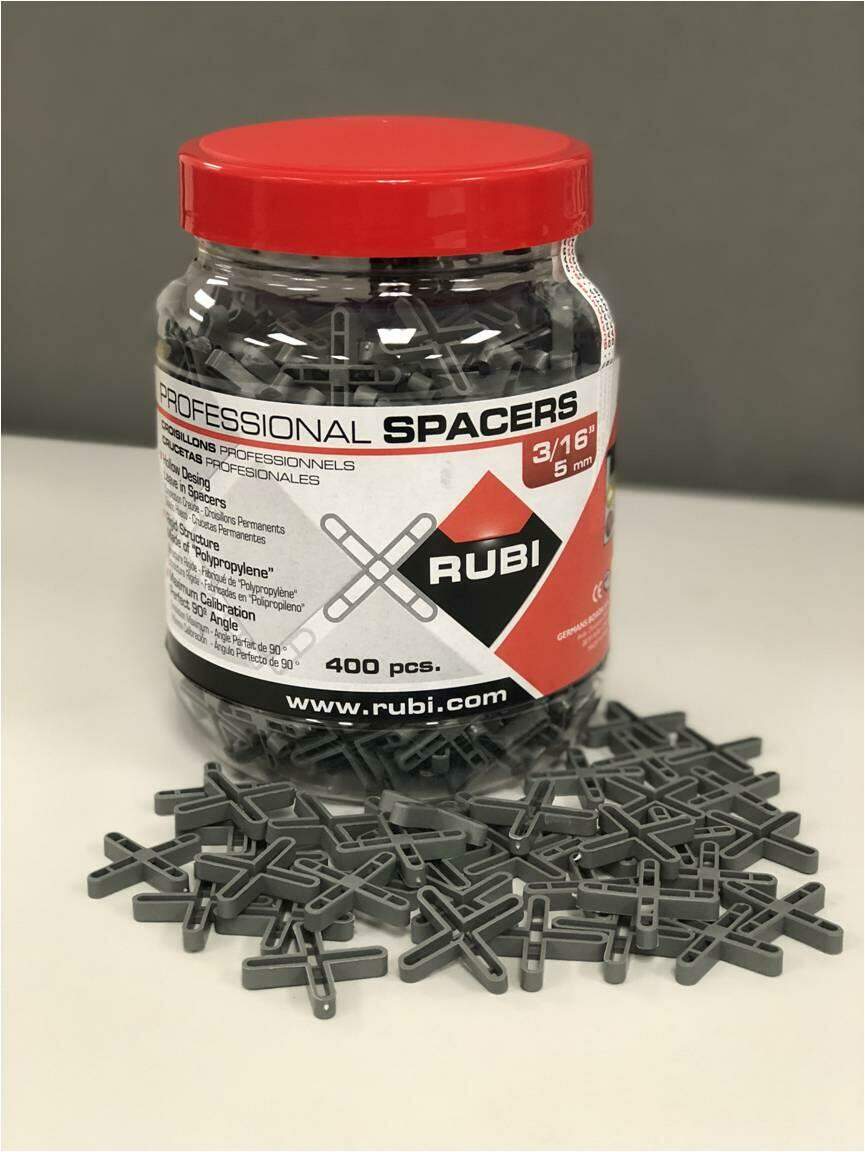
1. Start With The Right Products
Make sure that you take the time and spend the money to invest in high-quality plastic spacers. If you don’t use the right products, you could end up with cheap, cut-rate spacers that are hard to remove from your finished tile, or that break when you try to remove them.
2. Estimate The Proper Number Of Tile Spacers For Your Project
Whatever product you’re using, you need to estimate the proper number of spacers. If you overestimate, you’ll waste money on spacers that you don’t end up using. And if you underestimate, you could end up with serious project delays.
How can you estimate the right number of tile spacers? It’s easy! Just multiply the total number of tile sheets or squares that you’re using by 4! This way, you’ll know that you’ve got enough spacers for your project.
However, we also recommend picking up a few extra spacers, just in case you misplace any of them, or they become damaged.
3. Remove Tile Spacers At The Right Time – Or They Could Get Stuck!
Tile spacers should be removed around 20-30 minutes after the adhesive begins to set on your tile floor. You don’t want to remove them too soon, because this can cause your tiles to shift.
And, conversely, you don’t want to leave them in for too long, because this can lead to stuck spacers. We recommend checking your manufacturer’s instructions when removing tile spacers, to ensure they’re removed properly.
If your spacers are hard to remove, or you’re using small, cross-shaped spacers, we recommend using needle-nose pliers for extraction. Grab the side of the spacer firmly and pull it out using a vertical motion. Avoid horizontal movement. Horizontal movement can cause the still-adhering tiles to shift.
4. Never Grout Over Tile Spacers
If you’ve got low-profile tile spacers that are hard to remove, you may be tempted to simply grout over them. You should never do this. Grouting over tile spacers will result in a subpar result, and could even damage your floor.
While things may look fine for a few weeks – or even a few months – leaving spacers in place will damage the structural integrity of the grout. Eventually, you’ll see a small “x”-shaped crack over each tile spacer, as their height will cause excessive wear to the grout.
Don’t grout over tile spacers. Even if you have tile spacers that are stuck, they should be pulled out, or removed with a chisel, and grout should be re-applied. Trust us – this will save you quite a few headaches in the long run.
5. Make Sure to Cut Tiles Properly
Tile spacers are very difficult to use properly if you are cutting your own tiles, and they are not completely straight and true. If you use a spacer on just a single crooked tile, it can throw off your entire project.
Because of this, we recommend that you use a high-quality ceramic tile cutter, such as the Rubi Tile Cutter or Rubi Tile Saw during your project. These products both provide completely straight, reliable cuts. This means you can be sure that a single misshapen tile won’t throw off your entire project.
6. Thinner Is Usually Better
Thin grout lines require less maintenance, and 1/16th inch grout spacers are becoming very popular for both DIY tiling projects, and in professional projects.
However, extremely thin grout spacers can only be used on tiles such as sawn stone, or other high-quality tiles that have a very consistent edge. Some clay and ceramic tiles are fired in a kiln, leading to slight variations in width and thickness. These tiles should have at least a 1/8th inch grout line, to ensure consistent results.
When in doubt about what size of grout spacer to use, simply consult the manufacturer of your tiles, and tell them more about the particulars of your project. This will ensure that you’re making the right choice.
Follow These Tips For Spectacular Results!
Whether you choose to use Rubi tiling products, or any other tile spacers and leveling products, these tips are sure to help you. So don’t fret about your next DIY tile project. As long as you’ve got the right tools, the proper knowledge, and high-quality spacers, you’re sure to succeed!
For more tips and tricks related to tiling, as well as Rubi products, please feel free to visit our blog! You’ll learn everything you need to know about DIY projects – and you’ll be tiling like a pro in no time at all.
I am really thankful to the owner of this web page who has shared this fantastic paragraph at here.
I have read several excellent stuff here.
Certainly worth bookmarking for revisiting. I wonder how a lot attempt you set
to make this type of fantastic informative web site.
This website was… how do you say it? Relevant!! Finally
I have found something which helped me. Cheers!
It’s awesome in support of my interests to have found your web page,
which is beneficial for my experience as an installer. Thanks again!
Fantastic Mr. Kor, happy to be your source for recommendations and tips for your future and present projects. Stay tuned for continuous relevant articles using our Rubi Tools worldwide!
Hi there, You’ve performed an excellent job.
I will certainly digg it and individually recommend to my friends.
I am sure they will be benefited from this site.
Hey there, I think your website might be having browser
compatibility issues. When I look at your blog in Ie, it
looks fine but when opening in Internet Explorer, it has
some overlapping. I just wanted to give you a quick heads up!
Other then that, excellent blog!
Thank you so much for the notification, we looked into it and now it should be working just fine. Appreciate your comments and looking forward to provide relevant information in the near future. Cheers!
Does your site have a contact page? I’m having problems locating it but, I’d like to shoot you an email.
I’ve got some recommendations for your blog you might be interested in hearing.
Either way, great site and I look forward to seeing it develop
over time.
Hello there and thank you for your message. If you scroll all the way down on our blog page, you will find our message box, where you can send us a message in private. Would love to hear your recommendations. Cheers!
I read this piece of writing fully regarding the difference of most up-to-date and preceding technologies, it’s awesome article.
Its like you read my mind! You appear to know a lot about this, like you wrote the book in it or something.
I think that you could do with some pics to drive the message home a little bit, but instead of that, this
is magnificent blog. A great read. I’ll definitely be back.
Looking forward to find you back on our blog. Always striving to bring useful information and tips to have successful installation stories. Cheers!
This is very interesting, You’re a very
skilled blogger. I’ve joined your rss feed and look forward to
seeking more of your excellent post. Also, I have shared your site in my social
networks!
Very energetic post, I loved that a lot. Will
there be a part 2?
Thank you, I have just been searching for info approximately this topic for ages and yours is the greatest I have discovered till now.
But, what concerning the conclusion? Are you certain about the supply?
This is really interesting, You’re a very skilled blogger.
I have joined your feed and look forward to seeking more of
your magnificent post. Also, I have shared your website in my social networks!
Your blog is amazing it gives so much ideas om how to use tile spacer.
Finally found some really useful tips. Speaking as a tiler with experience.
Nice Blog Thanx
Nice Blog Thanx ….