
Every high-quality tile installation begins long before the first tile is set. It starts with choosing the right floor tiling materials, understanding how they work together, and selecting the proper tools to guarantee precision and durability. Whether you are a seasoned tile installer or an experienced DIYer, having a completetiling materials list can make the difference between an ordinary floor and a flawless, long-lasting result.
This guide breaks the process into three expert sections:
- The specialist tiling materials required
- The professional-grade tools you need
- The step-by-step installation process followed by trained installers
If you’ve ever wondered what materials are needed for tiling, or how to ensure your installation meets professional standards, this checklist-style article is your definitive reference.

What are the essential tiling materials and consumables?
Choosing the correct materials is the foundation of any successful installation. From tile type to adhesives, grout and sealers, each decision affects durability, maintenance, and overall performance. Below, you’ll find the essential materials needed for tiling, regardless of project size.?
Choosing the right tile type (ceramic, porcelain, glass, cement, marble)
Your tile selection influences installation technique, cutting difficulty, required tools, and even grout choice.
- Ceramic tiles remain a versatile and affordable option, ideal for standard residential projects.
- Porcelain tiles, denser and less porous, are preferred for high-traffic or moisture-prone environments because they offer excellent durability and reduced water absorption.
- Glass tiles provide a unique aesthetic but demand precision cutting and fully cured thinset to prevent voids behind the surface.
- Cement tiles, increasingly popular in design-forward projects, require careful sealing both before and after installation.
Marble and other natural stones offer unmatched elegance, but also require specialized handling, sealing, and cutting tools like tile cutters and saws.
Understanding the specifications of each tile type ensures proper material pairing and helps avoid installation issues such as lippage, adhesive incompatibility, or breakage during cutting.
Selecting the best adhesive material (thinset vs. mastic)
Adhesive choice is critical, and knowing whether to use thinset or mastic depends on the substrate, tile type, and environment. Thinset mortar is the professional standard for floor installations, offering superior strength, moisture resistance, and long-term reliability. Installers must choose between modified and unmodified thinset formulas.
Mastic is occasionally used for wall installations where moisture exposure is minimal, but it should never be applied to floors, large-format tiles, or areas requiring high structural performance.
When planning your materials for tiling, always verify that your adhesive is compatible with the tile’s porosity, format, and size.
Grout types and application (sanded vs. unsanded)
Grout selection plays a major role not only in aesthetics, but also in performance and lifespan. Sanded grout is the go-to option for most floor tiling materials, especially when joint widths exceed 1/8″. Its texture reduces shrinkage and provides better durability for heavy foot traffic. Unsanded grout is used for tighter joints, highly polished surfaces such as marble, or delicate tiles that may scratch.
Pairing the correct grout with high-quality application tools such as professional trowels and floats ensures a smooth application and helps achieve uniform coverage across the entire installation.

The professional tiling tools required for installation
High-performing installations depend just as much on tools as on materials. The following sections list the essential specialist tiling materials and tools that every pro includes in their setup.
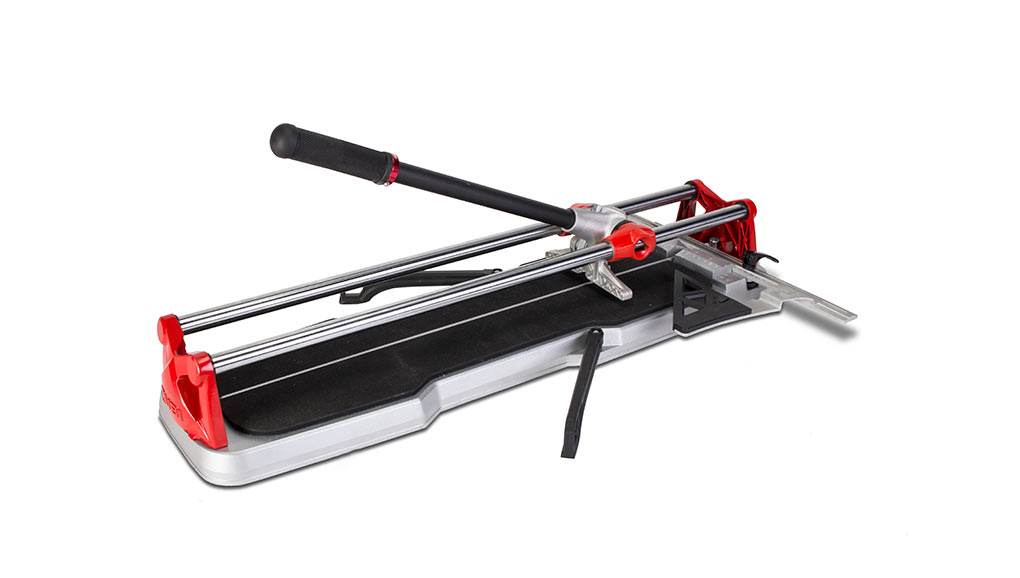
Tile cutting tools and diamond blades
Precise and clean cuts are non-negotiable in professional tiling. Manual cutters and wet saws grouped under tile cutters and saws are designed to handle everything from ceramic to dense porcelain or natural stone. Pairing your cutter with high-quality diamond blades ensures smoother cuts, fewer tile fractures, and overall improved productivity.
If you don’t know how to find the correct tile saw for your project, professionals often select their tools based on tile type, size, and thickness details.
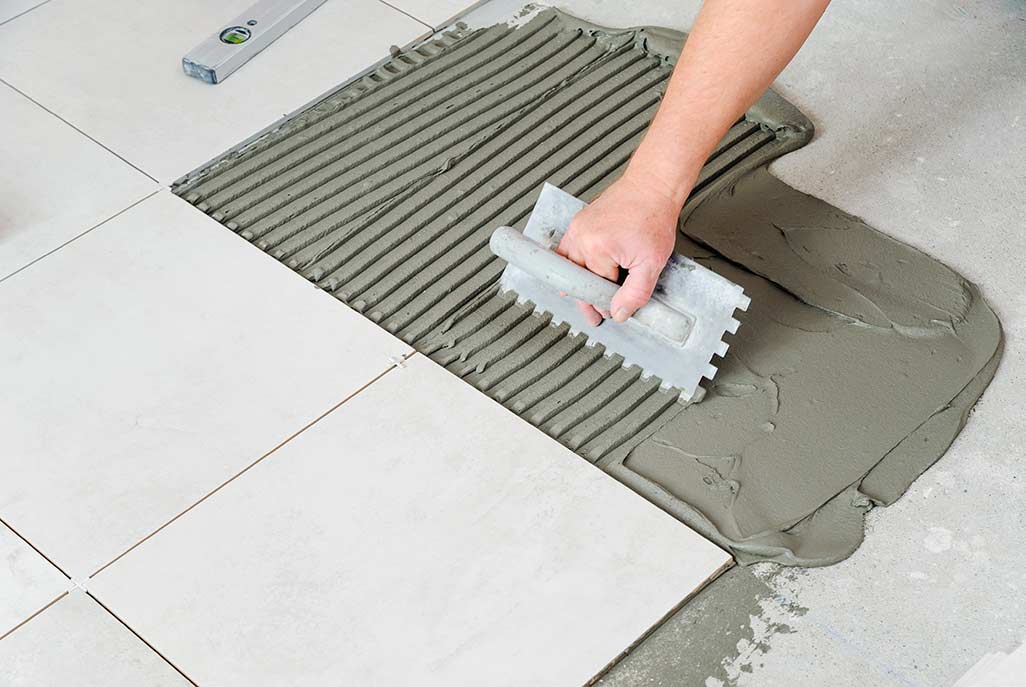
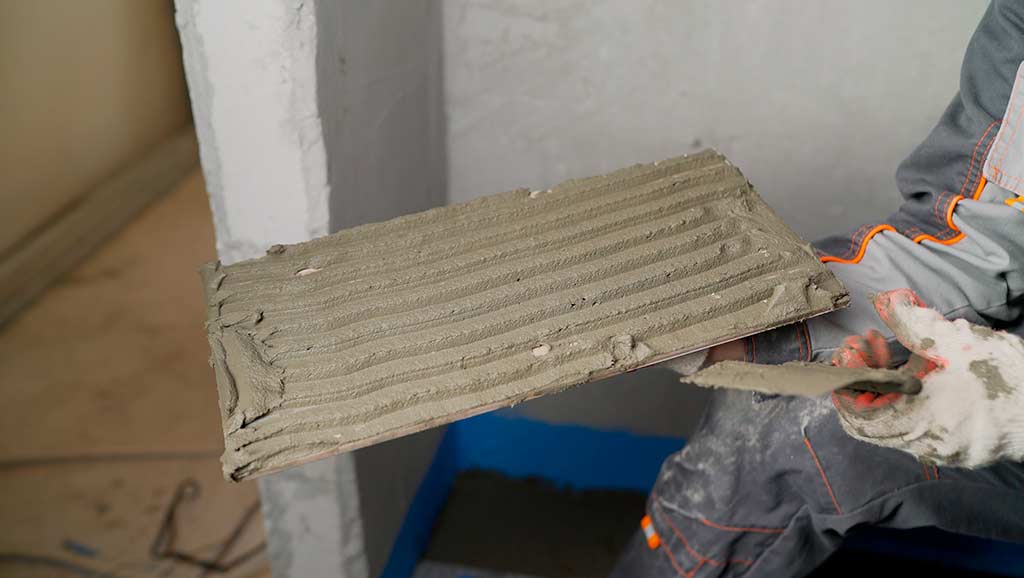
Trowel and grout float: Application tools
Proper adhesive coverage starts with the right trowel. Square-notch, U-notch, and slant-notch trowels each serve different tile formats and installation methods. Full-bed coverage, crucial for large-format tiles, depends on selecting the correct notch size. Grout floats, on the other hand, ensure grout is packed tightly into the joints without damaging the tile surface.
Spacers and tile leveling systems
Tile spacers are essential for maintaining consistent joints and achieving a symmetrical layout. However, to avoid lippage especially with large tiles, professional installers increasingly rely on tile leveling systems, which ensure perfectly even surfaces and reduce the need for constant repositioning. These systems form a crucial part of modern floor tiling materials, allowing installers to speed up the process while improving the final finish..
Safety first: Personal protection equipment (PPE)
Safety and protection should be at the forefront of every installation. Eye protection, gloves, hearing protection, knee pads, and dust masks are indispensable, particularly when cutting tiles or mixing adhesives. Professional-grade equipment (PPE) ensure installers to work efficiently without compromising their wellbeing.
How to lay floor tiles like a pro: The step-by-step process
With the materials needed for tiling and the professional tools prepared, you are ready to begin installation. The following method reflects the workflow used by experienced tile installers.
Step 1: Planning, preparation, and surface repair
Start by preparing the substrate. A clean, level, and structurally sound surface is essential for a durable installation. Address cracks, dips, or uneven areas before applying any adhesive. Proper planning also includes dry-laying your tiles to determine your layout, verify symmetry, and minimize narrow cuts along the perimeter.
Step 2: Cutting the tiles and mixing the adhesive
Once the layout is clear, cut the tiles using the appropriate tool (manual cutter, snap cutter, or wet saw depending on the material). As you mix the thinset, follow manufacturer recommendations for consistency and open time. A properly mixed adhesive ensures strong bonding and easier tile setting.
Step 3: Applying mortar, setting tile, and leveling
Spread the mortar with the appropriate trowel, ensuring full coverage. Set each tile firmly into place, maintaining consistent spacing and alignment. To prevent lippage, a common issue in large-format installations, we recommend to use tile leveling systems. Continually check flatness with a straightedge as you progress.
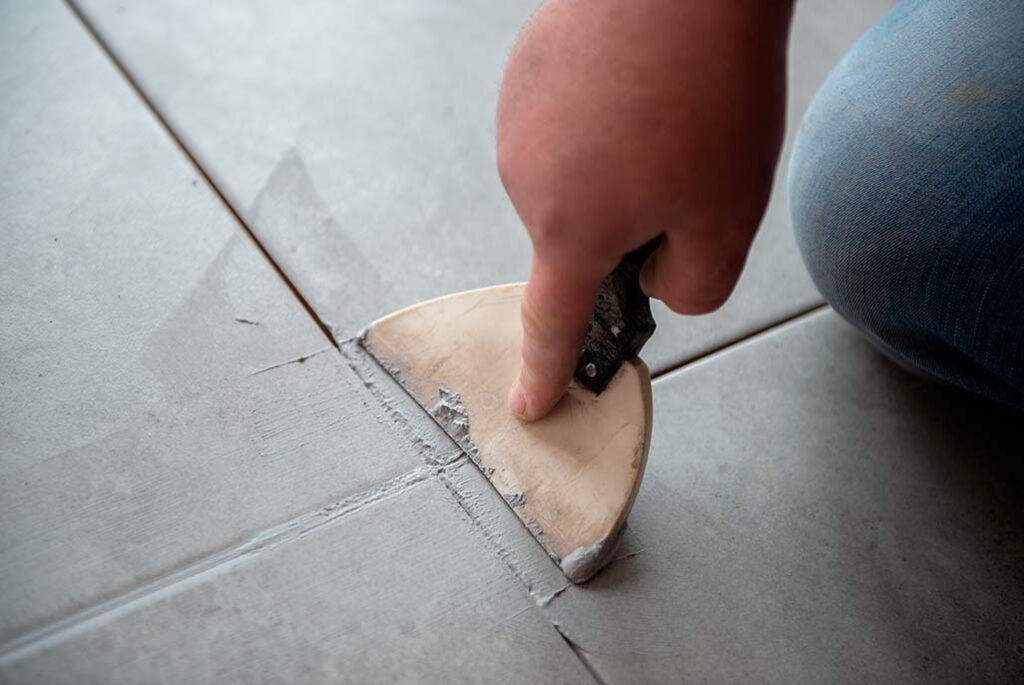
Step 4: Curing time, grouting, and sealing the finished floor
Allow the mortar to cure fully before walking on the surface. Once cured, apply the grout with a float and clean the tiles carefully to remove haze. Finally, seal the installation if required, particularly for natural stone, cement tiles, or porous grout. Proper sealing enhances longevity and makes maintenance significantly easier.

Post a comment