20mm porcelain tiles have become a staple for landscapers and tilers alike—and for good reason. But while they’re durable and versatile, knowing how to cut 20mm porcelain tiles without chipping can be a real challenge. If you’re struggling with chipped edges, don’t worry—we’ve got five pro tips to help you achieve a clean finish every time.
No matter if you are just learning how to tile or are a seasoned vet in the tiling or landscaping industry, this blog will offer you the tips needed to produce the best work without chipping.

Why Do Tiles Chip?
Before diving into tools and techniques, it’s important to understand why chipping happens. The way porcelain tiles are made—specifically how the pattern is printed on top—makes the surface prone to chipping at the edges when cut.
Even with the best tools and methods, some minor chipping is inevitable. However, with the right approach, you can reduce chipping significantly and make any imperfections easy to conceal or polish out.
Are You Using the Right Blade?
Using the correct blade is essential. The wrong blade can damage the tile, burn out prematurely, or deliver poor results. It’s worth the few extra minutes it takes to swap it out.
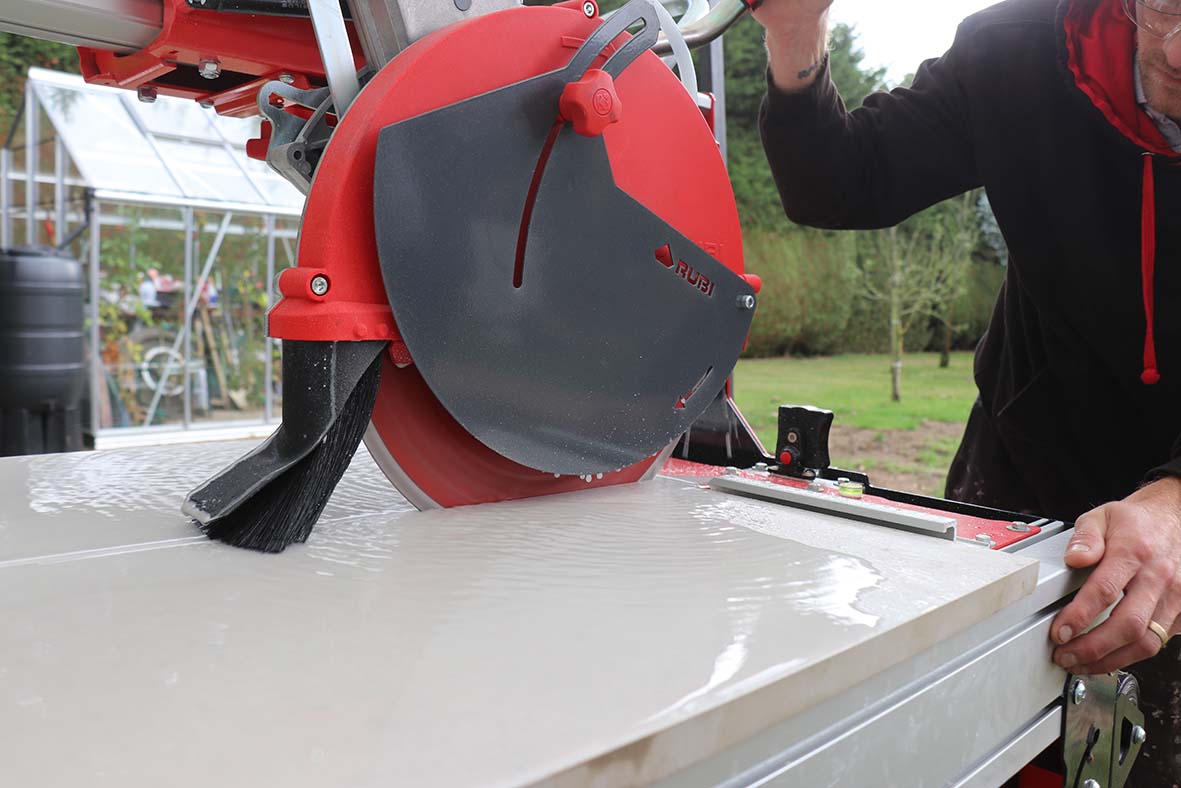
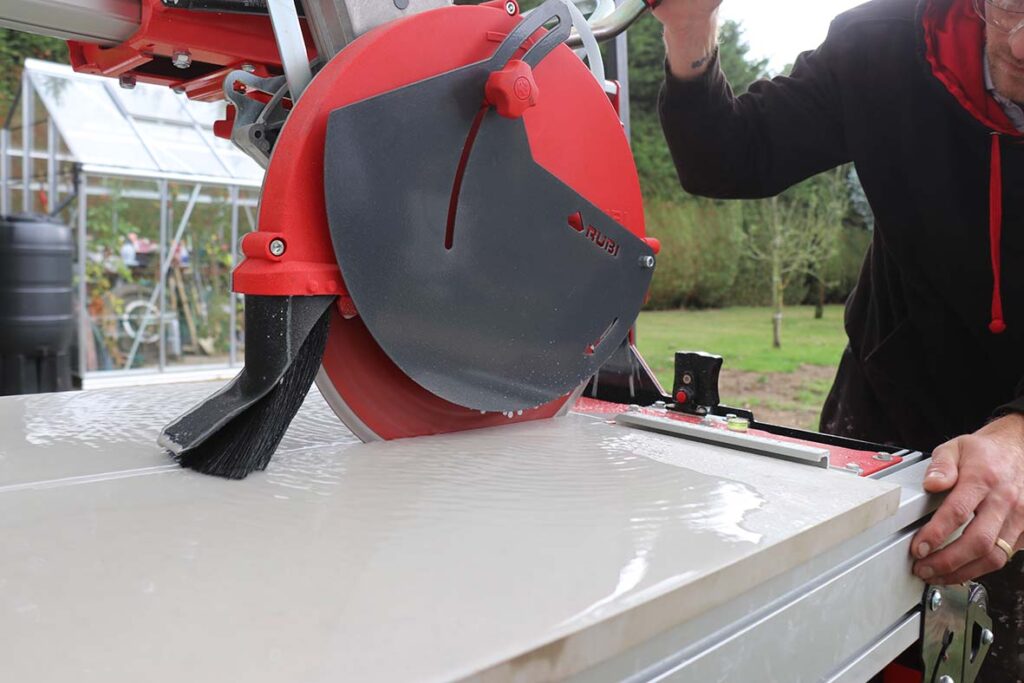
At RUBI, we colour-code our blades for different materials. Red blades are made for porcelain—but not all red blades are created equal. Make sure the packaging specifies it’s designed for cutting 20mm thick porcelain. These blades can handle thicker materials in one pass, saving time and reducing chipping.
Tip 1: All red RUBI blades are for porcelain, but not all are suitable for 20mm tiles. Look for our SPT, SPL, TLG, or Adder blades for best results.


Are You Using the Right Machine?
The right machine matters just as much as the blade. Using an inadequate cutter can lead to excessive tile wastage, longer job times, and frustrating results.
While manual tile cutters like our TX or TZ ranges can cut 20mm tiles, it’s not recommended due to inconsistent results. Wet saws are the way to go for cleaner, more reliable cuts.
Tip 2: Work smarter, not harder—use a wet saw designed for cutting 20mm porcelain.
But which saw is the best one to use? At RUBI we have a wide variety to suit the needs of every tiler and landscaper. To make it easier, we have separated our machines into small and large categories. But don’t be put off! Smaller machines might surprise you with how powerful they can be.
Smaller Options:
- TC-125 G2 – a versatile circular track saw capable of cutting and mitring 20mm porcelain.
- DT-250 Max – a folding table saw with sliding table.
- TC-180 – a larger circular track saw, but does not have mitring option.


Larger Options:
- DC 250 Python – a fantastic entry point if you’re working with 20mm porcelain tiles more and more.
- DCX 250 Xpert – an intensive expert machine for those working with thick porcelain tiles and landscape materials every day.
- DL-125 – small but mighty, a new machine with a side table included for larger format tiles.


Don’t automatically go for the biggest saw. Smaller machines often deliver impressive results in a more portable form. That said, don’t just pick the cheapest model either—each machine has trade-offs. The options above are all proven choices for 20mm porcelain.
Tip 3: Make sure your machine is designed for 20mm porcelain. The wrong one will slow you down and ruin tiles.

How to cut 20mm porcelain tiles without chipping
You’ve got the right blade and the right machine—but technique matters too. Chipping can still occur due to user error, so let’s run through the steps to get a clean cut.
First, make sure your blade is installed correctly. All RUBI blades have an etched arrow—this should match the direction of your machine’s rotation. If reversed, the blade spins the wrong way, resulting in excessive chipping and faster wear.
Next, control your cutting speed. Trying to rush through a 60x60cm tile in 10–20 seconds might feel efficient, but it forces the blade through the material instead of letting it do its job. This strains your motor and increases the risk of chipping.
Our machines are designed to cut about 1cm per second. So that same 60×60 tile should take at least a minute to cut through. A simple trick to slow down: use just one or two fingers to guide the motor head. It naturally paces your cut and allows the diamond band to do its job.
Tip 4: Let the blade do the work—don’t force it. Slow and steady wins the race.
Final Touches Matter
Even the cleanest cut can leave sharp or slightly chipped edges. That’s where polishing pads come in. They not only smooth sharp edges but also reduce visible chips.
There are two types:
- Manual polishing pads – Great for beginners and those doing occasional cuts. Simple and effective.
- Grinder polishing pads – Ideal for pros. Faster results, but be careful—not to overdo it. A light touch is all you need.
Tip 5: Use polishing pads. They’re essential for a professional finish.
5 Tips to Cut 20mm Porcelain Without Chipping
- Use the right blade – Not all red RUBI blades are made for 20mm tiles. Choose the correct one.
- Use a wet saw – Avoid manual cutters for thick porcelain.
- Choose the right machine – Bigger isn’t always better, your tool must be up to the task.
- Slow your cut – Don’t rush. Let the blade and machine do the work.
- Polish your edges – Use manual or grinder pads to clean up any chipping.
What’s your go-to tip? Drop it in the comments and share this guide with any tilers or landscapers in your network. Don’t forget to follow us for more expert advice!
I read the whole article and was very well detailed and informative for begainner and experts.