

For many years, mosaic tiles have been used as a creative way of creating stand-out patterns and eye-catching tile designs to help bring a room together. In todays blog, we’re here to tell you all about how to cut mosaic floor tiles. We will cover the best practices for cutting mosaic tile, to laying them to achieve a perfect, levelled finish!
There are many different materials of mosaic and varying formats and styles on how to tile with mosaics to help create the right aesthetic for your particular room and style. From metal and glass, to natural stone, porcelain and ceramic, there are many different options and opportunities to create a distinct design and look that will last many years.


WHAT ARE MOSAIC TILES
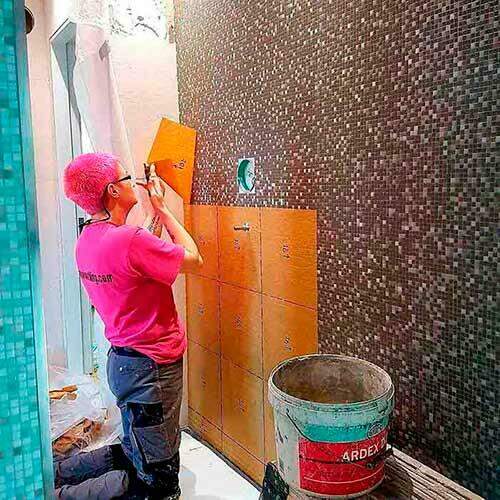
Mosaic tiles are typically used as part of a featured wall or floor space. They can be used to cover an entire wall with a soft and subtle pattern, or a vibrant colour to create a striking theme that draws the eye.
Similarly, they can often be used on bathroom floors, around baths or even inside shower cubicles, to create intricate and vibrant designs to bring your bathroom to life.
Another key benefit to using mosaic tiles in bathroom areas such as showers and wet-room floors, is the added grout lines provide more friction and therefore a more anti-slip surface than with large format tiles.
CUTTING YOUR TILES
When it comes to choosing the right cutter for your mosaic tiles, we recommend using a manual tile cutter as they are a lot faster and more efficient to cut mosaic tiles than using a wet saw.
The manual cutter needed for this job will be a lot lighter and more portable, therefore making them more efficient for regular use than a wet cutter.
In addition to this, there is no reliance or need for water or electricity that would come with using a wet cutter when cutting tiles and using a manual cutter would allow you to work indoors as well as outdoors, making a manual cutter a lot more practical than a wet cutter.
One of the most important factors in choosing to use a manual cutter over wet saw is the tile itself. If you are working with natural stone mosaic tiles however, we recommend using a wet cutter.
The ND-200 electric cutter is a portable, versatile and very powerful cutter. It’s small size and light weight make it an ideal for professionals to make necessary cuts at all times in the same workplace. Water is essential for cutting natural stone as it helps to lubricate the blade and keep it cool while cutting the tile.
Often when applying your tiles, a mosaic backing sheet should be used in order to give structure and stability to your sheet of mosaic tiles. If the backing sheet comes into contact with water, it can cause problems with the adhesive and result in the tiles not properly sticking to the adhesive, which will leave you with a poor finish that you may need to begin again.
It’s important to note that with mosaic tile sheets, depending on the design and pattern you’ve chosen, some sheets have interlocking edges such as popular subway mosaic tile. As the joints are staggered or alternating in tile pattern, the edges of the sheets will not be straight & require you to cut.
When measuring to make your cuts, make sure that the opposing sheet will meet when the cut sheet is installed i.e. making sure that a projecting tile on one sheet, properly fits with a space on the edge of the other tile sheet.
SCORING & CUTTING MOSAIC FLOOR TILES
When asking how to cut mosaic tiles, we recommend using either one of two methods. For cutting mosaic tiles an angle grinder could be used for this. Simply by marking the tile initially and then using an angle grinder to give enable you to cut efficiently following along the marked line.
For greater ease in achieving a precise cut, we recommend investing in a manual cutter with a multipoint breaker. When it comes to scoring and cutting your mosaic tile sheets, a multipoint breaker will allow you to easily work your way down along your scored line, and easily snap each tile individually in order to achieve a good finish. Below, we have given our two recommendations for the best manual cutters for working with mosaic tiles.
- The TR-MAGNET manual cutter allows for intensive cutting of ceramic tiles. The multipoint breaker of the TR-MAGNET ensures a perfect cutting quality in the execution of both straight and diagonal cuts from end to end. The magnet system locks the breaker making it easier to score the tile and provides greater visibility to the professional.
- The SPEED-MAGNET cutter is intended for frequent cuttings of all types of ceramic, porcelain and glass tile, making it idea for professional tilers looking for a versatile and light weight cutter for demanding jobs. The magnet system also locks the breaker on the SPEED-MAGNET making it operable with one hand, for greater ease and speed of cutting.
The solid rubber bed is better for glass mosaics as it has a more stability when breaking.
First thing to do is to mark your cut line on the front of the tile, using a marker pen. Then, taking your tile sheet, place it face up on your cutter bed, aligning the cut line with your scoring wheel. If you are cutting a mosaic pattern with interlocking edges, it’s important to make sure the nearest edge of the mosaic sheet is positioned flush, against the line of your manual cutter.
Score the marked line, making sure to not apply too much pressure to the tiles as your score the line, as this can cause the tile to crack. When it comes to breaking your tiles, you will want to make sure you move down your line, lightly applying pressure to snap the individual tiles as you work your way down.

USING TILE NIPPERS
Tile nippers are great to use when working with mosaic floor tiles. They’re particularly handy for when you need to remove thin cuts from your mosaic sheet. When using tile nippers, a smaller size will be more suited for working with mosaic tiles, however for mosaic tiles we also recommend using the RUBI porcelain tile nippers, as the small wheels will enable you to easily work with narrow strips of tile.
To use, simply mark and score your tile sheet with your manual cutter and then using your tile nippers, snap away at the scored line to remove the small pieces of tile.
LAYING MOSAIC TILE
Once you’ve measured and cut your tile sheets, you’re ready to start laying them on your floors or walls!
When it comes to laying your mosaic tile sheets, before mixing and adding your adhesive, we recommend dry-laying your mosaic pattern on your surface to make sure everything fits perfectly before you begin. This can be done along the entire surface on your floor or the bottom of your wall.
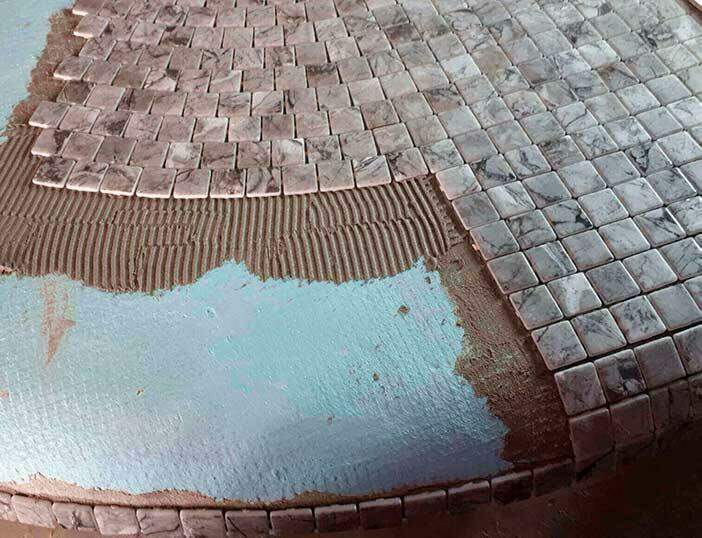
When laying your mosaic tile, you want to make sure you apply the tile to the adhesive with an even amount of pressure. You want to make sure the adhesive makes good contact with your mosaic and you have a strong, even bond.
Backing sheets can be suggested in order to help give your tile sheets more rigidity, however when laying your tiles, the adhesive will be sticking more to the sheet and not the tile itself. Therefore, for more rigidity & ease when tiling, it’s recommend to simply cut your sheets in half so they are more manageable and easier to work with.
Finally, make sure to check your work is level and straight as you continue to work along your surface, this way you can make any immediate adjustments to the tile as necessary. Using the correct sized trowel and a well-mixed adhesive will give you the best bond with your mosaic tile when laying and help you achieve a longer-lasting, more durable installation.
It’s a good idea to bed the mosaic floor tiles, so that they remain flat as the adhesive dries. Do this by using a grout float and applying pressure along the tiled work surface to help bed the tile. Lastly, mix your grout and using a grout float, spread the grout in-between your tile spaces, wiping any excess with a damp sponge.

Post a comment