
Preparing a wall for tiling can seem like a very difficult process that’s almost impossible for someone with little experience. At first glance, it may look like a meticulous and complicated job. However, knowing the steps that a professional tiler takes will greatly improve your work. It will show you how to proceed when figuring out how to tile a wall.
In this article, we will go over the steps and tips on how to prepare a wall for tiling to make this job much easier. In addition, thanks for our comprehensive catalogue of professional tools, we will provide you with the necessary tools to achieve perfect results.

6 Steps for preparing a wall for tiling
Before you start, it’s important to know that, in order to successfully tile a wall, there are some specific steps you need to take in order to achieve the best result. Following our guide will ensure you will easily achieve a professional finish.
Here are the steps to follow for preparing a wall for tiling.
1. Prepare the surface for tiling
The preparation of the wall should be considered as one of, if not the most important, parts. Before you think about the next steps, you must first make sure that you have a completely level surface because tiling an uneven wall can result in complete disaster.
To do this, we recommend running a long spirit level along the wall. This is to check that the wall is level. This tool will help you spot irregularities or bumps should any exist. It should be long enough to cover the entire wall you want to tile and ensure that any irregularities are clear to see.
You never want to begin tiling a wall at ground level, as it’s normal for it to have a little unevenness. It’s always best to start tiling in the centre of the wall, adjusting as necessary to avoid needing very thin cuts at the edges. This will make it easier to keep your tile pattern symmetrical.
2. Preparing the adhesive
It’s worth noting how important it is to choose and apply the right adhesive for the type of tile you are using, as different materials will have varying absorption, hardness, and size and will require different adhesives.
In addition, when it comes to mixing your adhesive, it’s very important to read the instructions on the adhesive bags. There are many different types and brands of adhesive, which all have varied instructions and measurements to achieve the perfect consistency. It’s important to make sure you don’t add too much or too little water to your mix. To easily facilitate the preparation of the adhesive mix, use our RUBIMIX mixers and buckets.

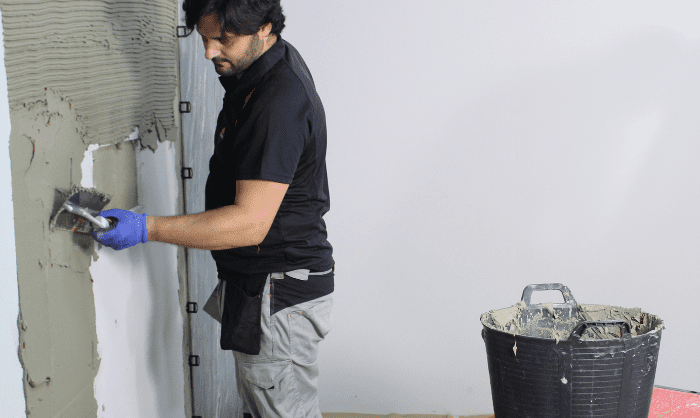
3. Comb the wall
Once you have prepared the adhesive, spread approximately one square meter on the wall that’s to be tiled. This will help you to confirm the consistency is right and that the adhesive is bonding well with the wall before it’s applied further. It is also important to check the brand and type of adhesive you’re using to confirm the pot life of your adhesive mix and how much time you have for optimum performance as this may vary.
Spread the adhesive mix using a notched trowel. The size of the notched trowel you choose depends on the tile size, the surface being tiled, and the profile on the back of the tile.
Remember that when choosing your trowel, comfort is very important. That is why we have our RUBIFLEX handles with two textures. These are highly ergonomic handle with increased grip.
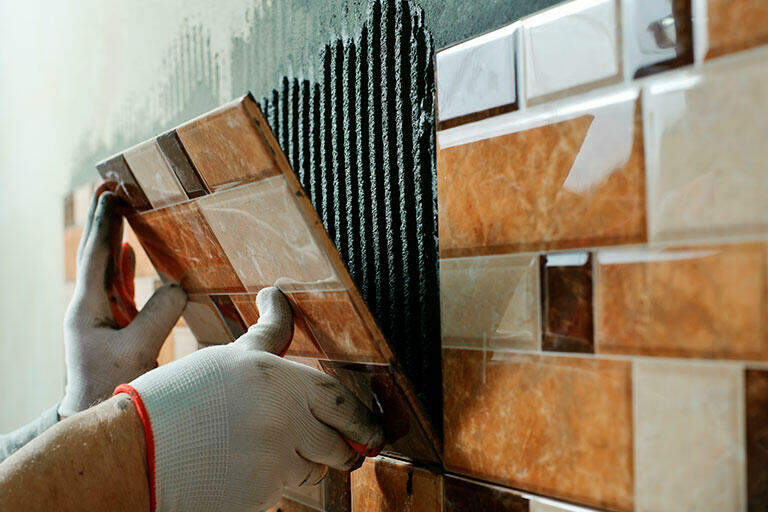
4. Lay the first tile
Once you have combed the area of the wall that you’re going to tile, place the tile on the adhesive. It’s important (particularly with large format tiles) to ‘back-butter’ your tiles. This means that you will need to spread a thin layer of adhesive on the back of the tile for better adhesion.
5. Position your levelling system
At RUBI, we have a number of different levelling systems, such as the Delta Level System, the Tile Level Quick, and the new Cyclone Level System that avoid lippage during tile installation. Once you’ve laid your first tile, place the levelling system on each side of the tile that another tile touches. This will ensure that you obtain a completely smooth surface.
As a quick tip, you can confirm this by running a wedge across your tiles. If your wedge doesn’t meet any friction, your tiles are level.
In addition, place a cross-spacer in each corner to make sure you have a perfectly aligned joint. It’s important to do this to ensure you have an even grout line that is both aesthetically pleasing and adheres to British standards.
6. Remove the air
Finally, once you’ve placed the first tile and added your levelling systems and spacers, you will have to make sure to remove the air between the wall and the tile. This will ensure a stronger bond and help avoid breakages in the future.
For this part, we recommend using the RUBI tile beating block. It has a large surface area, which allows you to remove more air efficiently. Alternatively, you could use our RUBI rubber mallet. However, as this targets more concentrated areas, be careful using it on materials such as porcelain, which could crack. In the event that you’re installing large-format tiles, we have our RUBI Triller vibrator. This tool will ensure that no air remains between the wall and the tile with very little effort.
Safety precautions and best practices
Personal protective equipment (PPE)
Wearing the appropriate personal protective equipment (PPE) is important for ensuring safety during tiling projects. Essential PPE includes safety goggles to protect your eyes from dust and debris, gloves to prevent cuts and irritation from sharp tiles and chemicals, and knee pads to safeguard your knees during prolonged periods of kneeling. Additionally, a dust mask or respirator is useful when cutting tiles or mixing powdered adhesive and grout, as inhaling these particles can cause respiratory issues. Making sure that you are properly equipped with PPE not only protects your health but also allows you to work more efficiently and confidently.
Safe handling of tools
Proper handling of tools is vital to prevent accidents and injuries. Always use tools according to the manufacturer’s instructions and be sure they are in good working condition. Regularly check your tools for any signs of wear or damage, such as frayed electrical cords or dull blades, and replace them as necessary. When using power tools, make sure to unplug them when they are not in use and store them safely. Keeping your work area organised and free of clutter reduces the risk of trips and falls.
Working with hazardous materials
Tiling often involves working with hazardous materials such as adhesives, grouts, and sealants, which can contain harmful chemicals. Always read the safety data sheets (SDS) provided by manufacturers to understand the risks associated with these products and the recommended safety measures. Use these materials in well-ventilated areas to avoid inhaling fumes, and wear appropriate PPE such as gloves and masks to protect your skin and respiratory system. In case of spills, clean them up immediately according to the manufacturer’s guidelines to prevent accidents. Proper storage of these materials is also important to prevent contamination and accidental exposure.
Post a comment