
Cutting glass tiles can seem like an intimidating task to take on. Since they have to be cut differently than other tiles, homeowners and DIYers may not know where to start with this kind of tile installation. That’s why in this article, we’ll teach you how to cut glass tile, what tools you’ll need, and what materials are best for each application.


When you cut glass tile, you have to be careful since it can break or shatter more easily than stone or ceramic tile. It is also more prone to jagged edges, and it’s easier for imperfections to show after a cut has been made, especially if your tile is colored on the back and clear throughout the rest.
Where glass tiles differ from ceramic or stone is the unique styles they come in. No matter the color, shape, or size you want, you can find a glass tile to match the image in your mind. There are many things it can be used for in your home aside from a kitchen backsplash.
These tiles are perfect for a shower tile installation, as they’re water-resistant. They’re even great for when you’re learning how to install tile backsplash.
There are more benefits, too. Don’t give up on the idea of glass tile due to its difficulty to cut! We’re here to help you learn how to make it work for you.
What Makes Glass Tile Appealing?
Glass has actually been used as material for mosaics in churches for a long time. Think of old stained glass windows and you’ll understand exactly what we mean. It has been a staple for art pieces throughout history and now it has found its way into our homes, especially into our kitchens.
If you’re new to the world of glass tile, you might not quite understand what makes it so appealing to homeowners nowadays. If something can shatter so easily, why wouldn’t you want to build with a different material?
Well, have you ever added a mirror to your space and felt like the room got bigger? That’s partly because the light was bouncing off the mirror and reflecting into different parts of the room. The mirror made everything in the room seem bigger and brighter, and glass tile has a similar effect.
It’s also easy to arrange into specific patterns and it can come in many different shapes, styles, and colors. Like we said earlier, cutting it is a different story, so let’s look at what materials you need for that.

What Tools Do You Need to Cut Glass Tile?
There are actually 4 different methods you can use to cut your tile. The different tools you would need for each method include:
- Glass cutter
- Wet saw
- Manual tile cutter
- Wheeled mosaic nippers
Each tool comes with its own unique method for cutting, as well as other materials you’re going to need.
Cutting Glass Tile with a Wet Saw
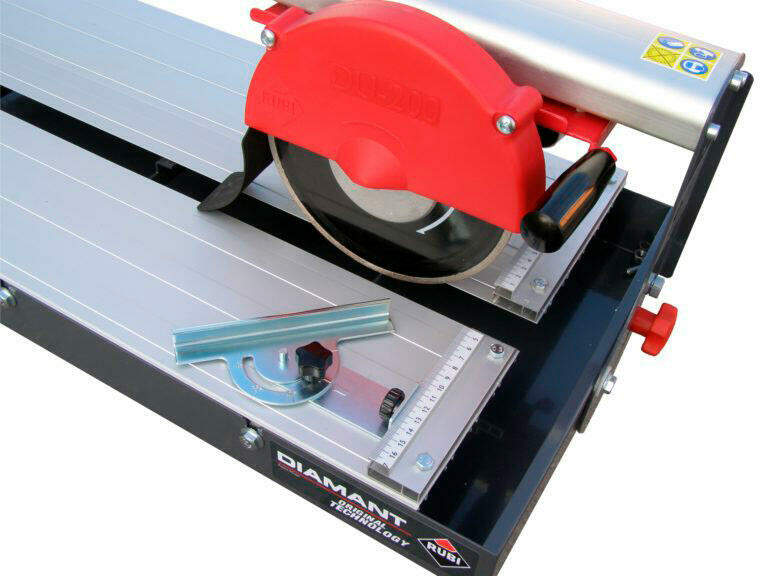
Cutting glass tile with a wet saw can be the most expensive method, but it’s also easy to rent this piece of equipment if you don’t want to spend money buying it. You can rent a manual cutter as well, but it’s a less popular rental option.
While electrical tile sawing tools range from $100 to $1,000, you can often rent them for about $50 a day.
The other materials besides the wet saw include:
- Washable marker
- Washcloth
- Rubber gloves
- Safety glasses
- Auditory protectors
- Rubbing stone
You are going to start by measuring the tile that must be cut. From there, use your washable marker to draw a cutting guideline across the tile. Don’t worry, you will be able to wipe this away with your washcloth later.
Once you have got your tiles marked and ready to go, it is time to pull on your rubber gloves and start the wet saw up. Allow it to run for 15 seconds so the blade gets nice and wet. When water is freely flowing over the blade, you are all set to begin your cuts.

You are going to align the glass tile with the guide on your wet saw and slowly move the saw blade to cut along the line you drew. Do not force the tile through, though. The pressure you apply should be steady, but light.
Once your cuts have been made, power down the saw and you are good to start your install.
Finally, with the rubbing stone, carefully smooth out your cuts and wipe away any glass shavings.
Manually Scoring and Cutting Glass Tiles
Before wet saws, there was manual tile scoring. While it can result in uneven or jagged cuts, it is a faster cutting method and it is great for smaller or customizable glass tile cuts.
Glass scoring wheels are particularly inexpensive and easy to buy. They are very small and portable, which can be a big benefit over wet saws, plus they are easier to store once you’re done using them. You will also need a pair of grozing pliers to work in tandem with this tool. Once you have them both, practice with a few sample pieces before testing your skills on the real thing. You’ll also need:
- Washable marker
- Straight edge
- Rubbing stone
- Washcloth
Start by marking your cuts, and then score one side of the tile. Place the scoring wheel at the far end of the tile and then pull the wheel towards you. You should press firmly enough to hear a cracking sound as the wheel rolls.
Once you have done that, take your grozing pliers and snap off the piece you want to break off. Be sure to pull downwards when you break the tile. From there, use your rubbing stone to smooth any edges before installation.
Using a Manual Tile Cutter
Manual tile cutters are far more efficient than a scoring wheel and pliers, since they cut and score.

To use a manual tile cutter, which often comes with a scoring wheel, you are going to need the same tools you needed to cut with a scoring wheel.
Once you have measured your cuts, you are going to place the tile on the manual tile cutter’s cutting pad. Align the marked line with the manual tile cutter’s cutting guide. From there, use the scoring handle to make the cut away from you. After you cut, you are going to snap the tile manually, or with the machine’s pressure foot. Smooth the edges, wipe away any marker and you are good to go!
Using Wheeled Mosaic Nippers
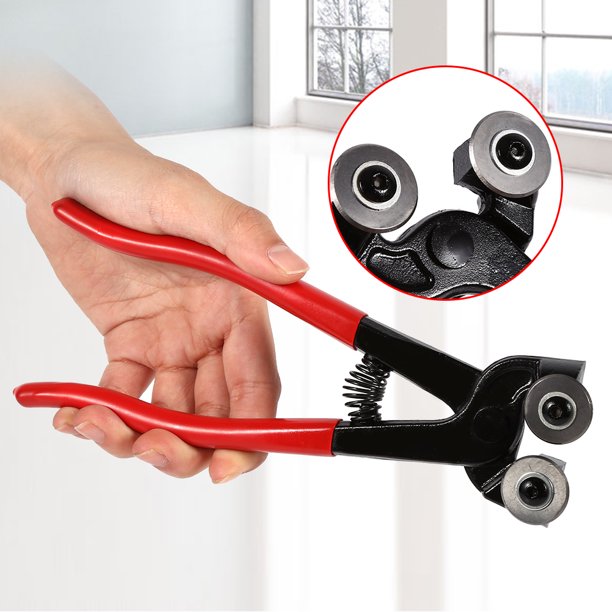
Most often, this tool is used to make small shapes for artistic glass tile designs.
This method is not as precise as any of the others, so it is going to require more practice to get the hang of it.
This tool is similar to a regular pair of pliers but has both upper and lower carbide wheels instead of a flat head. This cuts through glass more effectively.
For this method, you are going to need:
- Washable marker
- Goggles
- Washcloth
Besides that, you’re also going to need your wheeled mosaic nippers.
Making the Cuts
Start with drawing guidelines in your tile. It is recommended to mark the glass with a scoring wheel or manual cutter before nipping. Additionally, this technique is mostly used on small tiles.
To finish, take the rubbing stone, smooth out your cuts, wipe away any glass shavings.
What About Cutting Curves?
When you are laying tile around a curved object, like a rounded shower stall or similar fixture, you are not going to be able to cut straight lines and expect a good fit. With the help of these tools, however, it can be achieved.
- Scoring tool
- Wet saw
- Rubbing stone
- Grozing pliers
Once you have gathered all of these, you are going to start by marking your cuts and cutting (freehand) with a scoring tool along your line. Work slowly and precisely here.
Then, you are going to make several straight cuts with your wet saw. Start from the portion of tile you are going to discard and move to the line you have already scored.
Once you have made all the straight cuts, you are going to snap off all the pieces from the portion you just cut. You can also use your grozing pliers for this part. Finally, with the rubbing stone, smooth out your cuts, wipe away glass shavings, and get rid of the marker line. You are ready to install!
Enjoy Your New Glass Tiles!
Now that you have learned how to cut glass tile, it’s easier to move forward and begin your install! Just remember the tips we talked about here and you will be good to go. Which method you decide on is ultimately going to depend on your budget and the size of the project you are taking on, but the result will be the same no matter which you decide to go with.
In no time, you will be enjoying the beautiful, new glass tile in your home.
At RUBI, we offer a wide variety of manual and wet cutters to help with your glass installation. Take a look and get started today.

Post a comment