
A true professional is always looking to improve his craft. So learn everything you need to know from the pros at RUBI about tile installation. Each step is laid out so that anybody from a DIYer to a seasoned veteran installer can learn something.

INDEX
2. Tiling Tools
RUBI4. How to Tile Different Spaces
6. How to Lay Specialized Tiles
How to lay tile
Step 1: Choosing the Material
When deciding on what type of material to go with for your tile installation project, it’s important to consider where the tile will be in your home. Tile is a multi-purpose material that works well in a variety of places:
- Kitchen
- Bathroom
- Flooring
- The exterior of your home
There are more than just one or two different types of tiles. Depending upon where the tile will be, your personal style, and how durable it needs to be, there’s the perfect style for your tile installation project.
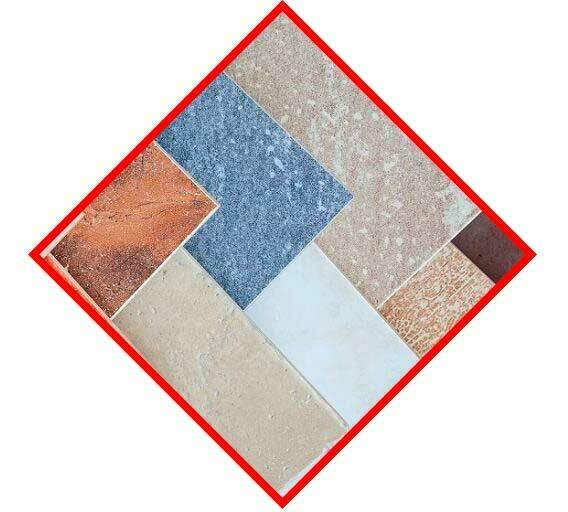
Choose from the following types of tile materials:
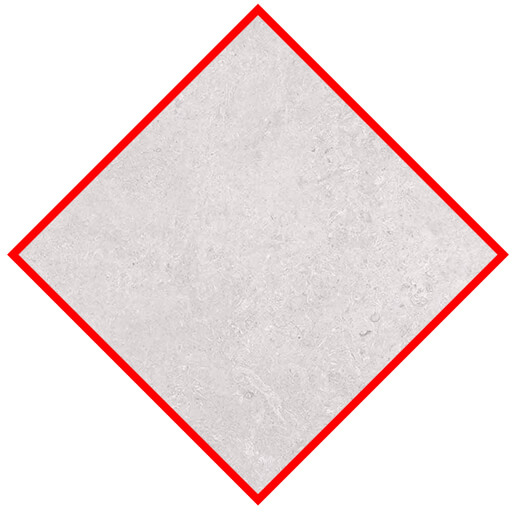
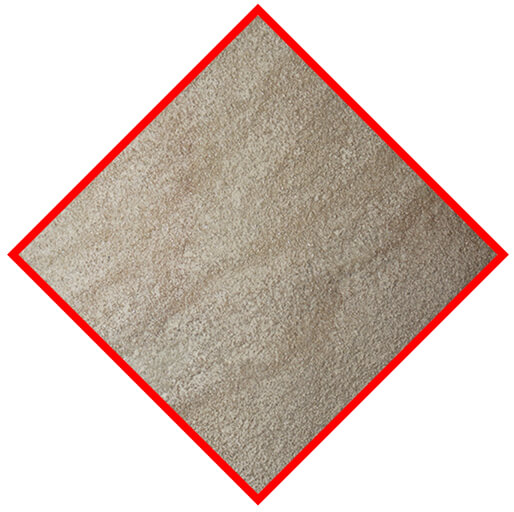
- Ceramic
- Porcelain
- Cement
- Marble
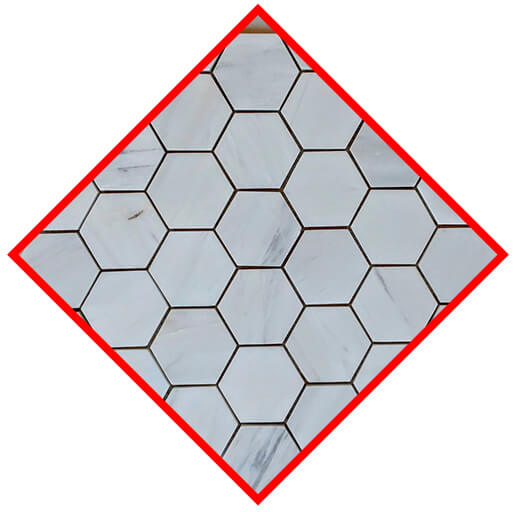
- Mosaic
- Granite
- Limestone
- Travertine
- Quarry
Several design trends are inspiring homeowners, interior designers, and architects when figuring out the type of tile to use in a project. Maybe you’ll be inspired by some of them as you embark on your DIY project.
Some of the trends for 2021 are:
- Matte tiles
- Graphic tiles
- Subway tiles
- Wood tiles
- Neutral colored tiles
- Hexagonal tiles
When choosing a tile material and style, consider your aesthetic and where the tile will be installed in your home. That will guarantee you choose a product that you love and that be around for years to come.
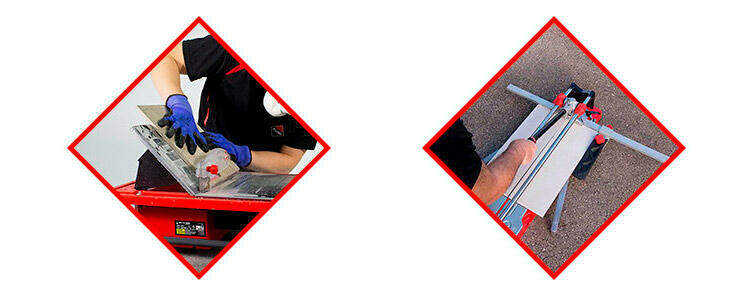
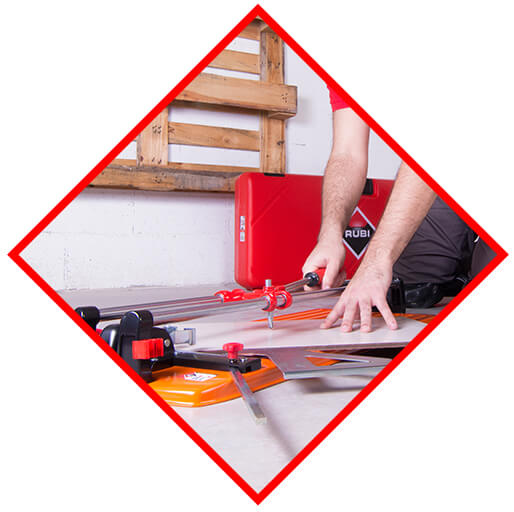
Step 2: Cutting Tiles
Now that you’ve selected your tile, we move onto the next step in your tile installation project: cutting. To cut your tile effectively and without wasting product, you’ll need a reliable saw.
There are four common types of tile saws:
- Snap or Rail Manual Cutters : A must-have, basic, economic, portable, and effective tool for the majority of your tile cutting needs
- Handheld Wet Tile Saws: Typically used for any touch-ups during a tile installation project
- Tabletop Wet Tile Saws: Smaller and more portable than an overheard tile saw
- Overhead Motor Wet Tile Saws: Professional grade saws that come with an adjustable stand
Tile cutting isn’t difficult. Having the proper tools for the tile you’re working with and the project’s scope is essential to complete the job. If you decide to work with a wet tile saw, you’ll need a few quality diamond blades on hand.
Step 3: Preparing the Surface
Tile is a wonderful option for flooring in a bathroom, kitchen, or entryway. The tile can apply it over different types of subfloor.
There are a few things you’ll need to do when preparing the surface for tile installation:
- Concrete Subfloor: Repair all cracks, replace any sections that need it, and clean with water
- Plywood Subfloor: Check for cracks around plumbing fixtures, fix weak areas, and fill in any low parts
- Tile Subfloor: Remove the tile if you’d like or apply thin-set over it before tile installation
Cushioned vinyl, sheet metal, masonite, and chipboard are not recommended subfloors for installing tile, and some may choose to remove them before installing. However there are multiple solutions for adecuately installing over these materials, which we cover more in depth in our blog.
Step 4: Mix the Adhesive
A reliable adhesive or mortar mixer is another vital tool in any home tile installation project. Mixers come with different types of paddle attachments to choose from depending upon the viscosity of the material and the amount you’re mixing.
If you have a big batch of mortar to mix, you’ll need a bigger paddle and a mixer with greater mixing potential.
When mixing the mortar, keep these tips in mind:
- Add the amount of water recommended by the manufacturer
- It should be as thick as peanut butter
- Let the adhesive set for 2-3 minutes after mixing
- Mix for one minute before using the adhesive
- Notice when it begins to stiffen up
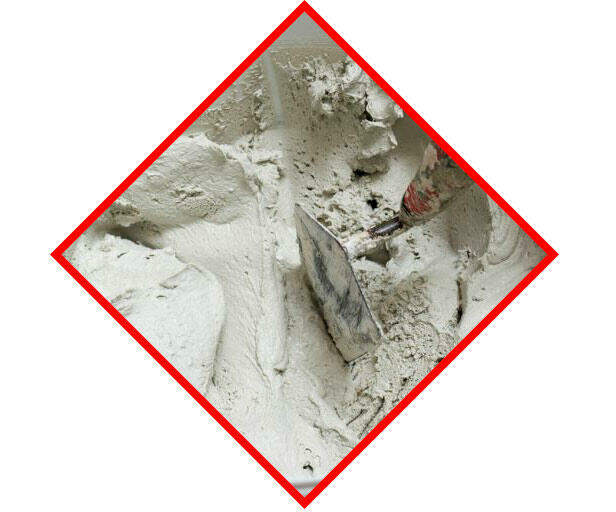
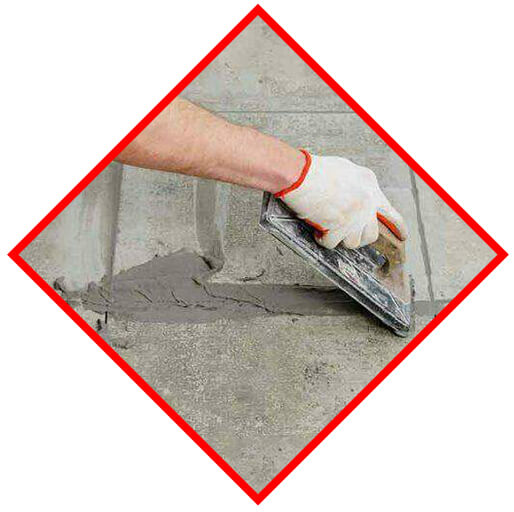
Step 5: Applying the Mortar
If you mixed the mortar properly, it should have standing ridges without any slumping when you spread it onto your subfloor with a trowel.
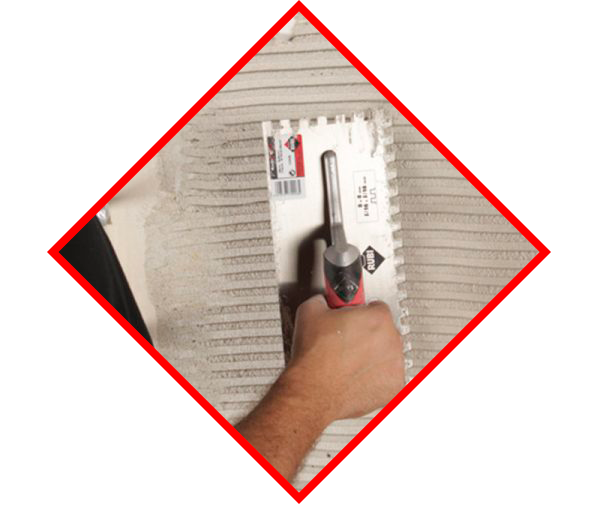
But what is mortar anyway? Well, mortar is composed of cement, sand, and/or lime and it’s adequate to use with the majority of ceramic tiles because it’s recommended for use with materials that absorb a lot of water. This makes it good for use with many tiles because they are highly porous.
However, nowadays the majority of tiles have very low porosity, some practically have none, such as porcelain. That’s why adhesives have evolved into the more modern tile adhesives we see on the market today, which guarantee a correct adhesion even in the least porous materials, thanks to the chemical additives that it has.
A 50-pound bag of mortar should easily cover a 40-50 square foot area using a 1/2 inch notch trowel. The same size of the bag will cover a 30-40 square foot space with a 1/2 inch trowel.
Step 6: Laying the Tile
Having the proper tools, tile, and adhesives will guarantee you success in your tiling project. There are many moving parts when working with tile, but if you plan and do your research, you’ll have no problem at all.
Tiling Tools
When undertaking a new tiling project, it’s important to have the right tools on hand. Let’s take a look at which ones are most useful.
Mortar: How to Mix the Right Proportion of Cement and Sand
Perfecting the recipe for mortar will help you achieve the strongest bond between your surface and the tile. Inadequate mortar can result in your entire project failing or issues throughout the process.
Most mortars include the following ingredients:
- Portland cement
- Sand
- Lime
- Various chemically manufactured additives
You need to add in the right amount of water and mortar to make a fairly thick consistency. You will also need to mix it for a long time — at least five to 10 minutes. This may seem like a long time, but it’s vital to make sure the individual molecules, additives, and cement, are blended and saturated.
One term you’ll often hear when reading about mortar preparation is slaking—in simple terms, slaking means letting the mortar mixture sit for over ten minutes. Remember, don’t touch it! You need to give the chemicals in the mixture time to start working.
Adhesive: Different Types and What to Consider
Thinset is another type of adhesive that can be used in tile installation projects. It’s a mix of water, cement, and fine sand. It’s typically used when applying tile to concrete or cement surfaces.
There are two types of thinset: modified and unmodified.
- Unmodified thinset has been around for quite some time, but modified thinset has become more prominent in the tile installation field in recent years.
- Modified thinset includes additional adhesive products that unmodified mortar doesn’t, specifically, latex polymers—these work to increase the strength and performance of the thinset. Additionally, with some modified thinset, you don’t have to mix it with water before spreading it on the subfloor.
When working with thinset, keep these tips in mind:
- Add dry thinset to water, not the other way around
- Mix the thinset slowly as if you’re mixing cake batter so it doesn’t splash out
- Use your thinset within 20-30 minutes of mixing

Leveling Systems
An uneven floor can ruin your entire project if you don’t take the necessary steps to avoid it. To prevent tile lippage, use a tile leveling system. Having an uneven floor is not only unappealing but can create a tripping hazard as well.
Tile lippage is when the edges of two adjoining tiles are vertically displaced. They’re set at two different levels. They may be spaced evenly in width, but they’re not in height.
To correctly install tile on an uneven floor, you’ll need the following tools:
- Chalk or contractor line
- Square notched trowel
- Mortar
- Grinder
- Sponge, bucket, and brush
Unfortunately, even if you’ve done everything in your power for your tile installation project to be on an even floor, there still can be irregularities in the tiles themselves. The leveling system can help you in this area. It interlocks the tiles, making sure the surface is flat and smooth while the thinset dries.
A tile leveling system comes with caps, strips, and pliers. They work together to prevent the tiles from moving while the compound sets in.

Spatula and Trowel
Ergonomic tools specially designed to match your hand to the handle’s shape are vital when completing a tile installation project. For example, a spatula helps you apply the grout or mortar to the surface you’re working on. You’ll need to decide if you need a flexible or rigid spatula based on the material you’re working with.
You’ll also need a notched trowel in your tool kit for your tile installation project. It helps you spread the mortar on whatever surface you’re tiling.
There are a few types of trowels out there:
- U-Notch: Spreads the mortar thinner and works well for tiles larger than 4″
- V-Notch: Typically used for mosaics and tiles up to 4 1/2″
- Square Notch: Spreads more thinset than the other types of trowels and is used for larger tiles
- Flat Trowel: A finishing trowel that smoothes the surface area
- YW Notched Trowel: Designed with special notches that optimize moistening
Tile Nippers
There are several options when it comes to tile nippers, so let’s go over the different types and what they are best for.
The parrot nippers, which have hard tungsten carbide edges, are ideal for rectifying holes, corners and other difficult cuts in pieces of tiles or glazed stoneware.
The nippers are the most general and are good for rectifying tile cuts, especially in ceramic tiles and glazed stoneware.
The nippers for glass mosaic have a curved edge, which is perfect for cutting pieces of tile and other types of glass mosaic.
The nippers for hard materials have a tempered steel beak, which is especially useful for rectifying small defects in cuts in very hard materials such as glazed stoneware and porcelain tiles.
The nippers for porcelain tiles allow you to rectify cuts in this hard material, due to their design and the addition of two tungsten carbide scoring wheels that have a titanium nitride surface treatment.

Grout Float
It is worth noting the importance of grout joints in tile installation. There is a wide range of rubber grout floats with different levels of hardness and thickness, which allow you to always obtain the best finish.
The solid rubber floats are highly valued for their great resistance to abrasion and in giving the best finish at joints with widths of more than 3 mm.
The lightness of the TERMOFLEX rubber float allows you to work on large surfaces as comfortably as possible. We also offer two categories of rubber grout floats; SUPERPRO for the most demanding jobs and PRO for smaller jobs.
Rubber Mallet
Using rubber mallets and beaters ensures the correct laying and leveling of tiles throughout installation.

Mallets with one spherical side reduce the size of the impact zone, minimizing its force. They are available in different weights, to adapt perfectly to everyone and to every tile fixing job or urban paving job (cobblestones, tiling, curbs, etc.).
RUBI’s mallets and beaters have a white rubber series, with rubber sheets for the hammers. With these tools it’s possible to avoid leaving any marks or stains on the surface of the material. They are made of highly abrasion resistant, water-repellent wood with guaranteed perfect flatness.
Plastic Buckets
Plastic buckets are ideal for collecting waste or for mixing pastes and mortars on site. One of the biggest advantages of these plastic baskets and buckets is their multisector use, strength, good flexibility and lightness.
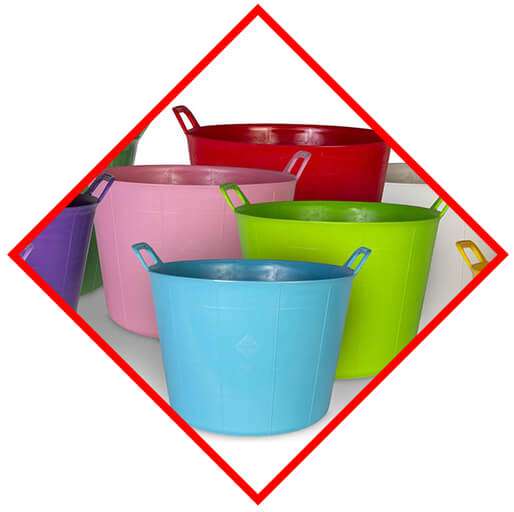
The design of their handles allows the user to transport with one hand any of the different models in this range, without the risk of breakage. Another characteristic that differentiates the FLEXTUB plastic baskets from the rest is the thickness of their walls, which gives them an optimum resistance in the most demanding working conditions.
The FLEXTUB plastic baskets come in three different capacities: 25, 40 and 55 liters. They are also stackable, which saves a lot of space and facilitates their transport.
Plastic buckets must be highly robust to be suitable for all types of work in the construction sector.
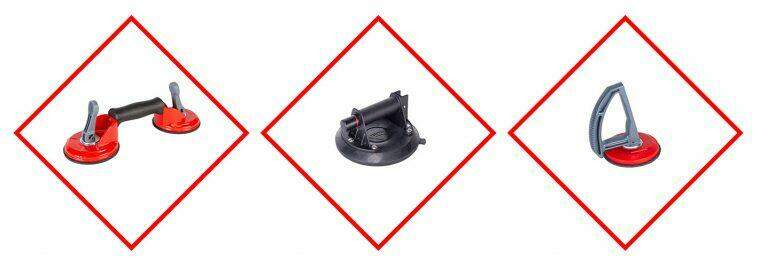
Suction Cups for Tile Installation
Suction cups are used for moving tiles around quickly, easily, and without cutting your hands. You can easily move, manipulate, and place tiles weighing up to 110 kg (242lbs) with different types of surfaces (smooth, rough, or structured) using the wide variety of suction cups and tile manipulation systems that RUBI offers.
They come equipped with a grasp and release handle, allowing for easy use.
CCrosspieces, Joints, and Ts
To create a seamless look in your tile installation, you’ll want to make sure the tiles are properly spaced apart. This can be accomplished with tile spacers.
They come equipped with a crosspiece to ensure the tiles have the same amount of distance between them.
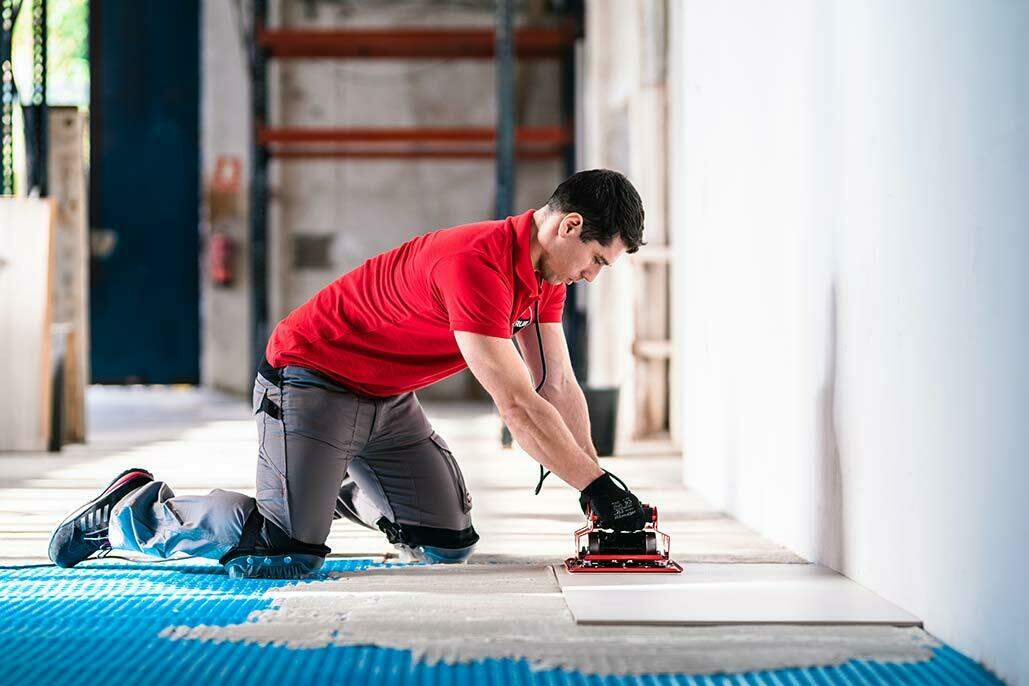
Protective Gear
While one of the purposes of wet saws is to eliminate tile dust from coating the air, you still need to wear protective gear when working on a tile installation project. First, it would help if you protect yourself from breathing in harmful products.
Some examples of protective gear you’ll need for your tile installation project are:
- Face Mask: Protects your airways.
- Goggles: Protects your eyes from tile or glaze particles
- Ear Protector: Helps you avoid discomfort or other possible injuries
- Lumbar Protector: Prevents back injuries from moving heavy objects and working in uncomfortable positions
- Knee pads: Protects your knees when kneeling on hard surfaces
- Gloves: Protects your hands against harmful chemicals or broken tile
How to Cut Tile
Knowing how to cut tile is essential to ensuring you don’t make any costly mistakes. Tiles are a popular choice among homeowners when doing various renovation projects, so having the best tile cutting tools at your disposal will make your job even easier.
Tiles can be a bit fragile. The smallest of chips makes a difference in their overall appearance, so you want to be careful and use the right methods when cutting tile.
Porcelain tiles are more durable but a glazed porcelain will react the same way as a ceramic tile in regards to the chipping caused by cutting.
Let’s go over how to cut tile with the best tools for the job, as well as some tips & tricks that you may not be aware of.

Tile Cutting Tools
Knowing how to properly use a tile cutter is essential. It will give you clean, straight edges and make your work look as professional as possible rather than rough and ragged.
When thinking about how to use a tile cutter, there are two types of machines you can purchase, a manual tile cutter and an electric cutter or ‘wet saw’. Depending on the type of material and size of tiles you’re working with, it may affect which tile cutter you go for.
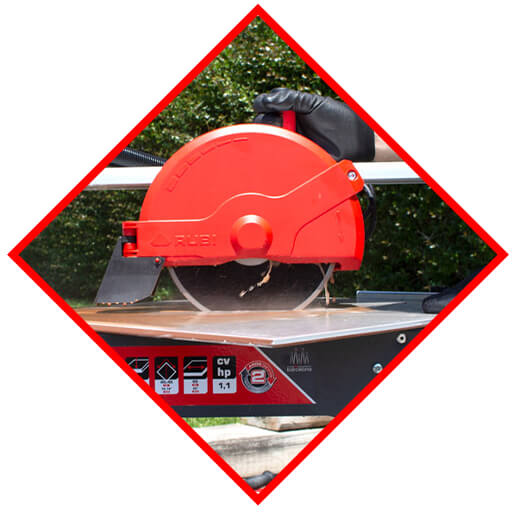
Wet Saw
If you look at a wet tile saw, it will look very similar to a regular table saw. The only difference is the diamond blade and the water sprayer. You’ll find some saws that connect to a water source while others come with a water reservoir.
The point of the water is to prevent the tile from breaking, smoking, or burning as you cut it. While wet tile saws may be more cumbersome to take to a site, they offer many more advantages than most other types of tile cutters and saws.
Wet tile saws make cutting straight lines easy. They also make the cleanest and most accurate cuts. Every tile you cut will have crisp clean edges that will align with other tiles perfectly, provided you measure correctly.
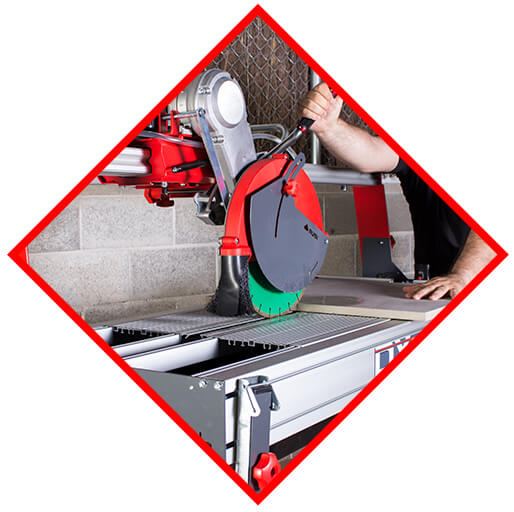
This is mainly due to the extremely sharp and durable rotating blade. You don’t need to score and snap the tile, meaning there are fewer jagged or uneven edges.
Besides cutting impressively straight lines, you can use a wet tile saw to cut curves and other complex shapes. This gives you greater room for creativity and flexibility.
There are many types of tile materials to choose from but whichever one you go with, a wet tile saw can cut it well. The final cut will be clean, smooth, and accurate.
However, you will need to pay close attention to what you’re doing when using a wet tile saw. Despite the effort and time-saving benefits, there is still the risk of making mistakes or injuring yourself.
Larger tiling jobs will benefit the most from a wet saw because they tend to require more tile cutting, more tiles, and more time. If you need to cut more than a few pieces of tile for a project, a wet tile saw makes the most sense.
A wet tile saw is also safe as long as you use it correctly. The water prevents friction when cutting the tile. There’s less heat, smoke, and dust. The water also helps to keep your work area clear of dust and debris so you can clearly see what you’re doing.
Tile Cutter
The manual tile cutters, also known as snap or rail cutters, are an essential piece of equipment that everyone should have in their toolbox. They are used to cut standard tiles and porcelain.
There are many benefits to using a manual tile cutter. Manual tile cutters are generally cheaper and a lot easier to set up and use than electric cutters. Due to their size, manual cutters are more portable, which makes them more efficient for regular use.
Due to their design and ease of use for manual cutters, professionals are also able to cut tile at a much faster rate using a manual cutter than with an electric cutter.
When it comes to cutting tile, some harder materials such as porcelain tiles can be difficult to score and cut.
It may take a little more time and effort to score the tile and apply pressure repeatedly along the scored line to efficiently cut the tile and not cause it to snap off the scored line. In cases like these, it is recommended to use an extreme or endure scoring wheels which will allow you to cut deeper into the surface of the tile.
Another aspect to keep in mind is safety. The manual tile cutters are very safe tools, due to the fact that they do not contain sharp parts that may come into contact with the user or high speed mobile parts that could endanger hands or limbs. They also don’t need electricity to work.
Diamond Blades
The RUBI range of diamond blades is constantly evolving and has earned the trust and appreciation of professionals around the world.
RUBI has a complete range of both wet cutting and dry cutting diamond blades. The blades are classified by color depending on the type of material or materials for which they were designed. Notably, within the range of RUBI diamond blades, there are special blades for cutting porcelain stoneware, an increasingly common material.
Diamond blades are super-abrasive and are made up of a circular body, mostly made of steel, called a “core”. On its periphery, the core has cutting material in the form of a continuous crown. This cutting material, which we call the diamond band, can be joined to the disc core in different ways. The most common method used by RUBI is laser welding.
Then there are the diamond grains, which can be attached to the discs in 3 different ways (sintering, electroplating and vacuum brazing). In the case of blades used for cutting tiles, sintering is the most common.
Diamond blades can be used to cut a variety of materials with differing cutting speeds and finish qualities. Learn more here.
How to Cut Porcelain Tile
To begin, make sure that your diamond blade is clean and sharp. Then use a grease pencil to mark where you want to cut. Take careful measurements and make sure to mark accurately so that you have a clean line to follow with your blade.
Next, take a cutter and make little notches along your line for your blade to follow. Attach masking tape along the edges of your line. Both of these measures will help you avoid chipping the porcelain as you cut.
Don’t force the diamond disc forward. Instead, let the disc direct the speed of the cut to make sure that you’ll get the best finish possible. You can use a leveler for even more accuracy.
Using the right cutters, blades, and hand tools will ensure a quality cut. Be sure to follow safe practices and go slowly, and you’re sure to get great results. If you’d like more tips on how to cut porcelain tile, take a look at this article.
How to Cut Glass Tile
First, you’ll need to decide which tool you will need. To do this, you need to figure out what type of tile you are cutting, what sort of cut is required, and how many tiles you need to cut. There are four main methods of cutting glass, and each requires its own specialized tool.
These tools are:
Glass tile cutter
A glass tile cutter is inexpensive and is conveniently small and portable. When purchasing this tool, you will also need to buy a pair of pliers.
When using it, start by marking your tile where you want to cut it. Next, score the tile on one side with the tile cutter.
Pro tip: press firmly enough that you hear a cracking noise as you cut.

Once scored, take your grozing pliers and grip the tile on one side. Pull down to snap it off. Finally, smooth the edges with your rubbing stone and wipe it down with the cloth.
A manual tile snap cutter can be really useful if you have a lot of tiles to cut. It’s more efficient than a glass tile cutter, as the cutter can both score and cut the tiles.
Using it is quite simple. First, mark the part you want to cut and place the tile on the cutting pad. Then, line up your marker line with the guide on the manual tile cutter.
Pro tip: always aim to use a diamond blade when cutting glass tiles.
Cut the tile by pushing the scoring handle away from you. If your machine is fitted with a separator, you can use that to snap it off. Otherwise, you can do it by hand.
Wet saw
Using a wet saw is the recommended method to cut glass tile. The water flow counteracts the overheating of the blade and tiles and results in a smooth, clean cut.
Like with all the other methods, start by marking cuts with your non-permanent marker. Next, put on your rubber gloves and start up the wet saw.
Pro tip: let the wet saw run for 10-15 seconds to ensure a properly wet blade.
Once the water flows over the blade, align your marked line with the guide on the wet saw. Next, slowly start moving the blade of the saw along your marked line to cut. You don’t want to exert too much force; instead, you want to apply light, even pressure.
Finally, turn off the saw, smooth the edges with your rubbing stone, and wipe it down with the cloth.
Tile nippers
This tool is typically used to make smaller, artistic shapes with glass tile. It looks like pliers, but it has upper and lower wheels, similar to a can opener.
To begin, mark your design on the tile with your marker, and put on your safety glasses. Next, align your nippers with your marked line and firmly squeeze the nipper’s handles to cut through the tile forcefully.
Pro tip: mark the glass with a scoring wheel before nipping.
Once you’ve completed your cut, smooth the edges with your rubbing stone and wipe it down with the cloth.
How to Tile Different Spaces
There are some different methods, tools and equipment that are needed when tiling different types of spaces. Let’s take a look at some of these.
How to Tile a Floor
Large-format tiles are typically used when installing tiles on your floor. They are good for your laundry room, kitchen, entryway, or bathroom as they have fewer joints that can collect grime, absorb water, or grow mold. However, they are more difficult to cut, so tile installers will need special tools to assist them in the process.
When installing floors, you’ll want to measure the area you’re tiling properly to avoid purchasing too much or too little tile. Once you measure the area, you’ll need to convert the square footage into how many tiles you need.
How to Tile a Wall
When tiling a wall, the preparation of the wall is one of the most important parts. Tiling an uneven wall can result in complete disaster, so to do this, we recommend using a long spirit level to run along the wall. This is to check the wall is level and is an easy way to spot irregularities or bumps should any exist.
You will never want to begin to tile a wall at ground level, as it is normal for it to have a little unevenness. Therefore, it’s always best to start tiling in the center of the wall and adjust as necessary to avoid needing very thin cuts at the edges.
It’s also important to choose and apply the right adhesive for the type of material you are going to tile, as different materials will have varying absorption, hardness, and size which will require different adhesives.
When it comes to mixing your adhesive, it’s very important to read the instructions on the bags. There are many different types and brands of adhesive, which all have varied instructions and measurements to achieve the perfect consistency
Once you have prepared the adhesive, spread it on approximately one square meter of the wall to be tiled. This will help you to confirm the consistency is right and that the adhesive is bonding well with the wall before it’s applied further. To spread the adhesive mix, you should use a notched trowel. You should also ‘back-butter’ your tiles. This means spreading a thin layer of adhesive on the back of the tile for better stick.
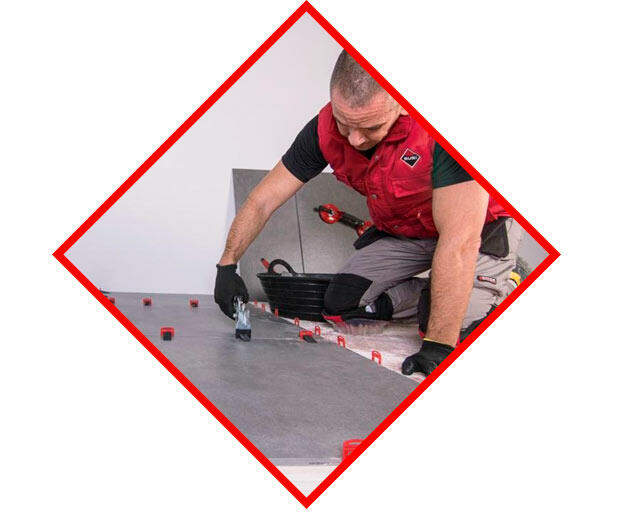
Now let’s talk about leveling. At RUBI we have a number of different leveling systems, such as the Delta Level System, the Tile Level Quick or the new Cyclone Level System. After you’ve laid your first tile, place the leveling system on each side of the tile that another tile touches.
Place a cross-spacer in each corner to make sure you have a perfectly aligned joint.
Finally, you will have to remove the air between the wall and the tile. This will both ensure a stronger bond and help avoid breakages in the future. For this part, we recommend using the RUBI tile beating block, which has a large surface area allowing you to remove more air efficiently. In the event that you’re installing large-format tiles, we have our new RUBI Triller vibrator. This will ensure that no air remains between the wall and the tile and will require very little physical effort.
How to Tile a Backsplash
A cost-effective way to improve your home and increase its value is by adding a new backsplash to your kitchen. It’s another easy project that you can do yourself over the course of a weekend.
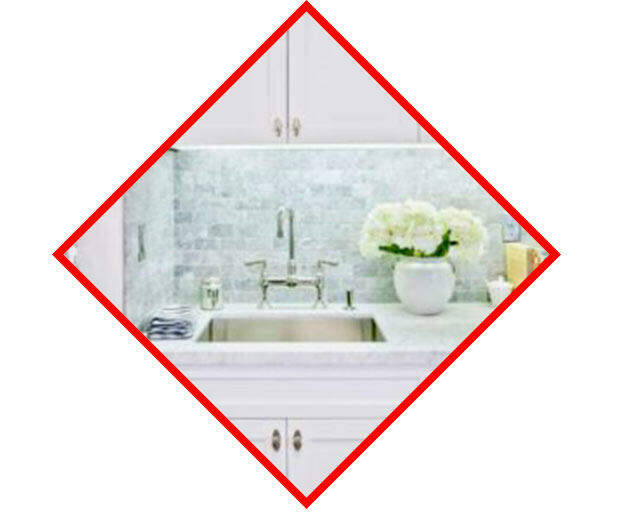
If your kitchen is fairly neutral in color, add a pop of visual appeal by picking a bold backsplash. You can mix and match tile colors to create a unique and funky design.
Ceramic, porcelain, and glass are typically used in kitchen backsplashes as they’re easy to keep clean. With all the grease and other materials that can happen in kitchens, you want something that you can easily wipe off. They also are the more affordable options as far as tiles go.
If you really want to be bold, explore using a mixed media tile. These stone or glass tiles add color, texture, and depth in a normally neutral space.
How to Tile a Shower Floor
Before you start, you’ll need to know the position of your shower drain and the connecting pipes. Plan your tile layout before starting and know where you’re going to put the shower doors.
Once you know this, remove the top half of your shower’s drain and plug it with a towel or rag. This will stop debris from clogging the pipes. Next, mix the mortar using our tile mortar mixer.
Level the first layer using a straight edge. Place your straight edge along the wall with the opposite end close to the drain.
There are a few things you should know before laying a pan liner inside your shower. Run your liner about 12 inches up your shower wall. Nail it to the studs and don’t pierce the liner anywhere except for at the drain. And don’t forget to fold the liner at the corners of your shower.
Cut the liner to fit outside of the flange bolts. Cover the drain’s top with masking or duct tape to protect your plumbing. Attach a cement board to your shower walls over the liner.
Cut and lay the metal lath over the top so it isn’t touching the cement walls. Cover your lath with a second layer of mortar and keep the same slope.
Dry lay the tiles before starting anything to make sure you understand the layout you want. You can cut any tiles that don’t fit using a tile cutter.
Next, use a notched trowel to spread your thin-set. Lay your tiles and wipe them down with water.

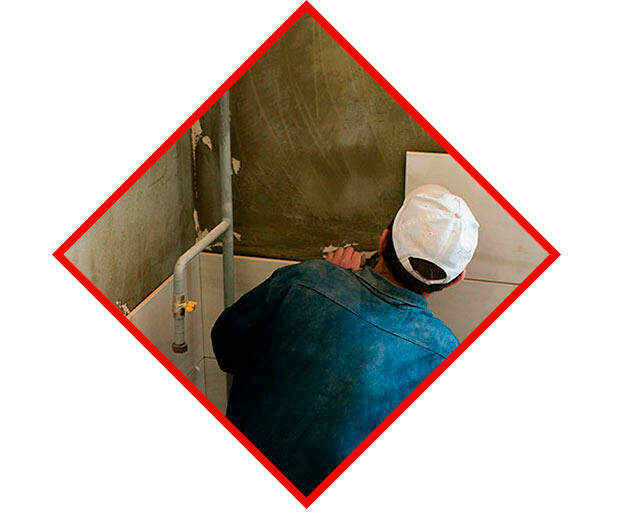
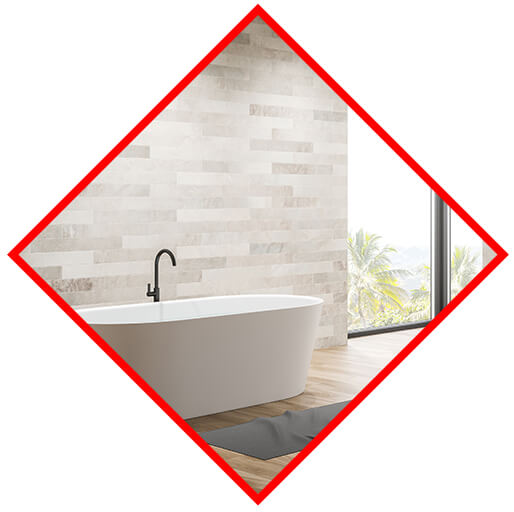
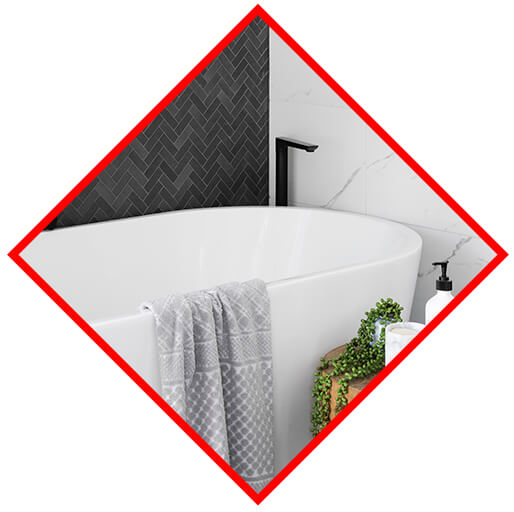
How to Tile a Bathroom
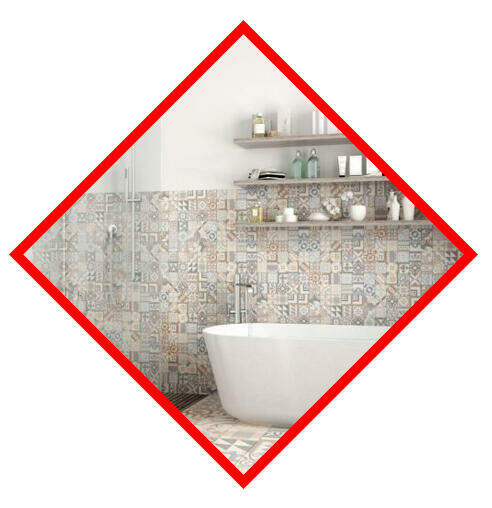
You’re not limited to only tiling a backsplash or floor in a bathroom. You can tile your bathroom shower. You don’t have to be limited to one color or a basic pattern. Explore interesting patterns or color combinations to draw visual interest to your shower. Being creative with a pattern can give your bathroom a modern edge over the typical black and white color scheme.
A tile floor is traditional for a bathroom, but it’s another great way to make your bathroom come alive. Choose quality materials that will withstand wear and tear and water. Knowing how to cut around a toilet is vital to ensuring the tile is installed properly and you don’t have any costly errors.
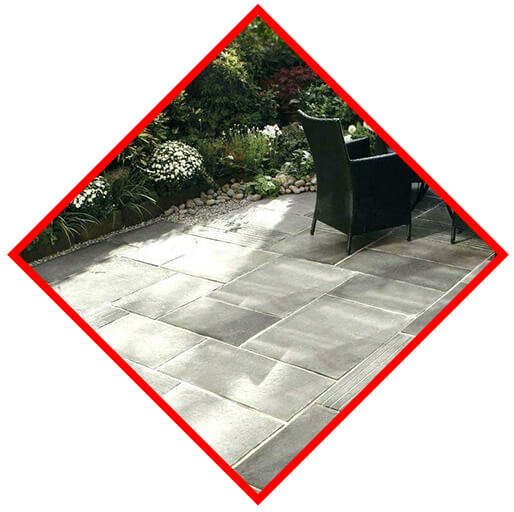
Outdoor Tile Installation
Outdoor tile installation may seem like a complicated task at first. You want to choose a material that’s resilient to the elements and built to last. The wrong choice could mean needing to re-tile later on.
Outdoor Tile Patio
Porcelain is often considered the best tile for outside spaces. It balances style with function because it is waterproof and highly durable. There are plenty of porcelain patio tile ideas to choose from.
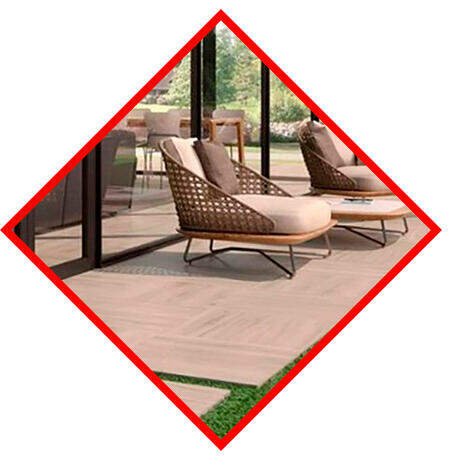
Porcelain comes in a variety of colors and patterns that can be mixed and matched for any design. It even comes in different textures like wood-look, stone-look, and matte. Try laying porcelain tile in a herringbone pattern or layering different colors and textures together.
However, porcelain isn’t your only choice. Patio tiles come in an assortment of materials. You may want to experiment with natural stone, ceramic, quarry, rubber, concrete, wood decking, and even plastic.
Because stone looks harmonious with nature, it’s a popular choice for outdoor designs. Natural stone tiles include limestone, sandstone, soapstone, granite, slate, and travertine. Cutting these materials can be tricky, and requires a high-quality wet tile saw. Luckily RUBI offers wet saws with the necessary horsepower to cut these materials.
The texture of the material of the tiles you choose can add visual interest to a space. Creating a rustic look with wood-look porcelain or a sleek design with slate could be the difference between a decent patio and a cutting edge design.
The texture of the tile you choose also has an impact on your client’s safety. There are tiles available with anti-slip finishes if you’re concerned about the safety of children running around or elderly people who have a hard time keeping their balance.
Outdoor Tile Over Concrete
First, you should use an acid-based or deep cleaner to clean the concrete and then let it dry. Next, check the concrete for any cracks or holes that need to be repaired.
Once the repairs are dry, it is time to seal the concrete. Apply the sealer. Sodium or lithium silicate-based sealers will help waterproof the concrete and reinforce it, and since the silicates work below the surface, they will not interfere with the bond.
Let it dry and then apply the leveler to ensure a flat and flawless surface.
Choose an adhesive depending on the type of tiles you are going to use and mix it with the help of an electric mixer, such as our Rubimix, following the manufacturer’s instructions. Then apply it with the help of a notched trowel.
Place the tile using crossheads and a leveling system, such as our Delta Level System, to ensure a perfect finish.
It is important to remember that if the tile is larger than 30×30 cm it is essential to use the double gluing technique and apply adhesive both to the substrate and to the tile.
Once you’ve placed all the tiles, clean the area with a cellulose sponge and let the adhesive dry for the time specified by the manufacturer.
Next, fill the joints with the help of a joint trowel. You can use either sanded joint mortars or non-sanded mortars.
Once the joints are dry, clean the entire surface and use a joint sealant to prevent stains and mold from forming in the future.
Outdoor Stone Tile
When it comes to outdoor stone tile, you have a variety of choices.
Slate
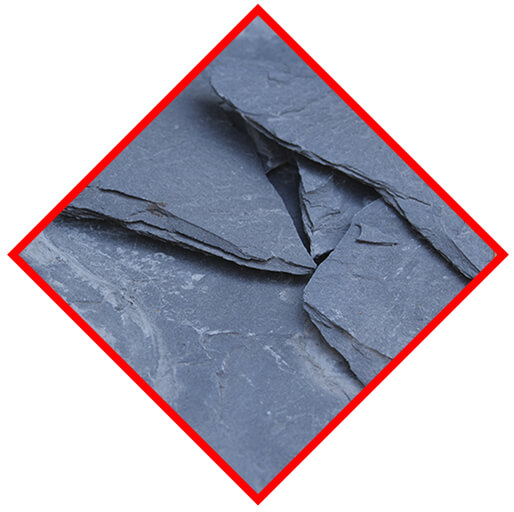
One of these is slate. Slate is a type of natural stone that is durable and strong. It also has a natural surface texture. This means it will be slip-resistant without you having to do anything else to it. You can find slate in a variety of colors, including dark colors like black and gray and brighter colors like green or orange.
Granite

Granite, another natural stone, makes beautiful indoor countertops, but it doesn’t hold up as well outside.
Apart from being slippery, granite is also a porous material. In other words, it will absorb moisture, causing stains and other damage, if you don’t seal it every few years.
Travertine

Travertine is a natural stone that creates beautifully textured and colored tile. This tile is hard, but it also has a pitted surface that can gather dirt over time. You can avoid this problem by polishing the surface so it’s smooth. But if you choose to do this, it will become slippery when wet.
Soapstone

Soapstone is also a natural stone, but it has a smooth and non-porous quality. This makes it resistant to stains and other types of water damage.
It can withstand high levels of heat and freezing temperatures. Because of this, soapstone is a good option for almost any climate. If you’re looking for something to surround your pool, you might want to consider soapstone.
Limestone
Limestone is a soft stone, meaning it can scratch and chip easily. You also have to seal this type of tile often to prevent water damage.
Don’t install limestone in your patio unless you live in a dry, mild environment.
Sandstone
While sandstone has a beautiful texture, it is even more fragile than limestone. Since this tile is made from layers of sand compressed together over time, it is soft and prone to scratches, chips, and cracks.
Water can also cause a lot of problems for sandstone. But if you live in a dry area and seal it often, this tile can look beautiful.
How to Lay Specialized Tiles
Now let’s take a look at how to lay different types of tile.
How to Install Tile
As you’ve read above, the process of laying tiles can be broken down into about 5 major steps
- First, you need to lay the subfloor, to make sure your installation is long lasting and has a good finish.
- Next, you need to measure your floor, calculate how many tiles you’ll need to cover it, find its center point or the most distinct wall, and choose a starting point based on these factors.
- After that, it’s recommended to lay the tiles out on the floor without adhesive to give yourself a very clear idea of exactly how the floorspace will be filled and how many tiles need to be adjusted or cut.
- After you’ve made your cuts, you execute the installation by laying the adhesive, laying the tiles, adding in the leveling system, and letting the adhesive dry.
- Then finally by spreading the grout.
Wood Look Tile Installation
Wood look tile can be challenging, above all because it isn’t as flat as you’d think. There is almost always a slight curvature to wood-look tile and this, coupled with its length and the popularity of installing it with a full offset, can result in serious lippage problems.
Still, you can achieve a great finish with this kind of tile by using a leveling system, a good quality thin set, and an adequate joint of at least 1/16th inch.
How To Lay Mosaic Tiles
Before you can start the installation, make sure the surface you’re laying the tile on is completely smooth and flat. There are many ways to do this but often, professionals use an underlayment consisting of a cement board applied over the plywood subfloor. The cement board can also be applied directly to your wall studs.
To start, install full sheets of cement board to the walls, then cut to fit any and all of your remaining pieces. To secure the cement board, use cement board screws. Leave about 1/8-inch between each and every panel.

Next, tape over each gap with your fiberglass cement board tape and apply thin-set adhesive using a taping knife.
If your tiles have patterns, it’s important to plan the layout. Lay your sheets on the surface as a dry run so you know you’ll be happy with the arrangement.
While you can cut your tile sheets we suggest doing it beforehand. You have several options when it comes to making these cuts. You can use a RUBI wet saw or a manual tile cutter like our RUBI multipoint breaker tile cutters. Sometimes, even just a tile nipper can do the job.
Once you’ve decided on a tile cutting tool, and have all your tiles cut, it’s time for installation.
Using a notched trowel, apply a thin layer of thin-set to the center of your layout lines. Work in squares of about two or three feet wide and be sure not to apply too much thin-set. From there, working outward, fill in the remaining quadrants of the space. Take notice of the grout seams as you work to ensure they’re all equal.
As you work, your tile sheets may begin to form waves or ripples. Take a small piece of plywood and rubber mallet and, after every few sheets you apply, tap them into place to achieve a perfect finish.
Once you’ve laid all your tile, it’s best to wait at least 24-48 hours before you apply any grout. This is to ensure that your thin-set is dried and ready to be set in place.
You can choose to mix up dry grout or use a pre-mixed grout, depending on the project. Once you have your grout, it’s time to apply it to the tile seams.
This is best done with a rubber grout float. Take a decent amount on your float, and then spread it over top of the tile. Holding your float at a 45-degree angle, force the grout into any and all of the joints and seams. The edge of the float is what’s going to allow the grout to sink deeply into the joints.
To ensure the grout has equally filled all the joints, alternate directions as you apply it and then use the edge of the float to scrape excess amounts of grout from the tile.
Once your grout has hardened slightly, it’s time to go in and wipe the face of the tiles with a clean cloth or sponge.
Keep multiple buckets of water on hand, and keep your cloth or sponge as clean as possible to ensure all the grout is removed. How long the grout takes to fully cure is going to depend on the manufacturer’s recommendation.
Tile to Carpet Transitions
Transitioning between floor types can be difficult, but we have plenty of information available for you to do it perfectly.
There are several methods for transitioning between tile and carpet specifically, but you’ll almost always need to add a transition strip of some kind to do it. From there, the methods of installation diverge.
You can use the tuck-in method (in which you use the hooks of a transition strip and the nails of a tack strip to hold the carpet in place), or a Z-bar transition (which hides the end of the carpet under the tile).
Then there’s also the options of mounting tack strips to the sub floor or using a reducer strip.
How to Grout Tile
When you’re at the grouting stage of your tiling project, you’re almost finished! It’s an exciting last step because soon you’ll have a new bathroom, kitchen, etc.
However, if you don’t know how to grout floor tiles properly, you could end up with your tiles looking messy or, even worse, they might come off, meaning that you’ll have to do the work all over again.
That’s why we’ve put together this list of tips and techniques on how to grout tile.
Tile Grout Tools
Grouting and cleaning is the culmination of any tiling project, and RUBI has everything to meet the needs of every tiler after the fixing process.
The range of tools and equipment for cleaning and finishes combines both manual and electric tools, allowing you to adapt and get the best results depending on the type of installation you are doing. This work ranges from grouting to cleaning, to draining racks and cleaning kits, and more.
The process of creating our tools includes a test period in real working situations conducted by a trusted group of professionals in the industry. This action allows us to identify areas of improvement in our products before putting them on sale and/or adapting them to the needs of the end-user.
How to Mix Grout
Once you’ve laid all your tile, it’s best to wait at least 24-48 hours before you apply any grout. This ensures that the thin-set is dry.
You can choose to mix dry grout or use a pre-mixed grout. Generally, you’re going to use sanded grout for wider seams, and unsanded grout for tile with seams of 1/8-inch or smaller.
When you grout tile correctly, the joints between the slabs are uniform in texture and color, with no cracks or residue. But, when the tile is installed over a thick mortar bed, the mixture could provide a sufficient amount of minerals to cause efflorescence. These problems can affect the grout life and require a lot of maintenance.
To ensure proper grout application, you must pay close attention to the preparation of the material.
If you use RG materials for grouting tile, then you need to know that the temperature range for handling and application is rather limited. How long does grout take to dry? Well, it depends on the material’s condition.If the condition is below or above the recommended temperature range, then you might have a difficult time working with it.
Be careful not to add any bonding agents to the grout material. Although they can add extra adhesive strength to the grout, bonding agents can also cause discoloration. And, with CG materials, use the manufacturer’s recommended quantity of water.
How to Seal Tiles
One of the most commonly used products for joint sealing is grout. To do this, use a prepared mixture to fill the gaps between the tiles. Even though it may not be the most luxurious material used in a renovation, grout plays an important role in the final appearance. It is usually white, gray, or brown, but there are also colored varieties to match or contrast with the tile color. With a variety of shades to choose from, the grout can be used to add contrast and create an elegant space. Waterproof grout is essential for the surroundings of showers and baths.
Clean the grout from the surface with a sponge before it dries completely and smooth the joints with a stick. Once it’s totally dry, polish the tiles with a cloth. Perhaps it is not the most exciting DIY work, but tiles with deficient grout not only look bad, but they are also less stable and are more likely to chip or require repairs.
How to Clean Tile Grout
Floor maintenance and grout care are important because if you take them into consideration, your grout won’t get dirty so often in the first place. However, if your grout is already dirty, there are a few cleaning tips that you can try. First, try to determine what is making your grout dirty.
In the bathroom, your grout will most likely have a mold or mildew problem because of the excess moisture. This is especially true if you don’t have a fan to circulate the air in the bathroom after a hot shower or bath.
While bleach is usually a good option for removing mold on most surfaces, it might not work as well with grout because of how porous it is. Instead, you might have to buy special cleaning products such as mold or mildew removers. With a bit of scrubbing, your mold and mildew should be gone.
But what if you don’t have a mold problem but rather a stain problem?
Stains are also notoriously difficult to remove. When cleaning stained grout, try to stick with water or neutral cleaners and avoid ones that are too acidic or too basic. These cleaners can damage the grout if they’re not absolutely necessary (such as when removing mold). When choosing grout cleaning tools, opt for a brush with stiff bristles. Then, grab some water or some neutral cleaner and scrub the grout as hard as you can.
A common DIY cleaner is a mixture of lemon juice, hydrogen peroxide, and a cream of tartar. When using this, scrub the grout first to remove any surface debris. Then, add the cleaner and let it sit for some time.
Afterward, do a little more scrubbing and your grout should be as good as new in no time at all.
What Different Tile Patterns Are There?
Before starting a tiling project, it’s important to choose the tile pattern you will create. Below are some choices for you to consider.
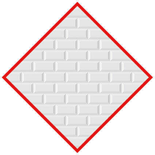
Subway Tile
Subway tiles refer to rectangular tiles that have one side that is twice as long as the other, usually 3 inches x 6 inches. These tiles are very popular and classic and get their name from the first New York City subway stations in which they were installed. Depending on how you lay them, you can achieve a very clean and polished look, or a rugged rustic one.
Below you can see some of the patterns in which subway tile can be laid to achieve different looks for your interior space. Bear in mind that any one of these patterns is equally compatible with square tiles as they are with subway tiles, so you have plenty of options.
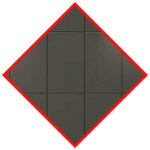
Horizontal Stack or Grid
The tiles are laid horizontally and centered on top of and next to each other so that the grout lines are continuous, creating an effect that looks like a grid and giving an organized, continuous, polished look to your space. This pattern can be laid using Subway tiles as well as square tiles.
Vertical Stack or Grid
Much like the horizontal grid, the tiles are laid centered on top of and next to each other, this time vertically, so that the grout lines are continuous, again creating an effect that looks like an organized grid.
Offset/Staggered
Technically speaking, “offset” and “stagger” are not single patterns in and of themselves, but instead are concepts that describe different patterns. The terms “stagger” and “offset” refer to the extent to which tiles are laid uncentered on top of one another. If two tiles of the same size are laid so that 20% of the top tile extends beyond the side border of the bottom tile, then the two tiles are said to have been laid with a 20% offset.
Brick
The Brick pattern is achieved when we use a 50% offset or stagger.
⅓ Offset
In this offset pattern, the tiles are laid uncentered by 33%, or 1/3 of the length of the tile.
Herringbone
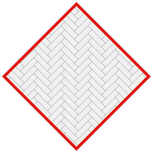
With the herringbone pattern, the tiles are laid diagonally along the wall, and they are laid so that the short side of the second tile is laid against the end of the long side of the second tile. This creates a 45-degree angle V shape.
Pinwheel
In this pattern, two different tiles of different sizes are used, and one needs to be substantially smaller than the other. The smaller tile needs to be laid along the end of each side of the larger tile so that their borders are continuous.
Versailles Tile Pattern
By combining two 8×8 inch, one 8×16 inch, two 16×16 inch, and one 16×24 inch tile, this pattern covers an 8 square foot area each time it is repeated. This pattern is especially popular to use with travertine tiles, which combine with the seemingly random appearance of the tiles’ placements to give a very natural but still stylish feeling to a room.
Diagonal/Diamond
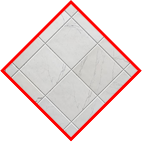
To achieve this pattern, you lay the tiles in a grid so that all of the grout joints are continuous, just as you would in the Grid pattern. What’s different here, is that the tiles are not laid straight, but are instead turned at a 45-degree angle. This pattern is usually made with square tiles.
Chevron
This pattern is unique in that it requires rhombus-shaped tiles rather than rectangular or square ones. It is achieved by laying them with their opposite short ends touching each other. This results in a 45-degree V shape.
Mix and Match Tile Ideas
Are you looking for ways to decorate or renovate your home? Do you wish to incorporate a bit of tile art into the tile installations of your bathrooms, kitchen, etc.? If so, consider what you can do with tile design.
What Are the Best Tile Pairings
Color isn’t the only feature that can help you create a unique design. In fact, other features of your tile design can stand out more by using a more neutral color.
Consider investing in colors like white, gray, or black, then letting the pattern do the talking. You might consider implementing a crosshatch design, or another pattern that gives the appearance that your wall is moving.
This is perfect for those of you that have a minimalistic approach to home design. The neutrals will provide balance within any room, giving a calm and comfortable feel. Neutral colors are also easier to match. Install other fixtures with neutral colors and place a few plants inside; the entire room will feel like an at-home spa.
White on white designs might sound bland, but you can’t deny the beauty and balance that white tile can offer.
However, if you want to shake things up a bit, try adding a bit of contrast. You can use a Rubi tile cutter or tile saw to cut the tiles into the proper shape for your preferred pattern. Then, when you’re performing tile installation, make sure to use a darker shade for the grout.
The result will be a well-defined pattern. The white tile will mix perfectly with the bold dark grout lines that make your pattern pop!
Another option is black tile, which you can pair with white grout. The white grout will stand out and emphasize the pattern of the black tiles.
You may then choose to install gold or silver appliances/fixtures, to make the room look more upscale.
You may also want to consider creating the perfect contrast to a light-colored floor by installing a variation of navy tile on the walls.
How Tile Patterns Can Define a Space
From creating an interesting center point on a floor, to serving practical functions of tiled backsplashes, mixed media offers many options for those who are ready to take on a new, creative tiling project.
Mixed media tile wall accents are popular for kitchen and bathroom backsplashes. Often coming in stone or glass in varying colors, these mixed media tiles add texture, color, and depth to underutilized space. They also protect spaces from water. Using these creative looks to waterproof splash-zone areas is one way to incorporate dynamic style into your decor.
Consider mixed media tile work in showers as well. Mosaic tiling is a creative way to add an artistic touch to a practical area, whether on the floor, wall, or edges.
Likewise, mixed media glass tiling on the walls of a shower lets light in while creating a privacy shield when used with frosted glass. Adding more light to showers also gives the illusion of space.
Incorporate a touch of nature into your shower by including pebble tiles amongst the floor tiles. Not only is this a beautiful look, but it also provides a different surface texture. Morning showers will begin to feel like bathing in a fresh brook with your pebble walls or floor.
Creating intentional spaces is very popular in current interior design. Each place in the home should have a purpose. Denoting the areas by design features is an essential part of the process.
Mixed media floor tiles can be an excellent way to do this. Many homes have an open concept design that has no clear delineation.
Using flooring to separate the kitchen, living space, dining area, and even the kid’s play area in a large open concept first floor can help organize the space.
Placing an easy to clean, spill-proof flooring under high traffic or common gathering areas, is always a smart move.
Can You Have 2 Different Tiles in Adjoining Rooms?
When planning to use mixed media in tiling, beautiful transitional spaces can be created. Perhaps hexagonal kitchen tiles integrate partially with custom-cut floorboards at the doorway between the kitchen and living room to avoid a harsh line or the need for a threshold.
Hospitals and schools often used color-coded floor tiles to mark out pathways for visitors to find their way around. This practical use could get a chic update with mix-media floor tiles that denote different spaces.
You can install tile patterns in public areas where you need to direct people to particular destinations. Or install subtle pathways in a home’s foyer to draw guests inward. The idea is to signal a direction for those who are coming in.
Consider mixing tile, stone, or wood look porcelain tiles in different types of tile patterns to create inviting designs.
Wow, this is an amazing blog! The details, guides, steps, and information are so detailed, well written, and understandable. I am so pleased to see this kind of article that could assist a lot of people in terms of tile installation. Great work and I hope to encounter more of this type of content. Thank you for this blog and try to visit Itile Bathrooms NT for bathroom renovation specialist services. Have a nice day!
I am creating outdoor patio mosaic patio signs/pictures. I have used 3/4″ rough one side plywood for my backer board and primed both sides with outdoor primer. Then I used thinnest to apply the stained glass and let it set up for a few days. Then I grouted the seams and edges. Plus a water sealant was brushed on top after a week of letting the grout set up. The sign has been outside for two years with no problem. This 5′ X 5′ mosaic is in a metal frame and sits on patio year round in S/W Ontario, Canada. This spring I found that the mosaic/grout/thinset has released in one piece from the board at the base.
What can I do to prevent this from happening in the future?
Should I have scuffed up the primer on the board?
Should I have used the newer thinnest with better adhesives?
I plan to make more patio signs
Hello. Sounds like the thinset you used might not have stood the test of time because it was used outdoors, where the temperature and humidity change drastically throughout the day. Try sticking the pieces that fall off with a thinset designed for use outside.