It’s no surprise that the housing market in 2023 is not ideal, so more and more people are finding that their best option to get on the ladder is to look at houses with good bones but need a little TLC. This is where it might come in handy to learn how to tile. But, tiling isn’t always easy, and rooms aren’t always perfectly square. At some point you might have to learn how to cut curves in tile.
Don’t worry though, it isn’t as hard as it seems if you have the right information and tools available. Even if you’re a professional trying to learn how to up your game, or a DIYer in need of a solution, this blog will be helpful to you.


WHEN IS IT NECESSARY TO CUT CURVES IN TILE?
Let’s talk about when you’ll need to know how to make curved cuts in tile. Here are some of the most common places you’ll find tile in your home. In each place, there’s a reason to make a curved cut.
Keep in mind that a curved cut in the tile may ultimately be the result of an aesthetic choice. It’s not always due to functional needs.

BATHROOM
There are several places in the bathroom that may require you to learn how to cut curves tile. The most common places will be around the toilet, bath, sink, or niche.
ENTRYWAY
You may need to know how to cut curves in tiles for areas in your hallway too. This might be around the staircase, radiators, or window bays.

KITCHEN
In the kitchen, people often use tile as a backsplash. Where this tile will curve often depends on the style of the kitchen and your personal aesthetic choice.
It’s good to know how to cut curves in tile for the kitchen space just in case.
FIREPLACE
The fireplace is meant to be a warm, cosy place in the home. Using tile to accentuate its cosiness is always a good idea. In this instance, a curved cut will likely be more aesthetic than functional.
HOW TO CUT CURVES IN TILE: DETERMINE WHAT TYPE OF TILE YOU’RE USING
Before we discuss tools, you need to establish what type of tile you’re using. There are four main types:
Ceramic and porcelain are the most commonly used tiles out of these options. They’re both easy to clean, and come in a wide variety of patterns and finishes. Also, they are the easiest of the four to cut and install in the home.
However, if you know what you’re doing, all four of these types can have properly cut curves to give your home a professional look.
HOW TO CUT CURVES IN TILE: THE TOOLS YOU’LL NEED
The best tools for cutting curves in tile are the manual tile cutter and a tile nipper. These tools are great for cutting curves in ceramic. It can also be used on thin porcelain as well. Depending on your other tiling tasks, you may need more tools. Make sure to do your research before purchasing!
HOW TO CUT CURVES IN TILE
Once you have the right tool for your type of tile, it’s time to get to work. Here’s a step-by-step guide for cutting curves in tile using the various tools.
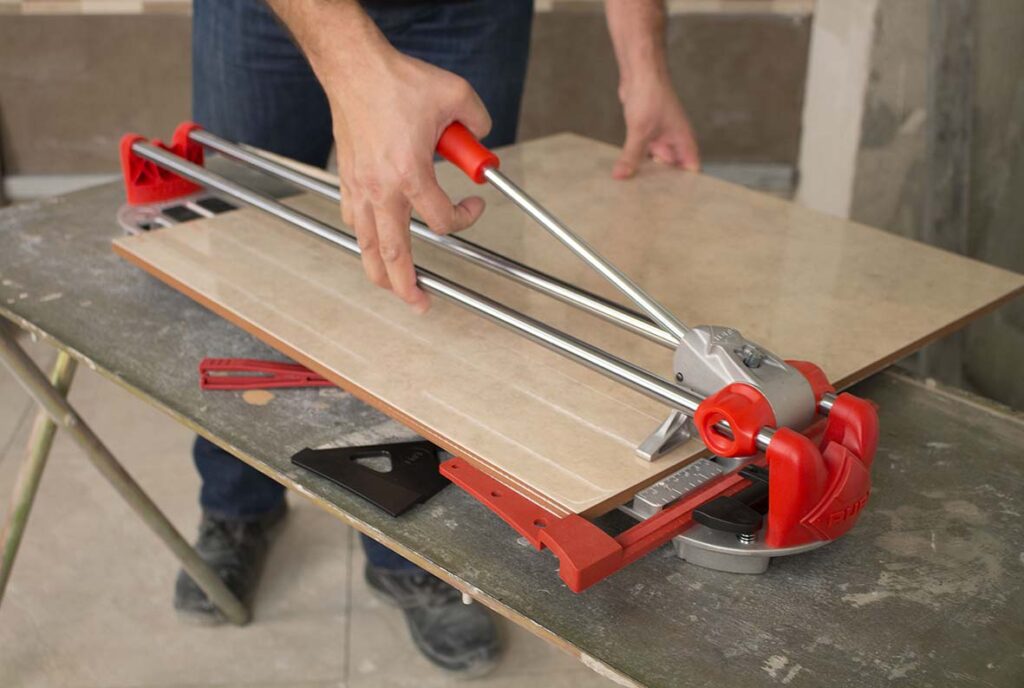
MANUAL TILE CUTTER
The most recommendable tool for cutting curves is the manual cutter.

STEP 1: MEASURE AND MARK
The first thing you need to do is measure your cut and mark where you’ll make the cut. It’s best to do this with a pencil. For clean lines, tracing a round object like a cup or bowl is helpful.
STEP 2: POSITION THE TILE ON THE MANUAL CUTTER
The tile should be placed with its visible side up on the manual cutter, and it should be placed far enough from the ends of the manual cutter to rotate it as much as will be necessary to execute the cut.
STEP 3: SCORE
The scoring wheel on a manual tile cutter only moves in one straight line. As you score for a curved cut, you will need to rotate the tile so that, as you push the handle of the manual cutter forward, the scoring wheel scrapes along the line that you marked in step 2, creating the curve.
STEP 4: BREAK
Move the tile to the end of the cutter where the separator works strongest and position the tile so that the end of the scored line is centred beneath the breaker. Then press down over the score with the breaker until the tile separates along the line you marked. You might need to do this at both ends to ensure a clean break.
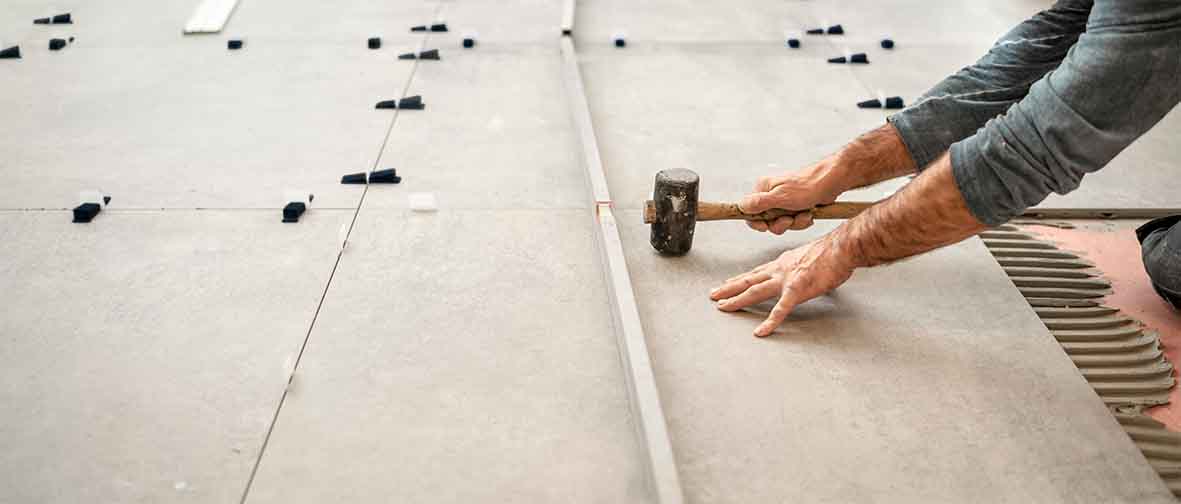
STEP 5: SMOOTH
The edges of the tile after they’ve been cut with a manual tile cutter are very sharp. You need to smooth them down once you’ve finished your curved cut.
It’s a good idea to see how the curved cut matches up to its intended shape, like the edge of the toilet or shower drain, before you smooth.

TILE NIPPER
Remember that a tile nipper is a handheld tool. Be sure to use it with caution and precision. Even though it’s a smaller tool, it’s still smart to read the user’s manual before proceeding.
STEP 1: MEASURE AND MARK
As we did with the manual tile cutter, prepare the area on the tile where the cut needs to be made. Making sure to take accurate measurements and use a template of the curve you want to cut.
STEP 2: POSITION THE TILE NIPPER
You want to make sure that you’ve got a firm grip on the tile nipper. Also, properly position it on your measured mark.
STEP 3: SNAP
You’ll make small, firm snaps along your measured mark. Do this slowly and carefully; there’s no need to rush. Remember, this tool is for smaller, more precise curved cuts.
If you go too fast, you risk breaking the tile beyond the mark you’ve made. If you do this, you’ll end up having to start over which wastes time and resources.
STEP 4: SMOOTH
The edges of the tile after they’ve been cut with a tile nipper are very sharp. You need to smooth them down once you’ve finished your curved cut. It’s a good idea to see how the curved cut matches up to its intended shape, like the edge of the toilet or shower drain, before you smooth.
ANGLE GRINDER
An angle grinder is larger than a tile nipper, but smaller than a manual tile cutter. There’s many available on the market so be sure to read the user’s manual before proceeding with your work.
STEP 1: MEASURE AND MARK
The first thing you need to do is measure your cut and mark where you’ll make the cut.
It’s best to do this with a pencil. For clean lines, tracing a round object like a cup or bowl is helpful.
STEP 2: POSITION THE ANGLED GRINDER
Make sure that the tile is placed on a flat surface. To be sure that your glaze doesn’t chip, place masking tape around the edge of your mark. Then, secure your tile with a clamp.

Make sure that you’re using the correct blade for your type of tile.
STEP 3: CUT
Using the right blade for the material you’re cutting, make small linear cuts going up to the marked line you’ve made, making sure to not go beyond the marked line.
Once you’ve made multiple cuts into the tile, almost creating teeth in the tile, you can go ahead and carefully knock them off.
Alternatively, you can use a conical drill bit on your grinder to make the final few cuts to get the desired shape you need.
STEP 4: SMOOTH
Like with the tile nipper, your edges will be sharp. You can smooth them out with the flat side of the blade as long as it’s also a grinding blade, or sandpaper.
SOME FINAL TIPS & TRICKS FOR CUTTING CURVES IN TILES
Here are some final tips and tricks to help you cut curves in tile like a pro:
- With a tile nipper, snap over a bin to avoid a mess
- Always place your cut tile along the curved shape before you smooth it down
- Do your research before buying tools
- Read the user’s manual before handling your tools
Now you’re ready to get started. Happy tile cutting!

Post a comment