
When you learn how to tile, keeping up with the changes in the industry is vital. Throughout these changes, the tools used when tiling can also change. One of the most commonly used tools for laying ceramic tiles nowadays is the notched trowel.

Changes are common to keep up with the advancements in the industry. From the manufacturing process to the techniques used to lay tiles. This is how we ensure success when tiling.
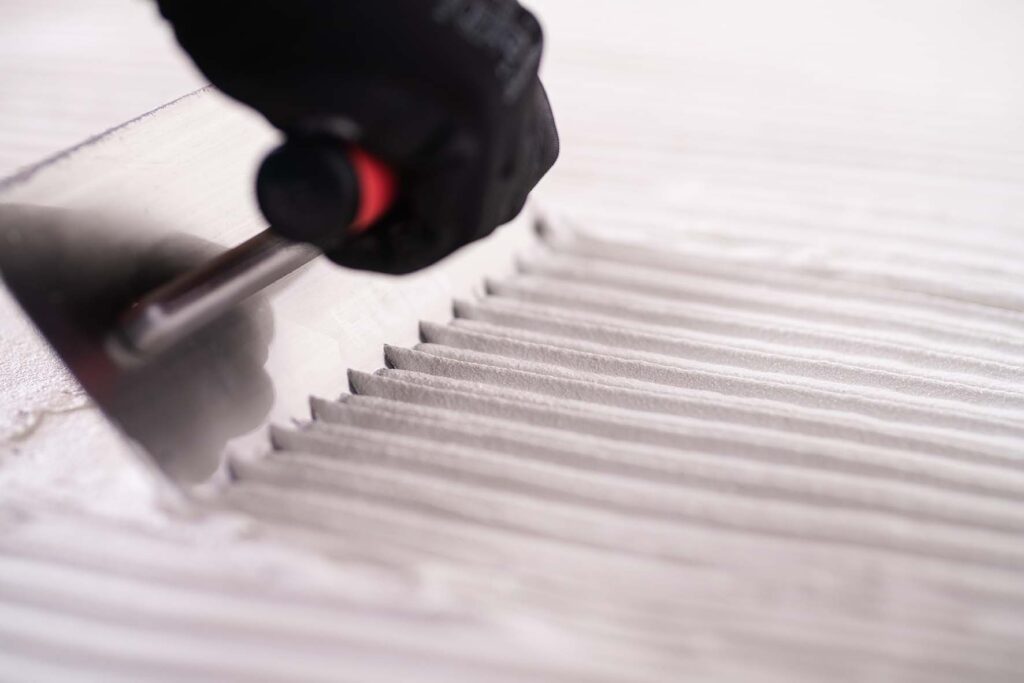
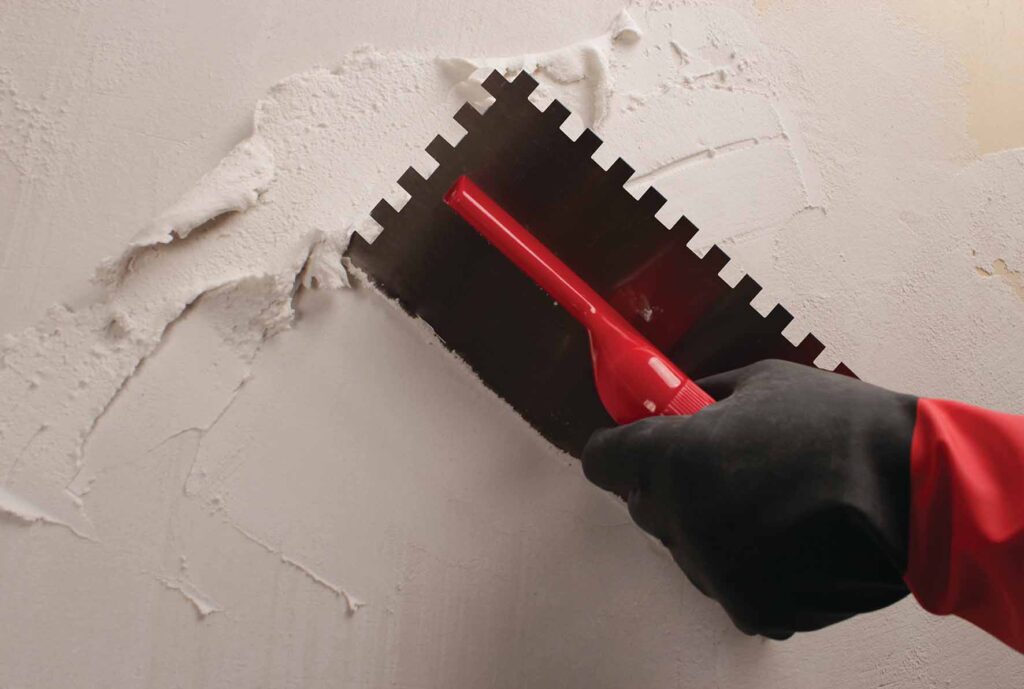
Long gone are the days when tiles were set with simple mortar. Sometimes with just a little in the centre of the tile. The adhesives used today require a much more technical application, which consists of applying and “combing” them with a notched trowel.
WHY IS IT NECESSARY TO “COMB” THE ADHESIVE?
When we comb adhesive, we create channels that create a suction effect and help the tile to stick long before the adhesive finally dries.
Wiggling the tile back and forth collapses the channels created when combing the adhesive. This achieves full coverage on the tile. Another aspect of the channels is that they allow air to escape from underneath the tiles during this process.
This not only ensures better adhesion, but also makes the layer more compact and resistant to traffic and impact. Most manufacturers strongly recommend back buttering, a technique where you apply a thin layer of adhesive to the back of the tile as well as the substrate. This improves wetting and helps to achieve full coverage across the tile.
WHICH TROWEL SHOULD WE USE?
RUBI offers a complete range of notched trowels, which cover all the needs of tilers and any professional who uses trowels in their day to day work.
THE TRIANGULAR-NOTCHED TROWEL

Although it is probably the least used, the triangular tooth trowel is very useful for applying liquid glue, such as those used for laying linoleum floors.
Its shape, which can be found in many different sizes, helps to distribute the glue evenly and without excess.
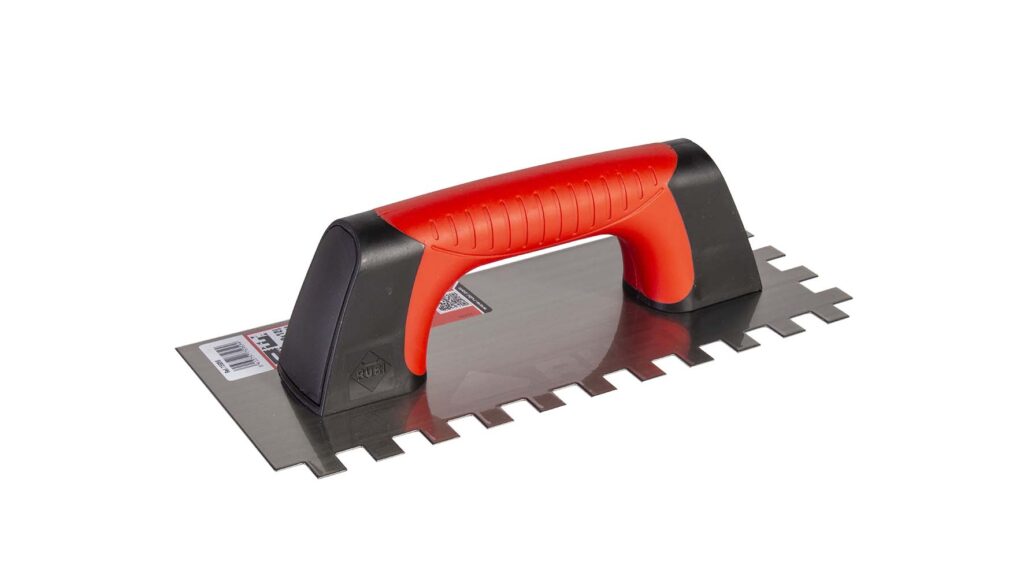
THE SQUARE-NOTCHED TROWEL
This is the most commonly used trowel on the building site. This is due to its versatility and efficiency in the application of cementitious adhesives. Generally, its name includes the height of the tooth and its width (the distance between teeth) in millimetres. Therefore, we can have 3×3, 4.5×4.5, even up to 20×20 trowels.
Obviously, we will have to select the right trowel for the format we use. Using a larger tooth for larger formats, and a smaller tooth for smaller formats. It would not make sense to use a large tooth trowel for mosaic, or a 3×3 tooth trowel for a 120×60 tile.
The best way to choose the size is experience. Although the thickness of the adhesive layer you want to leave is very important too.
The thickness you want under the tile is roughly half the thickness of the trowel notch. For example, if we use a 10×10 trowel we aim to leave a 5mm layer after laying the tile and eliminating the air from the channels.
But be careful: if we are working at 45º with the trowel, we will not leave 10mm of height with a 10×10 trowel, but approximately 6mm. When we eliminate the channels of the combing, the final layer would be around 3mm.
Therefore, it may be advisable to use a larger trowel. RUBI offers trowels with the teeth at 45º, which means that combing with a 10×10 does leave a height of 10mm. This is because the tooth is at 90º to the adhesive, while working with the trowel at 45º. This increases the height of the tooth, and therefore the thickness of the adhesive layer, so we can use smaller trowels.
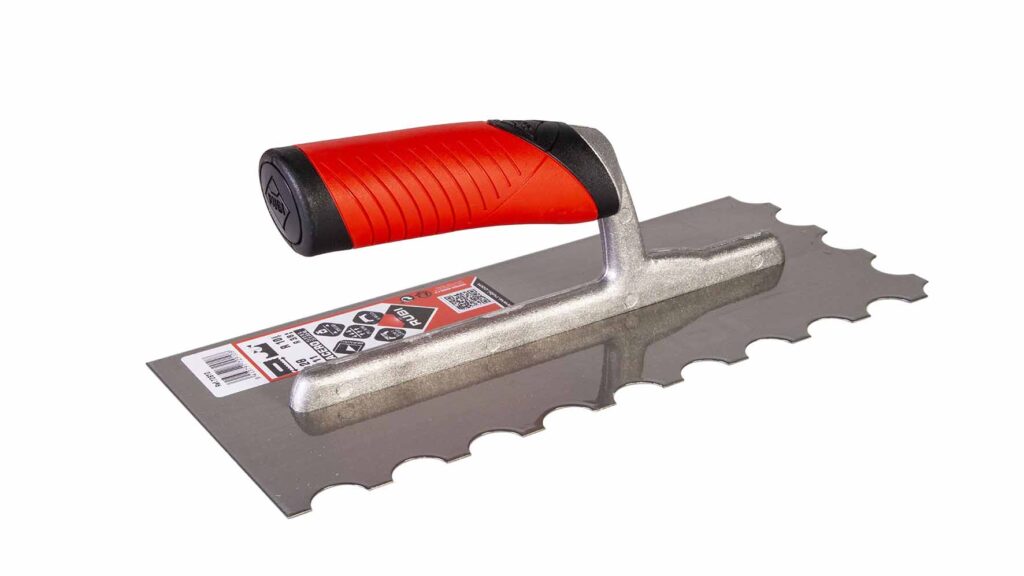
THE ROUND-NOTCHED TROWEL
With a radius of generally 10mm (R10), this type of trowel is intended for use with more fluid, liquid adhesives, which will allow an even distribution.
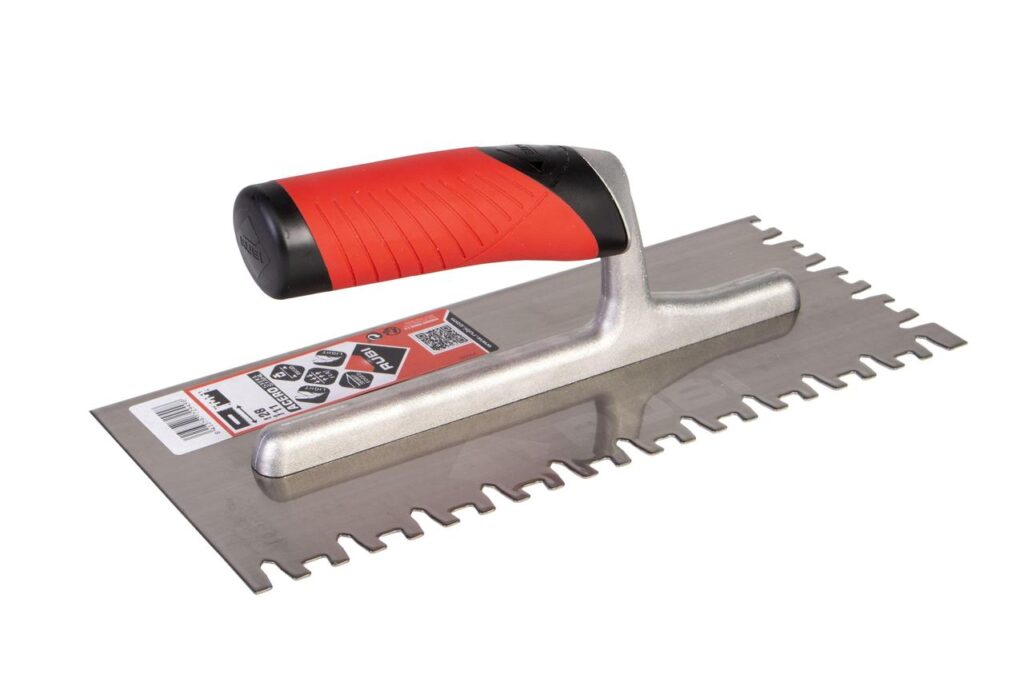
THE YW TROWEL
RUBI also offers an innovation, the YW trowel. Named due to the arrangement of its teeth (a higher one with a pointed finish – the Y, and a lower one in the shape of an inverted trapezoid – the W). It is mainly suitable for large formats. It achieves better wetting and elimination of more air than the square-notched trowel without the need to make the back-and-forth movement (which is difficult with very large formats).

TOOLS ACCORDING TO THE TILE INSTALLATION TECHNIQUE
With the evolution of ceramics, the new ceramic adhesives require more specific tools.
Choosing the right tool for each case will depend above all on the tile installation technique to be used. To do so, we will have to choose between a thick layer, thin, or medium layer.
THICK COAT
For the thick-bed technique, the trowel can be used as the tile installation tool, since it is not necessary to “comb” the bonding material, only to apply it correctly.
We must bear in mind that the thick layer technique for ceramic coatings can only be used:
- For ceramic tiles with water absorption capacity E>3% (if it is higher than 10%, water immersion and draining of the tiles is necessary).
- For tiles with nominal size less than a surface area S≤ 900 cm2
- On external flooring in temperate climates, without risk of frost
- On enclosures and partitions in conditions of maximum stability and laid on slabs of the same condition.
- Without compressible intermediate layers.
- On surfaces with medium/high water absorption and a certain surface texture.
- On surfaces compatible with cement/lime mortar (the application remains in the same condition).
THIN AND MEDIUM COAT
For thin and medium-bed techniques, we will always use the comb (notched trowel) as the tile installation tool with thicknesses of up to 5 mm in thin-bed and 15 mm in medium-bed. This type of tile installation is necessary for large tiles (larger than 900 cm2) but can also be used for smaller formats.
It will always be used with cement-based adhesives or dispersion adhesives and reaction resins, but never with traditional cement mortars.
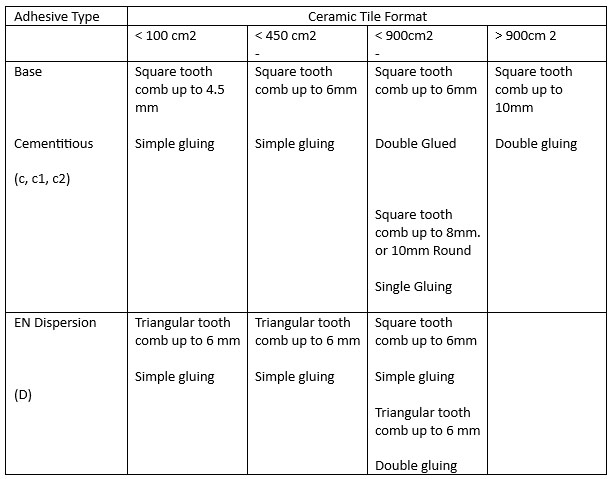
Single bonding is where the bonding material is applied only on the substrate, combed (depending on the type and quality of the substrate we will use different sizes of comb), and then we place the tile.
Double bonding is the application of the bonding material being applied to both the tile and the substrate. This guarantees perfect adhesion. It is only necessary to “comb” the material applied to the substrate.
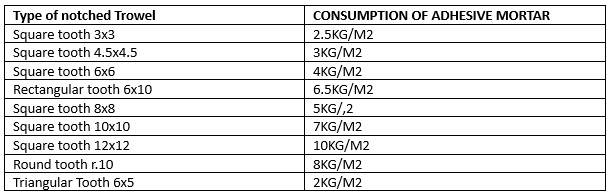
Another detail to consider when using a notched trowel is the variation in material consumption. The following table shows the approximate consumption for the most common and most used comb sizes.
TILE ADHESIVES
As a final point, we should highlight three characteristics of adhesives that should be considered in the installation of tiles and especially in the application of the thin-bed technique.
We are referring to:
- Paste pot life: the time since the paste has been mixed and exposed to room temperature and still useable. Exceeding this time results in the loss of the bonding material characteristics.
- Open fixing time: the time we have to place the tile from the moment the bonding material has been spread on the substrate. If we exceed this time the material loses its bonding capacity.
- Rectification time: the time we have to correct the position of the tile once it has been installed.
The type of adhesive and the tile format are the most important aspects in the selection of the comb.
What do you think of this information? Share your experiences and comment your opinions with us.

Post a comment