Tiling on new plaster typically isn’t an issue, the key is to make sure you’re well prepared. As long as you make sure you follow these simple steps on how to tile onto plaster then you should minimise any issues.

The planning
As it often is when it comes to tiling on new plaster, making sure you’ve planned everything is the most important part. From the design and pattern, to taking into account the drying time and any setbacks you might encounter all ensure the process is as smooth as possible.
If you’re tiling in a wet room then you have to make sure that you meet the British standards which state “The use of impervious grouts and adhesives is no substitute for a tanked installation.”
It’s recommended that you install a layer of cement board to ensure the area is completely waterproof and secure, however if this isn’t necessary a coating of sealing primer applied directly to the plaster will be enough to create a decent base but allow it 24 hours or more to dry.
Drying Times
It’s customary to wait at least 14 days to 3 weeks after plastering a surface to then tile onto it. This allows for the plaster to dry completely, and during this time you can start to make plans for how you start the job.
You also need to consider if the plaster is old, and if so, there might be repairs that need to be seen to before you can start to tile. Any loose material or hollows can cause tiles to fall, to check simply tap the plaster and listen for any hollows and patch over areas with loose material to improve the structural integrity.
Reactions and prevention
Knowing what adhesive and primer to use is one of the most important things, because if you use the wrong one then it can cause all kinds of problems that could have easily been avoided.
Plaster is typically Gypsum based, therefore a cement adhesive will not do well, causing de-bonding. This is from a chemical reaction that happens when these two substances come together, forming a weak layer of ettringite which is what causes the failure.
To prevent this an acrylic primer or SBR is recommended. This primer acts as a barrier and stops the two different substances from contacting each other. It is no longer advised that you use PVA of any kind.

Laying the tile
So, by now the plaster has been laid and dried, and you’re ready to tile. But there’s still a few things you have to check before you get out the adhesive.
Surface prep
The first thing to check for is if the plaster has been over-worked, resulting in a smooth and shiny finish. Plaster like this won’t be able to hold the tiles in place even with adhesive.
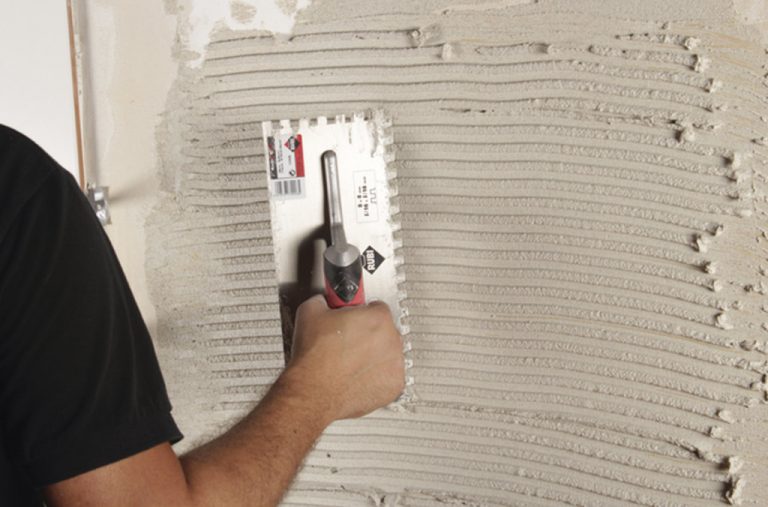
First, you need to prepare the surface by roughing it up with a wire brush before you prime. This increases the surface area and gives everything more texture to grip to.
Final check
By now you’ve prepped the wall and you’ve got your trowel in hand ready to go. Before you start, consider having one last check. Make sure you know how many tiles will be needed and how high the first tile is.
Find the middle and make a point where you will be starting your work. This helps you to avoid any small and problematic cuts, leaving you with a polished final product.
Finally, remember that plaster is a weak material compared to brick and cement. When applying tile to a plastered surface it is important not to overload the weight of what it will take. Plaster will support about 20kg/m2 or about a 9mm thickness of ceramic tile.
Now you know how to tile on new plaster like a pro. These tips and best practices will help you achieve your best work for your client.

Post a comment