
With an industry that commands over $12 billion, a tile installation is no small home improvement project. If you’re about to work on an exterior tile project, it’s worth taking seriously. You don’t want it to end up shabby.
Perhaps you’re a do-it-yourself home improvement lover. You take pride in caring for, maintaining, and upgrading your home. Rather, maybe you’re a professional tile installer looking to improve your skills.
Either way, this article is for you. Detailed below are five key tips for working with exterior tile. We’ll discuss materials, processes, and even clean up.
Make sure your outdoor tile ends up top-quality and impressive to any guest of the home. Keep reading to learn how you can make that happen.


Basics of Exterior Tile
Exterior tile is made of materials that can withstand harsh weather conditions. It comes in a variety of styles, colors, and textures to fit different design preferences. Choosing the right outdoor tile can make or break an outdoor living space.
Ceramic tiles are a popular choice for outdoor applications. This is due to their durability and resistance to water and weather. Plus, they’re visually appealing.
Porcelain tiles are also a durable option for exterior use. They’re highly resistant to moisture, stains, and scratches.
There are also natural stone tiles, such as granite, limestone, and slate. This style is a beautiful and long-lasting option. However, they require regular maintenance to prevent staining and discoloration.
Concrete tiles are a cost-effective option for budget-friendly projects. They can be customized with a variety of finishes and designs. For more specific guidance, check out this article about choosing the right outdoor tile.
Look for tiles that are backed by a warranty from the manufacturer. This can be a good indication of their quality and durability.
Ways to Use Exterior Tile
There are many different ways to enhance the beauty and functionality of outdoor spaces. Doing so could boost the home’s curb appeal if the owner is trying to sell.
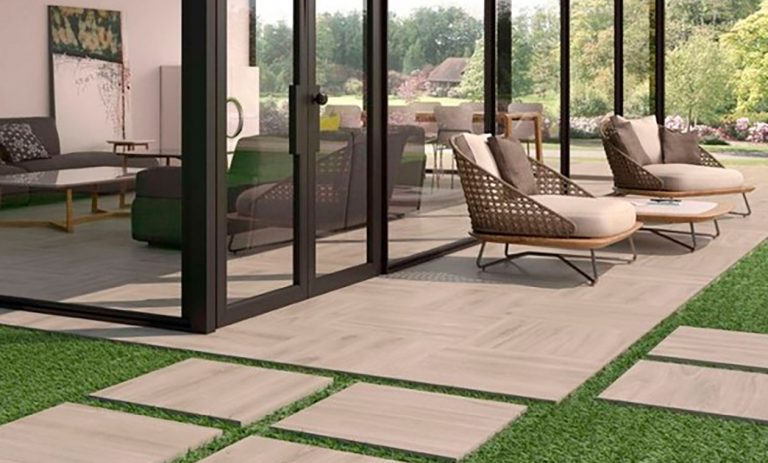
Installing outdoor tile is one way to give the exterior of a house a polished upgrade. They’re great for patios, for instance, and for creating a comfortable and stylish space for relaxation.
Walkways can also benefit from the use of exterior tile. The material provides a durable and visually appealing surface for foot traffic.
Also, exterior tile is an excellent choice for pool decks. That’s because it’s slip-resistant and can withstand exposure to water and chemicals.
For outdoor kitchens, exterior tile is wonderful as a countertop or backsplash material. It’s a durable and easy-to-clean surface that is also attractive.
Exterior tile can really enhance entryways, too. They’d become a welcoming and elegant entrance to a home or business.
Finally, exterior tile is ideal if you need to build retaining walls. This creates a functional and aesthetically pleasing way to manage slopes and erosion in outdoor spaces. With so many different uses, exterior tile is a versatile and practical choice for a variety of outdoor projects.

Tools and Materials You’ll Need
Using the right tools is essential when working with exterior tile. To start, you will need a tile cutter. This is designed specifically for cutting tiles to size.
You’ll also need a trowel for applying adhesive to the back of the tiles. This is essential for ensuring that they adhere properly.
Safety equipment such as gloves, eye protection, and a dust mask should also be worn. You’ll need to protect yourself from any harmful particles during the installation process.
Other tools that may be necessary include a notched trowel for applying adhesive. You’ll need a levelling system to ensure even installation, too. A grout float is also useful for applying grout between the tiles.
By using the right tools, you can ensure that your exterior tile project is successful. Proper preparation and attention to detail are essential when working with exterior tile. Be sure to take the time to choose the right tools and follow the proper installation process.
Tips for Exterior Tile Installation
Let’s say you’ve done your research and have chosen the right tile material for your project. You’re ready to get to work – but wait. There are still some tips that could make your installation go smoothly and safely.
Whether you’re an expert tile installer or a newbie, working with tile can be complex. For even more tile installation expertise, browse through our tips and tricks blog articles. First, consider these key installation practices you need to know about.
1. Surface Preparation
Making sure the surface is clean and dry is one of your most important steps. Before installing the tiles, thoroughly clean the surface. Ensure that it’s free from dust, dirt, and debris that could affect the adhesion of the tiles.
Start by sweeping or vacuuming the surface to remove any loose dirt or debris. Then, use a cleaning solution that is specifically designed for outdoor surfaces.
After cleaning, allow the surface to dry completely before installing the tiles. This is important to ensure that the adhesive is able to bond properly.
This is the best way to create a strong, lasting hold you can trust. If the surface isn’t properly cleaned and dried, the tiles could become loose or unstable over time.
2. Follow the Manufacturer’s Instructions
No matter how experienced you are, don’t forget to check the instructions. Each product has specific details for installation that should be followed carefully. This is the only way to ensure proper adhesion and durability of the tiles.
Read the instructions carefully before you even start the installation process. The manufacturer’s instructions will provide critical information about the type of adhesive to use, for instance. There’ll also be the recommended spacing between tiles you’ll need to note.
In addition, follow any local building codes or regulations that may apply to your project. These codes may specify requirements for the type of tile or the thickness of the adhesive layer. There might even be other factors that could affect the performance of your exterior tile installation.
3. Spacing and Alignment
When installing exterior tiles, proper spacing and alignment are crucial. Prioritize this to achieve a polished and professional-looking finish.
To ensure uniformity, it’s essential to use spacers. Spacers are small plastic pieces that come in various sizes. During installation, they’re placed between tiles to create even spacing.
Using spacers not only makes the installation process easier. It also allows for expansion and contraction due to temperature changes. Without spacers, the tiles may expand or contract, causing them to buckle or crack.
Further, ensuring proper alignment is necessary to achieve a clean and neat look. Misaligned tiles can make the finished product look sloppy and unprofessional.
One way to ensure proper alignment is to use a chalk line. Simply snap a chalk line on the surface where you want the tiles to be installed. Then, follow it to keep your tiles straight.
Be sure to periodically check the alignment as you work. If you notice something looks off, make the necessary adjustments as you go.
4. Consider Proper Drainage
Without proper drainage, water can accumulate underneath the tiles. This causes them to loosen or even crack over time. So, follow these steps for proper drainage.
First, ensure that the surface you are installing the tiles on has the right slope. It should allow for water to drain away in a sensible direction.
This slope should be at least 1/8 inch per foot. Use a level to check the slope of the surface.
Next, install a drainage mat underneath the tiles. This will help water drain away and prevent it from accumulating. The drainage mat should be installed over a waterproof membrane, so water doesn’t seep into the surface underneath.
5. Sealing and Maintenance
After installing exterior tiles, it’s crucial to protect them from weather elements and regular wear and tear. One way to do this is to apply a proper sealant.
The sealant will help to prevent moisture from penetrating the tile, which can cause damage. It will also help to prevent the growth of mold and mildew. To apply the sealant, ensure the tiles are completely clean and dry.
In addition, regular maintenance is also crucial to keep the tiles looking their best. This includes sweeping or using a leaf blower to remove debris from the surface of the tiles.
Homeowners will also want to wash the tiles periodically with mild detergent and water. They should avoid using harsh chemicals or abrasive cleaners. (These can damage the surface of the tiles.)
If any tiles become damaged or cracked, replace them as soon as possible to prevent further damage. Regular upkeep, though, will also help to prevent costly repairs or replacements in the future.
Invest in Your Tile Installation Project
Now that you hopefully know more about exterior tile installation, it’s time to take action. That’s where we at Rubi can be of such value.
We love working with DIY-ers and expert tile installers like you. Don’t trust just anyone to provide you with the tools you need for your home improvement jobs. Download our catalog of tools to ensure you have exactly what you need.

Post a comment