
For some installers, grouting tile is one of the best parts of a project. For starters, it’s the last step in the tile installation process, so you know you’re almost done. Secondly, filling the joints with grout can add a second dimension to the flooring, pulling the look together. But, more than anything, grout is a vital structural element that secures the tiles together. Simply put, it can make the difference between a tile installation project that will last for decades and one that will show signs of trouble after the very first weeks.
But, if you’ve ever struggled with getting the right thickness of the grouting mix or had grout turn rock hard before you managed to get it off the tile, then you know that this last step is also one of the most challenging. Make one mistake, and you’ll ruin all of your hard work to this point.
[Looking for a reliable grout removal tool? The RUBISCRAPER-250 will blow your mind]
This comprehensive guide about grouting tile will help you avoid any problems and get the best results with minimum efforts. We’ll talk about how to mix grout, what consistency should grout be, and how to apply it and remove it so that you get the best results every time.
The Purpose of Laying Joints
Besides the aesthetic functions, laying joints with grout also plays a crucial role in absorbing tensile and stress. From a mechanical point of view, grouting tile can prevent the deformation or instability of the structural supports, keep the cement from retracting, and protect the tiles from humidity or temperature changes.
All the movement and impact that tiles withstand causes stress to accumulate at the edges of the slabs. The grout serves as the first level of protection, reducing the tension by spreading it between tiles.
As mentioned already, another reason for laying joints is to protect tiles from humidity or temperature changes. In cold geographic areas, vapor diffusion can lead to condensation. Even in warm areas, in the case of bathroom tiles, due to the constant exposure to moisture and temperature changes, grout can absorb a significant amount of water if it’s not applied properly.
When grout constantly exposes to water and warm temperatures, it creates a breeding ground for bacteria. That can affect the bonding between the tile and mortar, as well as the structure of the grout. As water moves freely through the grout to the base of the tile, it can cause cracking in the grout, advancing the structural decline of the entire assembly.
Another crucial function of the grout is to hide the small dimensional variations of the tiles.
No one doubts the fact that grouting tile plays a major role in the installation process. The question is, how to grout tile so that you get the best results every time?
It all starts with working with the right type of grout for the task at hand.
Sanded vs. Unsanded Grout
Sanded Grout: Pros & Cons
When it comes to grouting tile, sanded grout is the favorite option for most installers. That’s because unsanded (also known as non-sanded) grout tends to shrink when mixed with cement. Due to the ratio of aggregate material to cement in sanded grout, this material has a thicker consistency and is more durable and resistant than unsanded grout.
On the downside, however, the harsh aggregate material presented in sanded grout can damage soft materials like granite, limestone or marble. This type of grout can act like sandpaper, scratching the smooth surface of soft stones. For this reason, it’s best to use an epoxy-based non-sanded grout. This type of grouting material uses an advanced chemical compound which consists of a base and an activator. When you add the activator to the base, the chemical reaction will result in a grout that is smooth and extremely powerful.
The problem with epoxy-based non-sanded grout is that it can be difficult to work with since it has a rather short curing time. If you don’t manage to apply it over the entire work area before it cures, it will harden, and you will have a difficult time applying it. That’s why it’s important to have the right tools for mixing grout.
Unsanded Grout: Pros & Cons
In spite of its tendency to shrink, non-sanded grout is ideal for vertical surfaces. Since it has no sand or aggregate added to it, this type of grout is extremely sticky. As a result, it will spread easily over vertical surfaces and will stick there without causing you any additional problems.
Although non-sanded grout is not recommended for applications where the tile would have to withstand a lot of foot pressure, when it comes to vertical surfaces, durability doesn’t represent a problem anymore.
Another great benefit of using unsanded grout for vertical surfaces is how easy it is to work with it. It spreads easily and evenly, allowing you to focus on placing the tiles in the right spot rather than trying to correct errors.
How to Prepare the Grouting Material
When you know how to grout tile correctly, the joints between the slabs are uniform in texture and color, with no cracks or residue. But, when the tile is installed over a thick mortar bed, the mixture could provide a sufficient amount of minerals to cause efflorescence. These problems can affect the grout life and require intense maintenance.
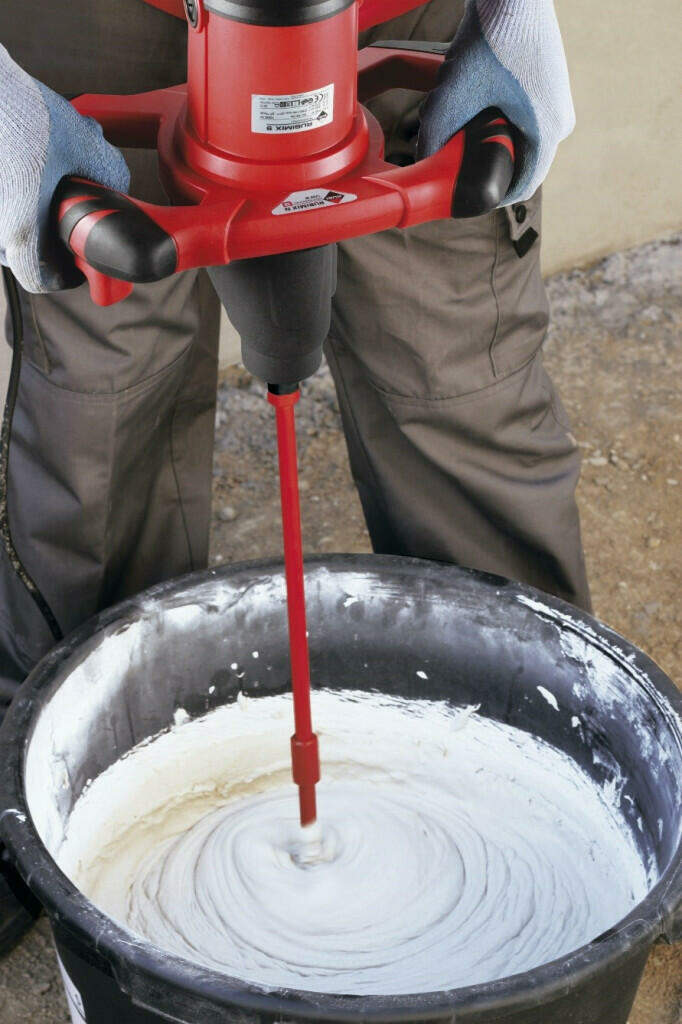
To ensure proper grout application, you must pay close attention to the preparation of the material.
If you use RG materials for grouting tile, then you need to know that the temperature range for handling and application is rather limited. How long does grout take to dry? Well, it depends on the material’s condition.
If the condition is below or above the recommended temperature range, then you might have a difficult time working with it.
Be careful not to add any bonding agents to the grout material and, with CG materials, to use manufacturer’s recommended quantity of water. Although they can add extra adhesive strength to the grout, bonding agents can also cause discoloration.

Grouting Tile: How to Apply the Material
Any person with an internet connection can learn how to apply grout in under an hour. Or, so they think. Proper grout application requires years of experience learning the ins and outs of each material.
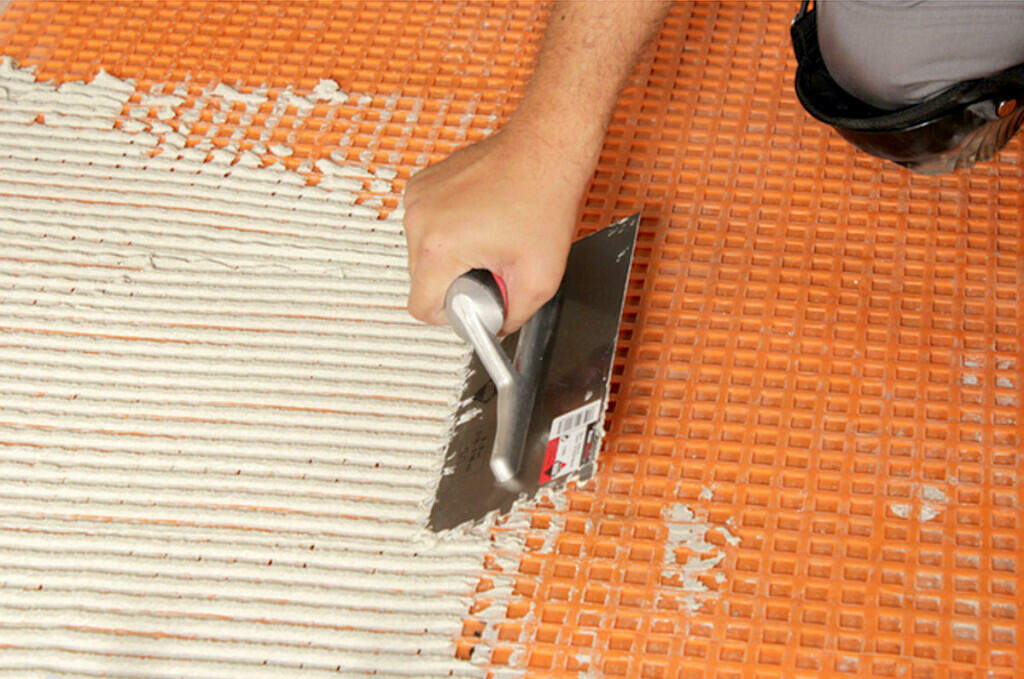
First of all, you need to ensure that the installation joints are clear of any excessive adhesive materials. If you are using RG materials, then you should make sure that the flanks and the bottom seal are dry. The presence of water can affect the curing reaction and prevent tiles from adhering to the subfloor.
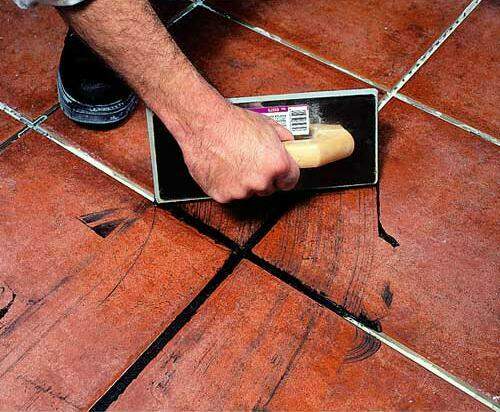
Now, that you’ve ensured that everything is in order, the grouting tile process can begin. You can use whichever technique fits you best. Most installers find that spreading the grout diagonally is the most efficient way to apply grout. This technique ensures that the grout gets into the joints and prevents it from popping out as you apply it. If you’re applying grout over a vertical surface, then spreading it diagonally can mean that there’s less mess to clean after you finish.
Of course, the right grouting tools can make a world of difference in how easy it is to apply the grout. Choose a mortar applicator that is lightweight and allows for an easy, quick, and clean application of the grout material.
How to Remove Grout
Here’s the part that most tile installers dread: removing grout.
It should go without saying that no tile installation project is finished without grout removal. The residue left from grout application can make tiles look dusky and ruin their overall appearance. Be one minute too late with removal, and it would be nearly impossible to do a proper grout repair.
So, even though this task is tedious and time-consuming, it needs to be done. So, get a sponge and water, get down on all fours, and start scrubbing. The sooner you get started, the faster you’ll finish.
Sure, no one says that you can’t cheat a little. A grout removal tool, such as a grout scraper can make this task a bit easier to endure.
[Watch the RUBISCRAPER-250 in action]
[embedyt] https://www.youtube.com/watch?v=-MzDcIfpBLg[/embedyt]
If you need to remove old grout, then don’t waste a few days hand-scrapping it. Use a reciprocating saw or an oscillating tool to remove grout in as little as one afternoon. Be careful, though, not to chip the tiles.
Conclusion
You are finally done! That is if the client doesn’t ask you to seal the tiles and grout. If they prefer the natural appearance of the tiles, then congratulations for a new amazing project.
Hopefully, after reading this guide, grouting tile, and especially removing grout, will become an easier task to handle.
Do you have any expert tips about how to grout tile? We would love to hear your input. So, let’s start the discussion in the comment section below!

Surely together with your thoughts here and that i adore your blog! Ive bookmarked it making sure that I can come back & read more inside the foreseeable future. kedkekeekffb
I really enjoy reading on this website, it holds great articles. Don’t put too fine a point to your wit for fear it should get blunted. by Miguel de Cervantes. cgekgcedkeafddbc
I want to know how I can remove dried grout on top of tile. A friend got it on top of tile a lot of it and it dried up now So how can she get it off the top of her tile now Thank You
Hi Nancy. There are special products designed for this. Try out a cement remover.