

Tiles, while durable, are not invincible. Every homeowner or professional installer faces the dreaded chipped tile at some point. The hassle? Replacing an entire tile for a small imperfection can seem disproportionate, and sometimes downright unnecessary. So, how does one address this common issue? This article provides a comprehensive guide on how to fix chipped tile to ensure a seamless finish that makes that chip a mere memory. Read on to discover not just the “how”, but also the “why” behind tile damages and the best preventive measures to keep your tile installation in pristine condition.


Types of Tile Damage
Tiles, though tough and resilient, can suffer from various types of damage over time. The first and most noticeable type is the cracked tile.
When a tile has a visible fissure or breakage running across its surface, it’s labeled as cracked. It’s different from a superficial scratch as the crack often penetrates deeper into the tile’s body.
Another common type is the chipped tile. This happens when a piece of the tile, usually from a corner or edge, gets knocked off. It’s different from a crack in that it’s usually localized to a small area rather than a line running across the tile.
The broad category of damaged tile covers a spectrum of issues including discoloration, pits, and erosion. It’s essential to pinpoint the specific type of damage before deciding on the right repair method.
Causes of Tile Damage
Just like a detective piecing together clues to solve a mystery, getting to the root of tile damage requires a keen eye and understanding of potential culprits. Tiles might appear sturdy and unyielding, but various factors can compromise their integrity.
Physical Impact
One of the primary reasons tiles crack or chip is due to a strong physical impact. Maybe something heavy dropped on it, or perhaps it faced undue pressure during installation or later. Chipped tiles often emerge as a result of such direct impacts, especially on the tile edges.
Thermal Stress
Tiles, like many materials, expand and contract with temperature changes. If a tile is exposed to rapid temperature fluctuations (like hot sunlight followed by cold water) it can crack. This phenomenon is especially common in outdoor settings or areas with direct sunlight.
Moisture and Improper Installation
Water is often a silent culprit behind many tile damages. If tiles aren’t installed properly, moisture can seep underneath, weakening the tile adhesive and causing the tile to lift, crack, or even erode over time.
The role of a solid foundation can’t be stressed enough. An uneven base can lead to undue pressure on specific tile areas and make them prone to breakage.
Quality of Tiles
Not all tiles are created equal. Some might look fantastic but could be of inferior quality. Such tiles are more susceptible to cracks, chips, and other forms of damage.
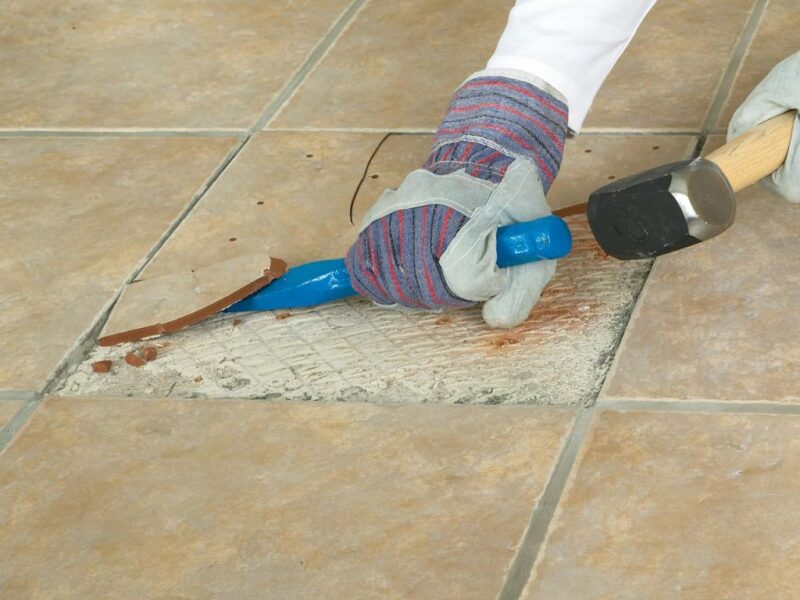
Step-by-Step Guide: How to Fix Chipped Tile
Before getting started on your repair, make sure you have the right tools and materials. For chipped tile repair, you’ll need:
- Epoxy resin or tile repair kit
- Fine-grit sandpaper
- Clean cloth
- Paintbrush or toothpick
- Paint matching the tile color
Cleaning the Chipped Area
A clean canvas is crucial for any repair work. Before attempting to mend a chipped tile, ensure the damaged area is free from dust and grime. A simple wipe-down with a damp cloth usually suffices.
Once clean, dry the area thoroughly to ensure no moisture remains.
Applying the Epoxy Resin
Epoxy resin is a strong adhesive commonly used in tile repair due to its durability and resistance.
To begin the repair mix the epoxy resin as per the instructions on the kit. Most resins come in two parts: a resin and a hardener. They need to be combined in a specific ratio, usually provided in the kit’s instructions.
Once mixed, apply a small amount of the epoxy to the chipped tile using a paintbrush or toothpick. The aim is to fill the chipped area without overflowing onto the surrounding tile surface. Smooth out the epoxy, ensuring it’s level with the tile’s surface.
Sanding for a Seamless Finish
After applying the epoxy and waiting for the recommended drying time, it’s time to sand the area. Using fine-grit sandpaper, gently sand over the repaired area. This will smooth out any bumps or uneven surfaces and ensure the repaired area blends seamlessly with the rest of the tile.
Painting Over the Repair
The repaired chipped tile area might stand out from the rest of the tile, especially if it’s a colored tile. Here’s where the paint comes into play:
- Ensure the paint matches your tile’s color
- It’s sometimes helpful to take a sample or picture of your tile to a paint store for a perfect match
- Using a small paintbrush, gently dab paint over the repaired area to make sure to blend the edges for a seamless look

Final Touches and Care
Once the paint dries, your chipped tile should look as good as new. While epoxy offers a sturdy repair, it’s essential to treat the repaired tile with care. Avoid placing heavy objects or exerting excessive pressure on the repaired area.
With proper care, your repaired tile can last for years without any issues.
Additional Considerations for Professional Tile Installers
Professional tile installers face chipped tiles now and then. While the above guide is apt for minor chips, more significant damages might require advanced tools and techniques. Here are some considerations for professionals:
- There are specialized tile repair kits available in the market designed explicitly for professional use
- These kits often come with colorants, allowing professionals to match the tile color more accurately
- Sanding ensures smoothness, but over-sanding might make the tile surface uneven
- Professionals should use their expertise to sand just the right amount for a flawless finish
- Educating clients about proper tile care can prevent future chipping
- Simple measures, such as using soft pads under heavy furniture or avoiding dragging objects across tiles, can go a long way
When to Opt for Tile Replacement Over Repair
Repairing tiles can be a lifesaver, especially when dealing with minor imperfections. But there are times when opting for tile replacement becomes a more viable and long-lasting solution. So, how do you decide between the two?
The first thing to consider is the extent of the damage. If a tile is severely cracked, spanning multiple lines across its surface, it may not be feasible to repair it.
A cracked tile can become a hazard, as the sharp edges can lead to injuries. Moreover, deeper cracks indicate that the tile’s integrity is compromised which makes it more susceptible to further damage.
The location of the tile plays a pivotal role as well. Tiles in high-traffic areas, like the center of a living room or kitchen, endure more wear and tear. A repaired tile in such a spot might not withstand the constant stress and could soon face another round of damage.
Another significant factor is the aesthetic appeal. Even though repair methods have come a long way, there are instances where the repaired area remains visible, especially in tiles with intricate patterns or gradients. In such cases, tile replacement ensures a seamless look to maintain the beauty of the space.
Lastly, think about the water exposure. In places like bathrooms or kitchens, where tiles are frequently exposed to moisture, a damaged tile, even if repaired, could be a weak point. Water might find its way underneath and lead to mold growth and further tile damage.
Tips to Prevent Chipping and Cracking
Your tiles are not just functional elements; they also add aesthetic appeal to your space. Protecting them from potential damages ensures longevity and reduces the hassle of frequent repairs or replacements.
One of the best ways to prevent chipping is to be mindful of heavy objects. Whether it’s furniture or a decorative piece, always lift and place them gently on tiled floors. Dragging or dropping them can exert undue pressure on tiles, leading to chips or cracks.
Cleaning plays a vital role in maintaining tiles. Regularly clean your tiles with mild soapy water to remove grime and dust. Avoid using harsh chemicals or abrasive cleaning tools as they can wear out the tile’s surface and make them more vulnerable to damage.
Temperature changes can be harmful, especially for tiles in outdoor settings or near large windows. If possible, use shades or curtains during peak sunlight hours to reduce the impact of thermal stress.
Moisture is often a tile’s silent enemy. Ensure that areas like bathrooms have proper ventilation to prevent prolonged moisture exposure.
Similarly, any spills on tiled surfaces should be wiped up promptly. Water left standing can seep into tiny cracks and exacerbate the damage.
Master Tile Repair with the Right Tools
Mastering how to fix chipped tile can be a game-changer for both DIY enthusiasts and professional tile installers. Not only does it save costs, but it also ensures longevity to bring back the original charm of your space.
For those seeking the perfect tools to aid in these repairs, RUBI stands proud. With a history rooted in innovation and a commitment to quality, RUBI offers a range of specialized products for every tiling need. Explore our top-tier tile installation tools today and ensure perfection with every tile you lay or mend.

Post a comment