
Has your tile floor bitten the proverbial dust? Looking to replace it, but not quite sure how? If so, you’re in the right place. In this article, we’re going to show you exactly how to replace a tile installation on your floor. Not only will we provide you with instructions step by step on how to replace tile floor, but we’ll also discuss the equipment and safety precautions necessary to properly facilitate the task.
Ready? Let’s get started!

Equipment Needed to Replace Tile Flooring
You’ll need a variety of equipment to replace tile flooring. The most prominent of this equipment includes the following:
Tile Cutter
First and foremost, you’ll need a tile cutter. This is a tool specifically designed to trim tiles. You’ll need it to size tiles up against baseboards.
Nippers
Tile cutters are used for cutting straight lines. If you want to cut curved lines, you’ll need to use nippers. These are plier-like tools that are operated by hand.
Level
A level is a tool that tests the flatness of a surface. You’ll need to use a level during the tile flooring replacement process, as it’s vital that the floor is 100% flat in all areas.
Mallet/Hammer
For the purpose of prying up old tiles, you need a mallet or a hammer. If you opt to smash apart old tiles, you can use a sledgehammer instead.
Chisel
Also used for the purpose of prying up old tiles, a chisel can work its way under the edge of a tile, providing leverage to the hammer or mallet. The chisel will need to be hit in a downward direction in order to pry the tile up.
Tile Trowel
A tile trowel is a handheld tool used to spread mortar onto a tile. This ensures that mortar is evenly distributed, thus keeping the floor flat.
Paddle Mixer
A paddle mixer is like a dough mixer but for grout or mortar instead of dough. It’s electrically powered and will ensure that the mortar and grout are mixed thoroughly.
Note that some grouts come pre-mixed. If this is the case for your grout, you won’t need a paddle mixer.
Materials Needed to Replace Tile Flooring
There are a number of materials you’ll need to adequately replace a tile floor. These include the following:
Tiles
This one’s obvious: tiles. You’ll need to choose some sort of flooring tiles. These could be marble tiles, granite tiles, porcelain tiles, or otherwise. There is a huge variety available, with each type of tile providing different benefits and drawbacks.
Learn more about the different types of tile floors by clicking here.
Thin-set Mortar
Thin-set mortar is an adhesive material that will hold your tiles in place. It needs to be spread across the bottom of each tile. Generally speaking, thin-set mortar is bought dry and then mixed with water when it’s time for it to be used.
Grout
Grout will need to be placed between the gaps in each tile. There are two types of grout: sanded and unsanded. If the gaps are wider than 1/8 of an inch, you’ll need sanded grout; if they’re less than 1/8 of an inch, you’ll need unsanded ground.
Grout Sealer
Grout sealer is applied to grout to make it more water resistant. It will not only prolong the duration of your tile floor, but it will also maintain the grout’s color.

How to Replace a Tile Floor: The Steps
We can now begin the explanation of the replacement process. We’ll cover it step by step, detailing the specifics along the way.
Decide Whether or Not to Rip Up the Old Tile
When replacing tile flooring, you have the option to leave the prior flooring there and install the new flooring on top of it. That’s if the existing flooring provides a solid base. If it doesn’t, you’ll need to rip up the existing flooring first.
Now, how can you determine whether the existing flooring is providing a solid base? First, check to see if any of the tiles are loose. If they are, you’re better off ripping them off.
Next, use a level to see whether they’re providing a flat surface. If there are any non-flat portions of the floor, they’ll need to be sanded down or ground down. Or you could just rip all of the tiles up to access the layer beneath.
If you do decide to use the existing tiles as a foundation, you’ll need to sand them down so that they provide a rough surface. This rough surface is necessary for securely attaching the new tiles to the old tiles.
It should be noted that if you install new flooring on top of your old flooring, it will heighten the level of your floor. This isn’t necessarily a bad thing. However, you might prefer your floor to be lower.
Not sure what to do? A local flooring company can assist you. Flooring companies do this all the time and will know the best course of action.
Rip Up the Old Tile
Have you decided to rip up your tiles? If so, you should start by prying them loose. You can do this with a chisel and a hammer.
Place the chisel at the edge of the tile and then hammer it lightly. As you do this, the tile will lift up, slowly separating from the floor below.
Not interested in using a chisel? You can probably get away with smashing the tiles to pieces with a sledgehammer. Simply hit the tiles in their centers until they crack to pieces. Then, pick up loose pieces and dispose of them in a waste receptacle.
When doing this, it’s wise to wear protective clothing. This will protect you not only from dust but from potential shrapnel as well. You’ll need goggles, a mask, long-sleeved pants, and a shirt.
Apply a Floor Stripper
Once you’ve removed existing tiles, there will still be old glue stuck to the floor. You’ll have to remove this fully in order to make the floor 100% level. This can be done with a floor stripper solution.
You can purchase floor stripper solutions at hardware stores and at online retail sites. These abrasive chemicals eat away at residue, loosening it up so that it can quickly be scrubbed away.
Spread the solution over the entirety of your floor and wait for it to take effect. Once it has, use a scouring pad to remove any and all residues.
Inspect the Subfloor
Now that the glue residue has been removed, you’ll need to inspect the subfloor. This is the floor’s base, the part that serves as the foundation for the primary flooring material.
If it’s made out of wood, check for rotting; totted pieces of wood will have to be replaced. If it’s made out of cement, look for cracks; shallow cracks should be sanded down.
Measure the Floor
Now it’s time to measure the floor. Measure the length of the room and the width of the room and then multiply the two numbers. This will give you the room’s square footage and will inform you of how many tiles you need to purchase.
Lay the Tiles Without Adhesive
Once you have the tiles in your possession, you should lay them down in the room without adhesive attached. This will enable you to size them up before permanently attaching them.
Trim Tiles as Needed
You may need to trim tiles that are up against the wall. You can do this with the help of a tile cutter. If you’re interested in cutting unique shapes in your tiles so as to facilitate unique layouts, you should use a nipper tool.
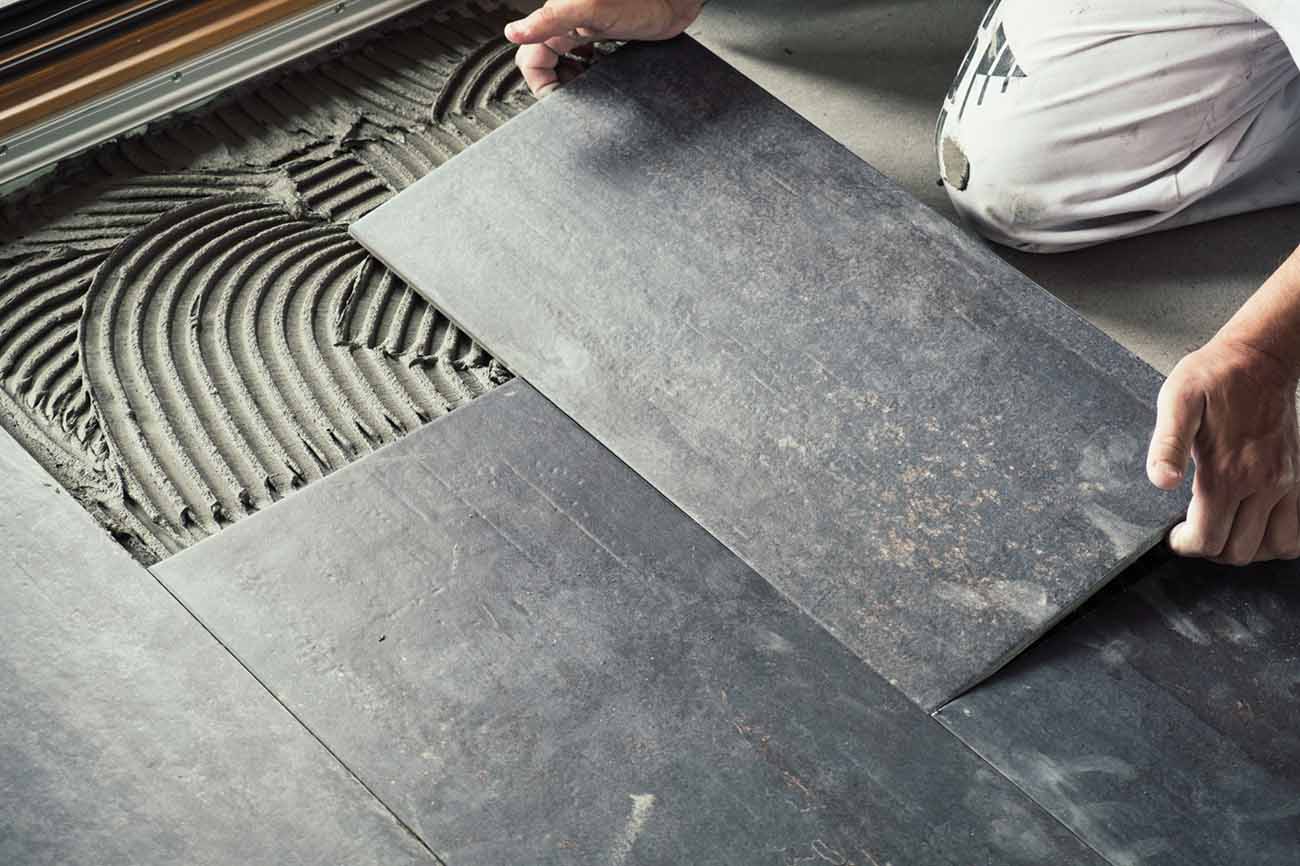
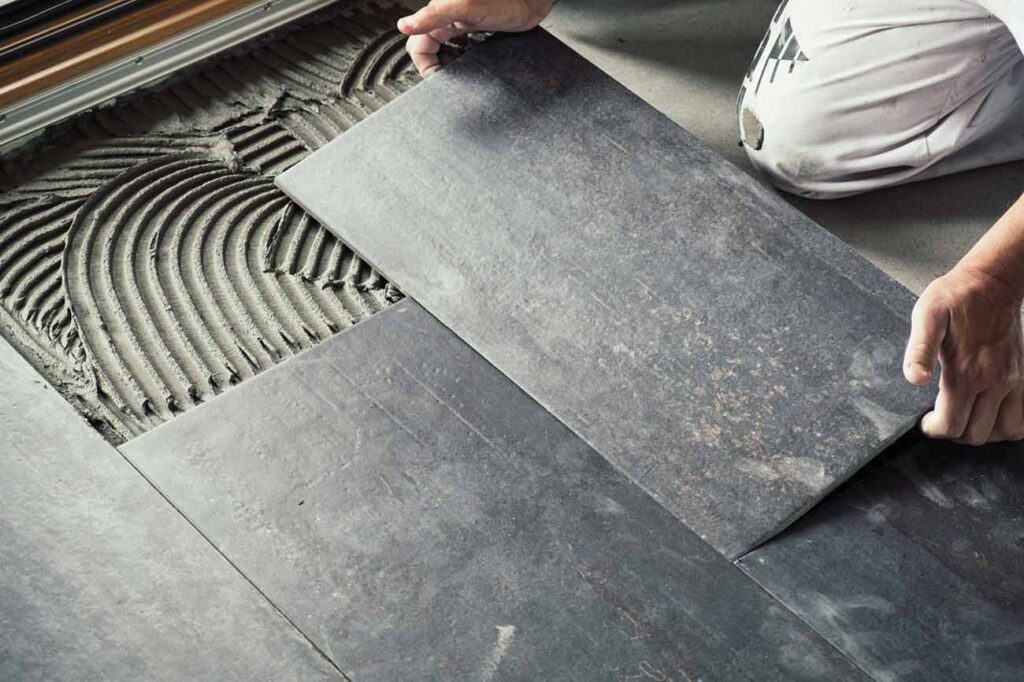
Spread the Mortar
Now, it’s time to lay the tiles down for good. You’ll start this process by spreading the mortar with a tile trowel. Make sure that the mortar is evenly distributed, and try to spread in a single direction so as to avoid bubbling.
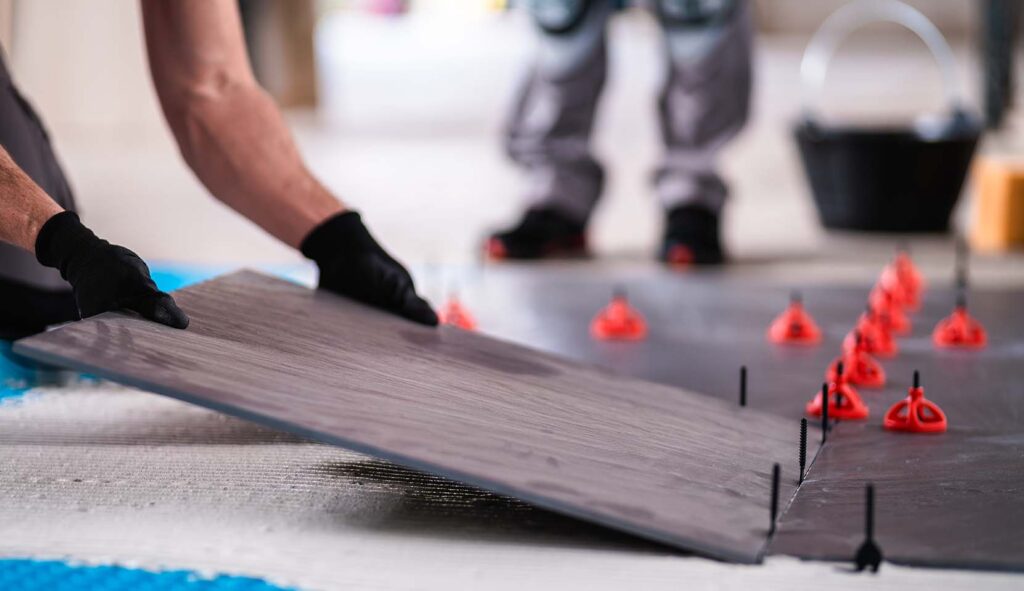
Lay the Tiles Permanently
Now, it’s time to lay the tiles for good. Start up against the wall and drop the tile in its rightful place. Once it’s there, wiggle it slightly while pressing down. Then, finish the process off by tapping the tile with a rubber hammer or rubber mallet.
Do this for the remaining tiles in the room, making sure to complete the process within 24 hours (the mortar begins to dry at this point).
While you’re doing this, be sure to use a level to determine the flatness of each tile. Also, take a step back and assess the look of the tiles after each few tiles are applied.
Note that if the mortar ends up on the surface of a tile, you should wipe it away with a wet rag before 24 hours have set in.
Apply the Grout
You’ll finish the process by applying the grout. This will need to be put between each tile as it’s integral to sealing off the floor below. You can use a tile trowel to help you apply the grout.
Once all the grout has been applied, give it two days to dry. As soon as it has, your floor will be ready for use.
Need Tools to Assist You with Your Tile Flooring Replacement?
Now that you know how to replace a tile floor, you might be looking for tools to assist you with the replacement. If so, you’re in the right place. Rubi has you covered.
We sell a wide variety of tools, from levels to scrapers to brick trowels to suction cups and more. Regardless of your needs, we have the tools that will accommodate you.
Check out our selection of tools now!

Post a comment