
On average, Americans spend over $500 billion at home improvement stores each year. Most home improvement projects aim to increase the home’s value while creating something usable and aesthetically pleasing. A new tile installation would be a good example of such a project. Having a niche in your shower wall is stylish and practical. It offers several advantages, such as convenient storage and easy access to bath essentials. It adds organization to the space that is stylish and clutter-free. A well-thought-out shower niche will enhance the aesthetic of your shower and add to an overall pleasant experience while using the shower. So keep reading to find out how to tile a shower niche.

Why Should You Add a Shower Niche?
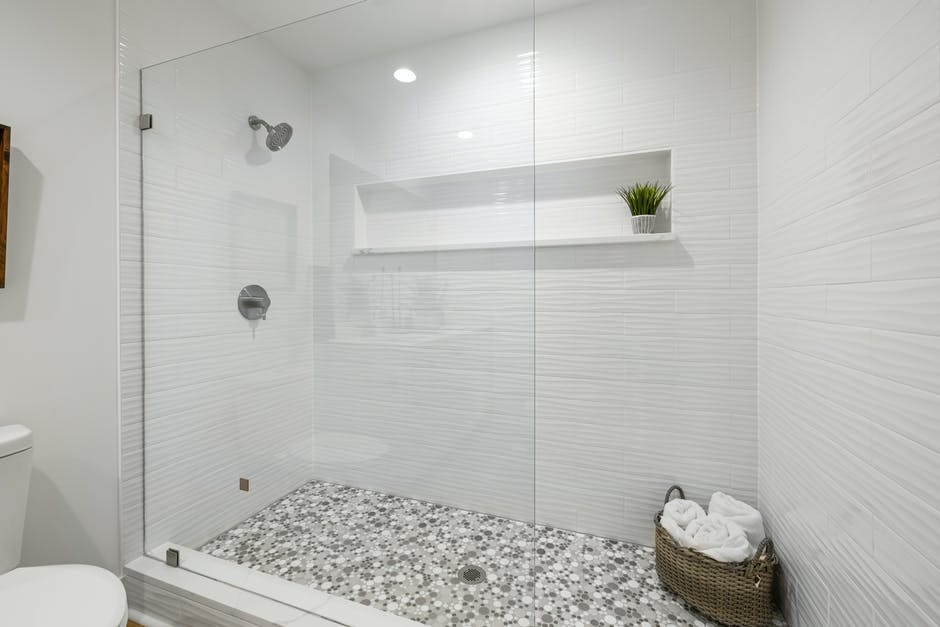
A shower niche provides a designated space within the shower area to store bath products such as shampoo, conditioner, soap, and other toiletries. It eliminates the need for bulky shower caddies or hanging organizers, keeping your shower area organized and clutter-free.
With a shower niche, you can keep your toiletries within reach, making it easy to grab what you need while showering. It provides a convenient and efficient way to access your essentials without stepping out of the shower or reaching for items outside the shower area. It also keeps you from placing products on your shower floor.
A well-designed and adequately tiled shower niche will enhance the overall visual appeal of your bathroom. It adds a decorative element to the shower area, creates a focal point, and gives your bathroom an upscale and finished look. You can choose tiles that complement the rest of your shower design or create an accent with contrasting tiles.
A shower niche can be a space-saving solution if you have a small bathroom. Instead of occupying valuable shower floor space with a free-standing storage unit or shelves, a niche uses the vertical wall space, maximizing the usability of your shower area without compromising on functionality.
Shower niches are constructed with waterproofing measures that help protect all the surrounding walls and prevent water damage. Also, cleaning a tiled shower niche is relatively easier than cleaning free-standing units.
Take Your Time With Planning and Design
Think about the position and design of the shower niche early in the process. The size of the niche should meet the needs of all shower users and should be placed at a convenient height. If you’re over 6 feet tall, but the main people using the shower are much shorter, you must remember when placing the niche; otherwise, they won’t be able to use it easily.
The niche should not be placed where plumbing, electrical wiring, or load-bearing structures are located. Placing a shower niche on an outside wall where there can be interference with insulation materials is also not advised.
The finished niche must fit seamlessly into the area, so consider the tile layout and how the niche will tie into this to create an appealing look.
A niche can be customized or premade, so choose a product that will fit nicely into your shower and suit your budget.

Learn About the Different Types of Shower Niches
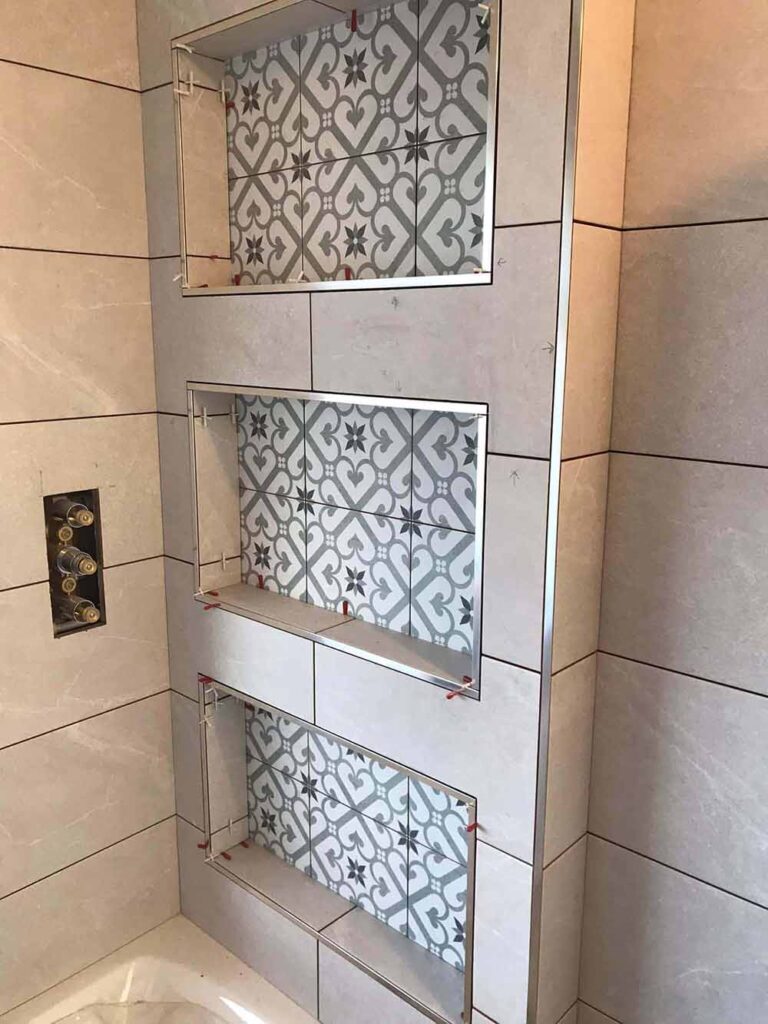
A built-in shower niche is constructed directly into the wall and consists of a framed box placed between the wall stud. The box would then be attached to the tile backer board. Built-in niches can be customized in size, shape, and placement according to your preferences.
Preformed shower niches come as ready-to-install units. They are made of durable materials such as plastic, fiberglass, stainless steel, or foam board. These niches are available in various sizes and designs, can be easily integrated into the shower wall, and comes ready to install and waterproof.
Gathering the Tools of the Trade
To tile a shower niche, you’ll need various tools to ensure a successful and efficient project. Here’s a list of tools you may need:
- Tape measure to ensure all measurements and dimensions of the niche and tiles are accurate.
- A level to ensure that the niche and tiles are straight and level
- A tile cutter or wet saw for cutting shower tile to fit around the edges or corners of the niche
- Notched trowel to apply thin-set mortar or adhesive to the back of the tiles and the niche area
- Grout float to apply the grout to the gaps between the tiles
- Tile spacers to maintain consistent spacing between tiles and ensure a professional finish
- Margin trowel for mixing thin-set mortar or adhesive
- Sponge or damp cloth for cleaning excess grout off the tiles during the grouting process
- Utility knife for trimming and cutting materials like waterproofing membranes or silicone sealant
- A drill with a mixing attachment will make the task of mixing grout much easier
- Grout sealer and applicator for sealing the grout lines after the grout has cured
- Safety glasses and gloves to protect your eyes and hands during tile cutting and other tasks
- Dust mask to use when cutting tiles to prevent inhalation of dust and other particles
- Caulk gun for applying silicone sealant around the edges of the niche
- Tile cleaner to clean the tiles and remove any grout haze or residue after the grouting process
Plan Some Preparation Time
The first step in tiling a shower is ensuring it’s waterproof. Apply a waterproofing membrane or a liquid waterproofing product to the inside of the niche and the surrounding area. Follow the manufacturer’s instructions for application.
Choose tiles that complement the overall design of your shower. Selecting tiles suitable for wet areas and can withstand constant water exposure is vital. Porcelain or ceramic tiles are famous for their durability and water resistance, but granite and marble have also started growing in popularity.
Take accurate measurements of the niche to determine the size and amount of tiles needed. It is a good idea to use smaller tiles for the niche to ensure they fit correctly and allow for any slopes or angles.
You may need to cut some tiles to fit into the niche and around the edges or corners of the niche. Use a tile cutter or a wet saw to make precise cuts. Take safety precautions when using power tools, and always wear protective gear.
How to Tile a Shower Niche
Start by applying thin-set mortar or adhesive to the back of the niche. Press the tiles into place, ensuring they are level and aligned with the surrounding tiles. Use tile spacers to maintain consistent spacing between the tiles. Continue tiling until the niche is fully covered.
You can use a bullnose tile with rounded edges or a metal rim to finish off the edges of the shower niche. Different products are available, and your local hardware store will be able to advise you in this regard.
After the tiles have been set, remove the tile spacers and prepare the grout according to the manufacturer’s instructions. Apply the grout to the gaps between the tiles using a grout float. Remove excess grout from the tile surface with a damp sponge and allow the grout to cure before applying a grout sealer.
Consider using a latex-based liquid additive instead of water to mix the grout. This product is designed as a water substitute when tiling or grouting wet areas such as showers.
Setting the tiles on the bottom of the niche, or shelf, with a forward angle will ensure that water runs off the niche and does not collect inside. Smaller tiles, such as mosaics or penny tiles, are easier to use and position in a small space, but full-sized tiles are also suitable; this depends on your taste and budget.
Once the grout is fully cured, clean the tiles with a tile cleaner to remove any haze or residue. Apply a bead of silicone sealant around the edges of the niche to prevent any possible water penetration. This provides an extra layer of waterproofing and will add a finished look to your work.
Shower Niche Creation Made Easy
Whether you’re remodeling a shower or simply changing your shower tiles, it’s a good idea to understand how to tile a shower niche. This small change not only offers you more space in your shower but also changes the aesthetic of your shower space.
So go ahead and consider adding a shower niche to your shower. If your bathroom is on the compact side, you will not regret it!
If you’re considering tackling a shower remodel, contact us today for all your tiling needs! Let Rubi Tools help you bring to life all your tiling project dreams.

Post a comment