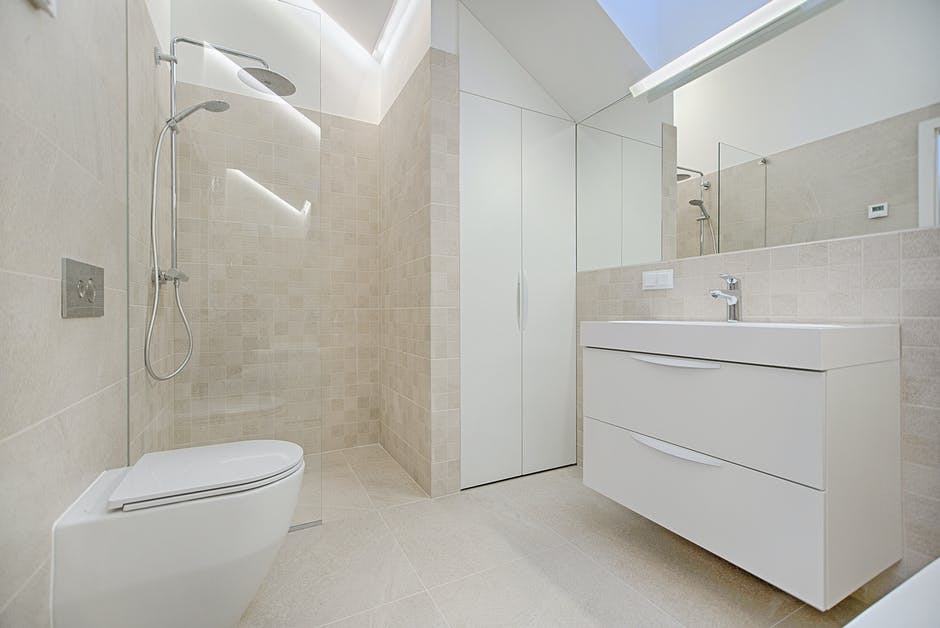
Learning how to tile a shower floor without relying on a pre-made pan is a high-level tiling skill that separates basic installations from truly professional shower systems. While the process isn’t complicated in theory, it does demand technical precision, correct slope management, and a flawless waterproofing strategy. When executed properly, this method delivers a custom, durable, and fully watertight shower floor that performs as well as a factory pan.
This guide is designed as a technical instruction manual and best-practice reference for professional installers and experienced DIYers who want to understand how to tile a shower floor without a pan, avoid drainage failures, and achieve long-term performance. The same principles also apply if you’re planning how to tile a shower wall and floor as part of a complete bathroom renovation.

Tools and Materials Required for Tiling a Shower Floor
Before starting any work, assembling the correct tile installation tools is essential. Precision at this stage prevents costly corrections later and ensures consistent results throughout the installation.
Essential tools:
- Notched trowel
- Tile spacers for consistent joint spacing
- Manual or electric tile cutters for accurate edge and drain cuts
- Rubber mallet for proper tile bedding
- Levels (short and long) to control slope and flatness
- Buckets, sponges, and clean water
- Mixing equipment for mortar and grout
Required materials:
- Shower floor tiles (mosaic tiles are often preferred for slope adaptability)
- Thinset mortar rated for wet areas
- Waterproofing membrane or liquid-applied waterproofing system
- Grout suitable for shower environments
- Grout sealer for long-term moisture protection
Having professional-grade tools is not optional when learning how to build a tile shower floor without a pan. Accuracy in mixing, cutting, spacing, and leveling directly impacts drainage and waterproofing performance.
Step 1: Prepare the Shower Floor and Substrate
Proper preparation is the foundation of every successful shower installation. Skipping or rushing this step is one of the most common causes of leaks, cracked grout, and drainage failures.
Start by ensuring the shower floor substrate is structurally sound, clean, and free of contaminants. Remove dust, debris, grease, or old adhesive residues that could interfere with mortar bonding. Any movement in the substrate will eventually transfer to the tile surface, so rigidity is non-negotiable.
Next, confirm the substrate is properly sloped toward the drain. When tiling a shower floor without a pan, the slope must be built into the mortar bed itself. Industry best practice requires a pitch of approximately ¼ inch per foot, directing water efficiently toward the drain and preventing pooling.
Once slope and substrate integrity are verified, apply the waterproofing membrane. This layer is the true barrier protecting the structure beneath the tile. Extend the membrane across the entire floor and several inches up the walls, sealing all seams, corners, and penetrations according to the manufacturer’s specifications.
Step 2: Mark Your Layout for Perfect Drainage
Layout planning is where aesthetics and performance intersect. A well-planned layout ensures visual symmetry while maintaining proper drainage geometry.
Begin by identifying the center of the shower floor and the exact drain position. Dry-lay tiles without adhesive to visualize joint alignment and tile cuts, paying special attention to how tiles meet the drain flange. Avoid narrow tile slivers, which are difficult to cut and prone to cracking.
Spacing must remain consistent throughout the floor, not only for appearance but also to maintain uniform grout joints that accommodate movement and water flow. Using spacers correctly at this stage sets the tone for the entire installation. This is where applying tips for using tile spacers effectively makes a measurable difference.
A properly marked layout also helps control slope transitions, ensuring tiles follow the pitch naturally without creating uneven edges or uncomfortable footing.
Step 3: Mix and Apply the Thinset Mortar
Thinset mortar is more than an adhesive. It’s a structural component of the shower floor system. Mixing and applying it correctly is critical for tile bonding and long-term durability.
Always follow the manufacturer’s mixing ratios precisely. Add water first, then mortar powder, and mix thoroughly using professional mixers and paddles until achieving a smooth, lump-free consistency. The mortar should be creamy and workable, holding ridges without slumping.
Allow the mortar to slake (rest) for the recommended time before remixing. This activates the chemical components and improves bonding strength.
Apply thinset using the correct notched trowel, holding it at a consistent 45-degree angle. Selecting the right notch size is essential: too much mortar causes lippage, too little compromises adhesion. Refer to choosing the right trowel size for tile to match tile size and substrate conditions accurately.
Spread only as much mortar as you can tile within the open working time, maintaining clean ridges that promote full tile coverage.

Step 4: Lay Down the Tiles and Ensure Leveling
With the mortar properly applied, tile placement becomes a process of precision rather than speed. Start laying tiles from the center and work outward, following the layout lines established earlier.
Press each tile firmly into the thinset, using a slight twisting motion to collapse the mortar ridges beneath. Periodically lift a tile to verify full coverage, especially near the drain where water exposure is highest.
Use spacers consistently to maintain joint alignment, and check frequently with a level to ensure tiles follow the intended slope without creating high or low spots. Small mosaic tiles are often preferred in shower floors because they adapt more easily to pitch variations.
For edge cuts and drain adjustments, rely on professional tile cutters to achieve clean, accurate results that won’t compromise waterproofing integrity.
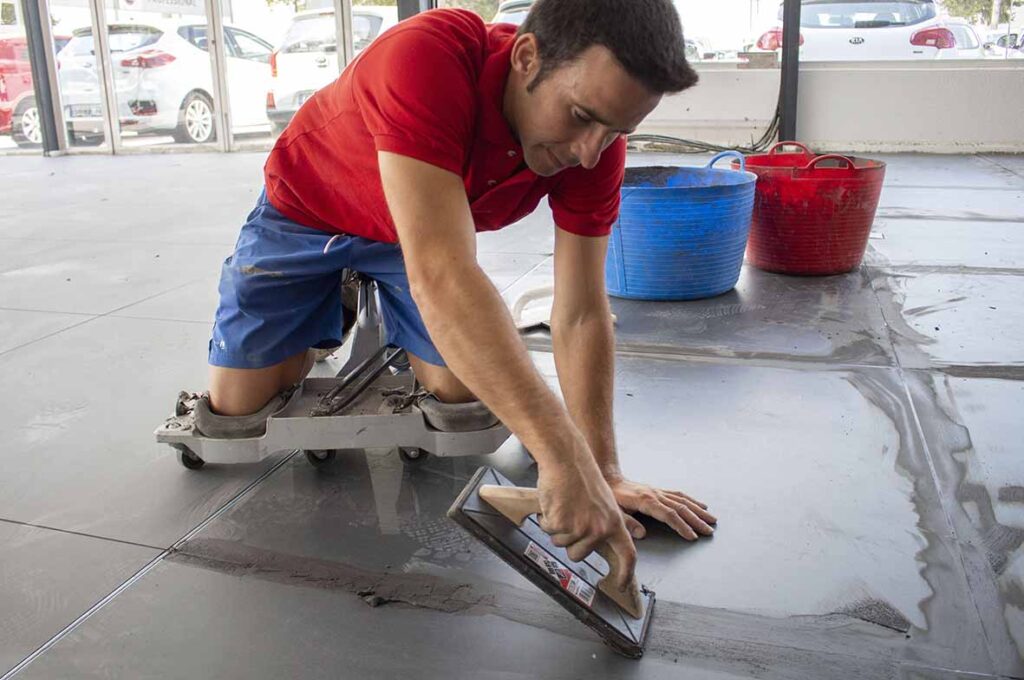
Step 5: Grouting the Shower Floor Tiles
Once the tiles are fully set and the thinset has cured (typically 24 hours), it’s time to move on to grouting. This step is not purely aesthetic because grout plays a critical role in protecting the installation from moisture infiltration and accommodating minor movement within the tile assembly.
Select a grout specifically rated for wet environments. Cement-based grouts are common, but many professionals opt for high-performance or epoxy-based alternatives in showers due to their enhanced durability and water resistance. Regardless of the type, proper mixing is essential. Follow manufacturer instructions closely to achieve a smooth, workable consistency without excess water, which can weaken the grout structure.
Apply grout using a rubber float, working diagonally across the joints to fully pack them. The goal is complete joint fill with no voids, especially around the drain area where water exposure is constant. Mastering how to grout tile correctly ensures uniform joints and reduces the risk of premature cracking or discoloration.
After initial application, remove excess grout with a damp sponge, rinsing frequently and avoiding excessive pressure that could pull grout from the joints. Allow the grout to cure fully before exposing the surface to moisture.
Step 6: Sealing and Finishing Touches for Waterproofing
Sealing is the final defensive layer in a shower floor installation and a step that should never be overlooked. Even the best grout remains porous unless properly sealed, allowing water to penetrate over time.
Once the grout has cured according to manufacturer specifications, apply a high-quality grout sealer evenly across all joints. This creates a protective barrier that repels moisture, reduces staining, and extends the lifespan of the installation.
Finishing touches should also include a thorough inspection of the tile surface. Check for lippage, loose tiles, or incomplete grout joints. Clean any remaining haze from the tile surface and confirm that water flows smoothly toward the drain without pooling. A final water test is strongly recommended before the shower is put into service.
How to Tile a Shower Floor Without a Pan: Troubleshooting Common Issues
Even with careful execution, issues can arise. One of the most common problems is poor drainage, often caused by insufficient slope or uneven tile placement. This reinforces why slope control is a central concept when learning how to build a tile shower floor.
Tiles that fail to bond properly are typically the result of inadequate mortar coverage, incorrect thinset consistency, or working beyond the mortar’s open time. Lifting and resetting affected tiles early prevents larger failures later.
Cracked or shrinking grout usually points to excess water during mixing or insufficient curing time. Adhering strictly to grout specifications and sealing appropriately minimizes these risks.
Uneven tiles, also known as lippage, often stem from inconsistent mortar application or improper leveling during installation. Regular checks with a level during tile placement are the best preventive measure.
Trusted RUBI Tools for a Flawless Shower Finish
Achieving professional results when mastering how to tile a shower floor depends heavily on the quality of the tools used. RUBI offers a complete ecosystem of tile installation tools designed for precision, durability, and installer efficiency.
From high-performance tile cutters that deliver clean, accurate cuts, to ergonomic mixing solutions using professional mixers and paddles, RUBI tools help installers maintain consistency at every stage of the process. When paired with correct technique, the right tools transform a complex installation into a controlled, repeatable system with flawless results.
Frequently Asked Questions (FAQ) About Shower Floor Tiling
Can you tile a shower floor without a pre-made pan?
Yes. Tiling without a pan is a proven method when the slope, waterproofing membrane, and drain integration are executed correctly. This approach is common in custom showers and professional installations.
What is the best tile for a shower floor to avoid slipping?
Small-format or mosaic tiles are preferred because they follow the slope more easily and provide additional grout lines, improving slip resistance.
How long should I wait to use the shower after tiling?
In most cases, wait at least 48–72 hours after sealing the grout. Always follow the specific curing times recommended by the mortar, grout, and sealer manufacturers.
Why is the slope (pitch) so important when building a tile shower floor?
The slope ensures proper drainage. Without adequate pitch, water pools on the surface, increasing the risk of leaks, mold, and premature system failure.
Do I need to seal grout on a shower floor?
Absolutely. Sealing grout is essential to prevent moisture penetration, staining, and long-term deterioration, especially in high-exposure environments like showers.
Post a comment