
When you’re at the grouting stage of your tile installation project, you’re almost finished! It’s an exciting last step to be taking because soon you’ll have a new bathroom, kitchen, etc.
However, if you don’t know how to grout floor tiles properly, you could end up with your tiles looking messy or, even worse, they might come off, meaning that you’ll have to do the work all over again.
That’s why we’ve put together this list of tips and techniques on how to grout tile.
Here, you’ll learn all the best tips so that you’ll have a beautifully finished set of tiles. Finally, you can have the bathroom or kitchen of your dreams! Read on to learn more.

1. Remix the Grout After You Set It
When it comes to grouting tile, you need to make sure you’re setting and remixing it properly. Even though it’s tempting to immediately start grouting once the grout is mixed, this could leave you with disastrous results.
What you have to do, after you’ve first mixed the grout, is to allow it to set. This part of the process is called slaking. This step makes it possible for the water to moisten all the dry elements of the grout completely. You should wait at least ten minutes for this.
After the time has passed, you should remix the grout. Depending on its viscosity, you might need to add more water or powder. You want it to have the thickness of mayonnaise.
Be careful when you add water, since you could end up accidentally adding too much and have to start over again.
2. Tape off Areas You Want to Protect
When you’re grouting, accidentally getting any of the grout on unintended areas can cause damage. This is especially when it comes to paneling, wallpaper, and inset tiles that have designs on them.
To protect these areas, put tape over them before you start grouting. That way, the surfaces won’t get damaging while you’re completing your project.
3. Start Small
Once you start to apply the grout to the tile, it hardens pretty quickly (though the rate is affected by humidity and temperature). Once the hardening starts, you’ll have to quickly wipe off any excess grout before it hardens in the wrong place.
To avoid having to rush to wipe away any misplaced grout, start small. Spread the grout in areas that are 3 feet by 3 feet. Then to finish the grouting in each section, shape the joints and clean the excess grout before you move onto the next section.
4. Force the Grout Into the Joints
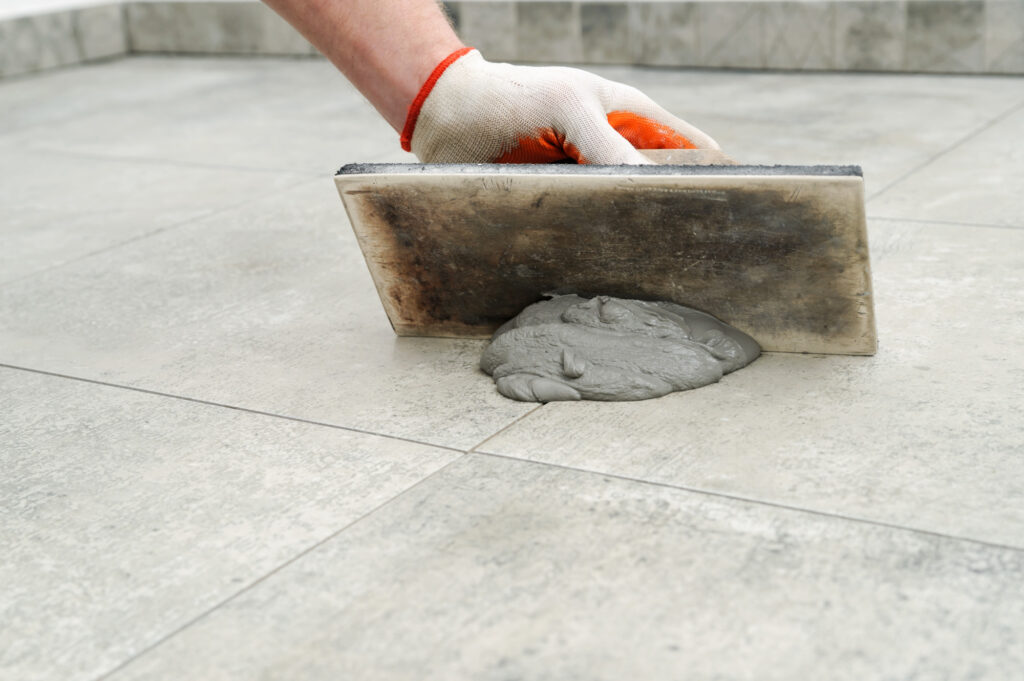
Unless you want to spend a long time cleaning, you should force the grout into the joints. This will ensure that they’re all completely filled. To do this, you should apply the grout with the grout float from different directions.
When you’re holding the float against the joints, place the face at an angle of 45 degrees so you can force in the grout.
Once you’ve filled the joints, you can hold the float at close to 90 degrees, and scrape off any excess grout.
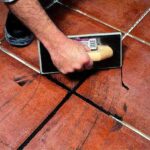
5. Shape the Grout
Now, you have to shape the grout and compact it by taking a tool and dragging it across all the joints. You can use almost anything as a tool.
For example, you could use a toothbrush handle’s rounded edge. You can also use the grout float’s rounded corner.
Basically, you need a tool that’s round and small enough to create a joint that’s slightly concave.
When choosing tools, remember not to use any that are made from metal, as this could leave marks on the tiles or damage them in another way.
If you finish this step correctly, cleaning the tile grout later on will be far less work.

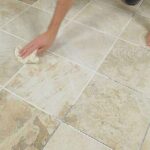
6. Remove the Grout With a Sponge
When cleaning tile grout you have to use a sponge. To start, put clean water in a bucket, dip the sponge, and wring it out well.
Now, place the sponge against the end of a grouted area, making sure not to miss any space in the corners. Drag your sponge, using continuous strokes up along the end of the grouted area.
Then, flip the sponge so that you can wipe the surface with a clean corner and do the same motion next to where you just cleaned off the grout. Continue doing this until you’ve used all the clean corners of the sponge.
Once all the sponge’s corners are dirty, put the sponge back into the bucket and wring it out again. Then, do the same as above until the entire area has been cleaned.
You’ll want to do this entire process two or three times. After the area has dried, you might notice that there’s a thin grout film left. You can buff it off using a soft cloth.
7. Don’t Use Too Much Water When Cleaning
One of the biggest mistakes people make when using a sponge as a tile grout cleaner is to use too much water. Even though you want to get it clean, you don’t want to water down the whole project and loosen the tile! It will also cause the grout color to be uneven when it dries.
Be careful not to use too much water. If you notice that there are streaks of water coming down like when you’re washing a whole wall, you’re using too much water. Wring out your sponge and start again.
8. Don’t Scrub When Cleaning
It can also be tempting to scrub hard when you’re cleaning the grout. However, this will move the grout instead of properly cleaning it, so just use a gentle sponge and press it gently against the grout.
9. Remove Grout Before Caulking
Many people choose to use caulk for the corners of the room because it can handle slight movement and is flexible. If you want your tiles to be installed properly, there are several steps you have to take when using both grout and caulking.
First, after you’ve grouted the entire area, remove the grout in the corners and other places you’re planning to put the caulk. This will make it possible for the caulk joint to be of good quality.
Then, apply the caulk to areas that are vulnerable, such as inside corners and along countertops and the tub.
Remember to choose a caulk that matches with your grout so that it won’t stand out.
10. Seal Porous Tile Before You Grout
If you’re installing porous tile, the grout will stick to it like glue. As a result,it will be almost impossible to clean off when you’ve finished your grouting job. Fortunately, there are products you can use to seal off your porous tile before this happens. If you want your tile to have a matte finish, you should use a liquid grout release product. This won’t produce a sheen and will prevent the grout from sticking to the porous tile.
However, if you want a “wet” look or want to enhance the color of the tiles, you should use sealer. After you’ve applied the grout and cleaned it, apply another sealer coat.
This will both protect your tiles and enhance the stones’ color.
11. Save Some of the Grout
Finally, you should save some of the grout after you’ve completed your grouting project. If you need to do any touch-ups or use the grout for other purposes in the future, having some extra comes in handy. Just remember to keep it in an airtight container.
Need More Help on How to Grout Tile?
Now that you’ve learned some of the top tips and techniques on how to grout tile correctly, you might find that you need help with other tiling projects. Maybe you want to know how to lay a specific type of tile or you want to hire a professional for the job.
Whatever you need, we can help. At RUBI, we’re experts when it comes to any title projects you might be working on. To learn more about how we can help you, check out RUBI Tools now.

Post a comment