
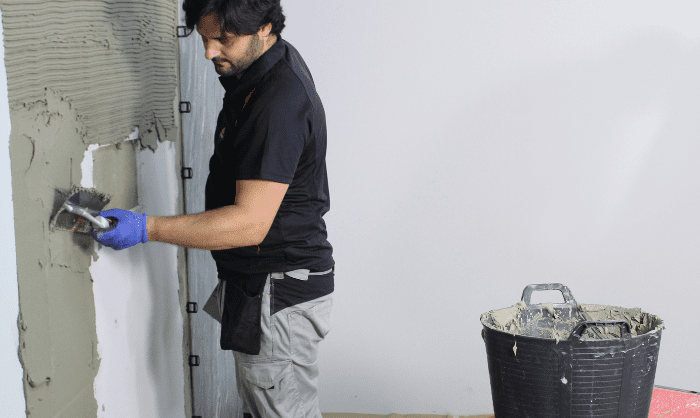
Tiles transform spaces in a timeless, effortless way that is both practical and beautiful to look at. The key to successful wall tiling lies in assessing and preparing the surface that will support the tiles. Any shortcuts on surface preparation can compromise your tiling job and create problems later on.
Tackling a tile installation without adequately preparing the wall is a recipe for falling tiles. So how do you prepare a wall for tiling? Depending on the wall surface and the methods, the products you use will vary. Use this handy reference for your wall tiling preparations.

How to Prepare a Wall for Tiling
Wall tiling steps will vary depending on the surface you’re working with, the type of tiles you’re using and where you’ll be tiling. Regardless of these three variables, here are the initial steps for how to prepare a wall for tiling:
- Remove any nails, screws, photo hooks, and other fittings
- Remove loose plaster
- Remove any old wallpaper
- Fill in any cracks or holes in the wall
- Check the wall to see if it’s level
- Sand the surface down if necessary
- Vacuum up all the dust and wipe down the walls
Once you’ve completed these basic steps, you can move on to tiling. You’ll need to take into account specific surface and tile instructions.
Standard Wall Tiling Preparation
You can apply wall tiles to many different surfaces, as long as they are level, and correctly prepared. Taking shortcuts in the preparation phase will cause tiles to break or lift from the wall.
Textured or Painted Drywall
Remove any loose paint, repair holes and cracks, sand uneven areas. Vacuum clean the wall to remove all traces of dust or heavy particles. Use ammonia or a TSP (trisodium phosphate) based cleaner to remove all dust, oil, and grease residue. Once the wall is completely dry, the tile installation can begin.
Wood Surfaces
Wooden surfaces need priming. Start by sanding with a medium-grit sandpaper. This creates a uniform surface that’s rough enough for tile adhesive. Vacuum the area and wipe it down with a damp sponge. Make sure the surface is thoroughly dry before applying adhesive.
Plywood
Tiling on plywood isn’t recommended. Plywood responds to temperature changes and will swell and shrink. This can lead to tiles and grout cracking and cause permanent damage. To avoid this, install a concrete board over the plywood as a suitable tile backing.
Fresh Plaster
Fresh plaster takes up to 30 days to set, attach, and dry. Once it’s dry, you don’t need to tape the joints. After applying the last layer of skim coat, use medium sandpaper to roughen the texture to improve adhesive bonding.
Tiling on Tiles
If the surface you want to tile is already tiled, you have the choice of chiseling off the existing tiles or tiling on top of them. If you opt for tiling on top, you should clean the already-installed tiles and replace any broken ones. Next you need to sand the surface of the tiles down so that they feel rough to touch, and then spread a primer over them. Once you’ve finished these steps you can start spreading thinset mortar over the surface. Wait 24 hours and then you can begin installing the new tiles.
The reason you need to use primer is because most tile adhesives need to be spread over an at least slightly porous surface in order to work correctly, and the glazed surface of a tile is not porous. By applying primer you can create a union between the already-installed tile and the adhesive that you are using to install the new tile.
Tiling On Old Plaster
The condition of the old plaster will determine whether you should tile straight onto it or not. If the plaster is too old and in the process of disintegrating, it won’t support the weight of the tiles. In this case, it would be better to replace it with a layer of plasterboard.
However, if the plaster is still in good condition, use an acrylic primer and a cement-based adhesive. The primer will act as a seal.
Tiling on Wallpaper
This is simple, never tile on wallpaper. The finish is too smooth and shiny for proper adhesion. Wallpaper won’t support the weight of the tiles. Remove the wallpaper with the strip and sand method or a steamer. Make sure the surface is free of moisture before applying the tiles.
How to Prepare a Wall for Tiling: Tools Checklist
Having the right wall tiling tools is essential in order to complete the job efficiently and accurately. The tools required will vary depending on the surface of the walls being prepared. If you need to stock up, RUBI Tools has everything you’ll need. To get started, use this list as a rough guideline.
- Protective clothing, goggles, and gloves
- Pencil
- Spirit level
- Dust sheet
- A hammer or pliers for removing nails, screws, and hooks
- Mortar, notched trowel, and brick trowel
- Sponges and cloths
- Box cutter
- Tape measure
- Step ladder
- Angle grinder and grinding diamond blades
- Scraper or steamer for removing old wallpaper

Tiling Best Practices
Tile design trends will come and go. Tiling remains the go-to for bathrooms and kitchens, and there are three main tiling installation fundamentals that remain constant.
1. Prepare the Substrate
Make sure that new surfaces are allowed the correct drying or curing times. If those times are not adhered to, drying shrinkage movement may occur in the substrate. This will compromise the tiling installation.
Choose the correct primer for the surface as it will create a good bond with the substrate. Surfaces can be dusty, impervious, powdery, smooth, or rough.
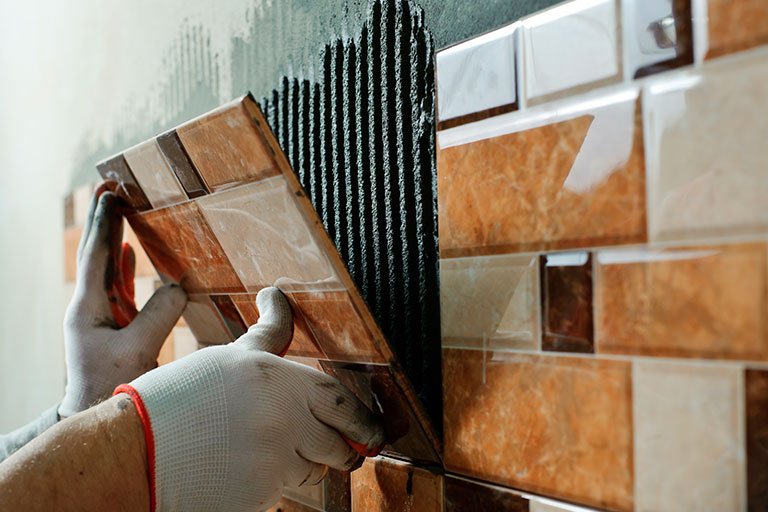
2. Adhesive Selection
Wall tiles come in a variety of types. Ceramic, natural stone, stone-veneer, porcelain, glass, and others. Each type has specific characteristics, and it’s important to choose the right adhesive for each type of tile to ensure good bonding.
Also take into consideration where the tiles will be installed. Tiles installed on the exterior, interior, or suspended surfaces will need different types of adhesives.
3. Joints for Tile Panels
5mm wide movement joints that extend through the tile and adhesive layers must be located at a maximum of 5mm centers for interior tile applications and 3m centers for exterior and suspended applications. Internal corners, obstructions fixed to a structural background, discontinuities in building materials, stairs, or columns should have movement joints.
Joints between each tile are also necessary, because as the tile is used and experiences varying temperatures and environmental stresses, it will expand and contract, and these joints are necessary to prevent the damage that can result from these changes. The minimum joint width necessary will depend on where the tile is installed as well as the type of tile you’re using, so it’s best to ask how wide to make your joints when you purchase your tiles.
Common Wall Preparation Issues When Tiling
Preparing a wall for tiling isn’t difficult, but it can cause major problems if not done right. Here are the three main wall preparation issues that will cause tiles to lift, break, or fall off.
- Uneven surface
- Moisture content that’s too high
- Dirty, dusty, or oily surface that hasn’t been cleaned properly
Any one of these three (or a combination of them) is enough to sabotage your tiling job. Take the extra time in the beginning to prepare the surface properly and save time having to fix it afterward.
A Prepared Surface Equals A Great Tiling Job
All walls are not equal! When it comes to a successful tiling job, preparing a wall for tiling is key. Analyze the surface, figure out the best way forward, gather your tools, and see the job come together beautifully.
If there is an important piece of equipment missing from your tool arsenal, check out our free RUBI Tools catalog, or give us a call at 305-715-9892.

Post a comment