

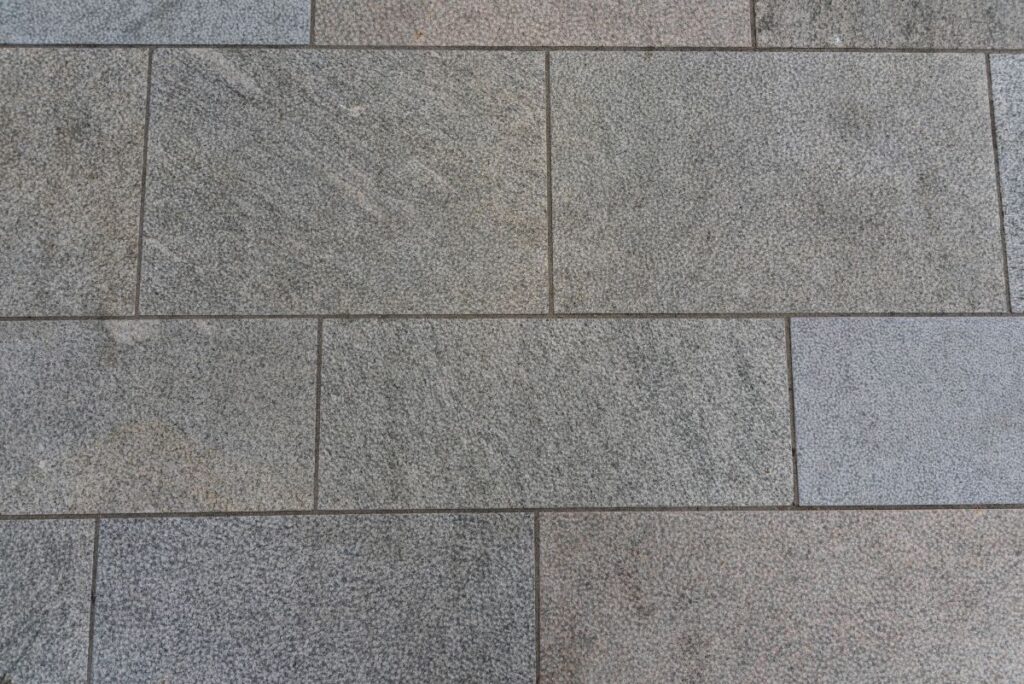
Dense outdoor porcelain puts more load on the blade because material thickness amplifies vibration and edge stress shows up fast on exposed cuts. On patios, terraces, and pool decks, a weak setup quickly turns into chipping, drift, and wasted pieces. That is where RUBI enters the conversation, helping pros match the right blade, saw, and tile cutter for 2cm porcelain to the demands of outdoor work. See Porcelain Tile Cutter: Best Practices and Tips for related guidance.
Why 2cm porcelain is harder to cut on outdoor jobs
Outdoor 2cm porcelain behaves differently from standard interior tile because installers are dealing with greater thickness, more visible edges, and more demanding jobsite conditions. Thick porcelain also increases the difficulty of phase 2 of installation, where cutting becomes the most delicate part of the process, especially when the layout includes corners, bevels, and trim pieces. For exterior work, clean results come from matching the blade and saw to the application instead of pushing dense material through a light-duty setup.
Material density, edge stress, and vibration in 2cm porcelain
With 2cm porcelain, the cut stays under pressure longer, so blade deflection and vibration show up faster than they do on thinner tile. Example guidance for outdoor pavers makes the same point: thick porcelain creates more vibration and more edge stress, which is why blade stability has such a direct impact on finish quality.
Why outdoor pavers demand more blade stability
Exterior layouts usually involve long perimeter cuts, exposed edges, and repetitive trimming that has to stay consistent across multiple pieces. On those jobs, a thicker blade body improves stability, reduces deflection, and helps produce a cleaner cut on dense materials such as outdoor porcelain pavers.
Why exposed edges are more prone to chipping
Outdoor cuts are often more visible than interior cuts, so micro-chipping becomes a much bigger finish issue. That is why pros usually move away from generic cutting advice and toward system-based setups that improve control, protect the edge, and reduce stress on the material during the cut.

Choosing the right setup for cutting 2cm porcelain
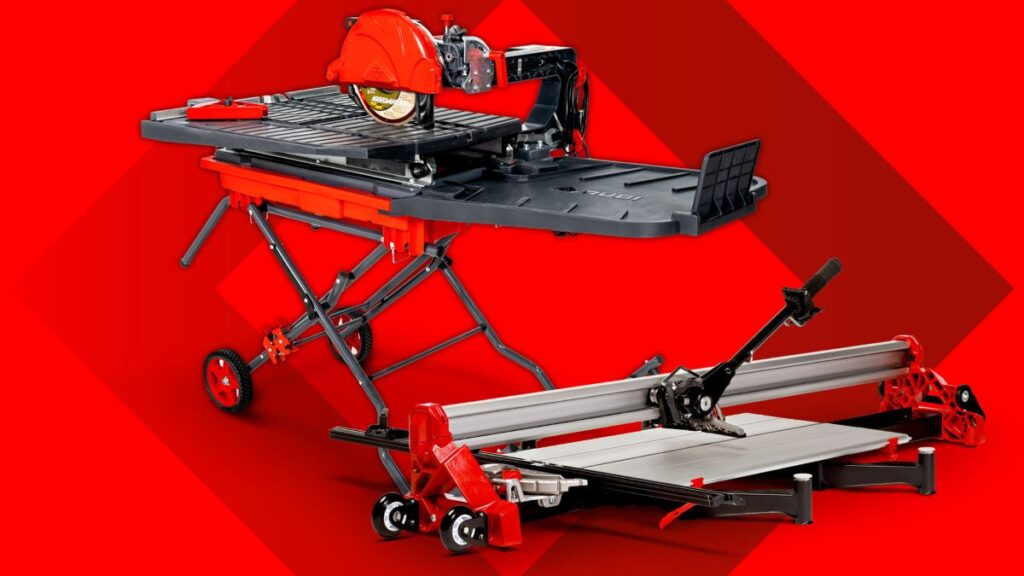
The right setup depends on whether the installer is making a few field cuts or handling full runs of repetitive cuts, exposed edges, and miter work. For demanding outdoor jobs, professional saws are often more efficient than forcing dense porcelain through a light-duty setup. For related equipment, see Manual tile cutters for porcelain tile work and Electric tile cutters for thick porcelain and outdoor cuts.

When a manual tile cutter works and when it does not
Not just any manual cutter will work on 3/4-inch thick porcelain. RUBI recommends manual cutters in the 2,645 to 3,307 lbs separation-force range for this thickness. That is why heavy-duty manual cutters can score and snap some 2cm porcelain successfully, and the TK manual cutter reaches 3,306.9 lb of breaking force with a 7/8 in cutting capacity.
Why score-and-snap performance still depends on the tile
Even with enough breaking power, score-and-snap results still depend on the material itself. Dense porcelain can carry internal tension, and thick tile does not always react the same way from one product line to another, which is why test cuts still matter before committing to full production.
Electric tile cutters for repetitive cuts, miters, and special work
Manual cutting is not always the ideal solution because miters, bevels, notches, and other special cuts usually require electric cutting. On 2cm porcelain, professional wet saws give better control for repetitive cuts, straight guided trimming, and edge-sensitive work, while rail-style solutions such as the G2 TC-125 also support dry and wet cutting with plunge and 45° miter capability.
- Manual cutter: viable for some 3/4-inch thick porcelain when separation force is high enough.
- Wet saw: preferred for repetitive cuts, exposed edges, and controlled trimming.
- Rail saw: useful when the project needs plunge cutting and 45° miters on large pieces.
- Light-duty setup: more likely to lose accuracy and finish quality on dense outdoor porcelain.
How to cut 2cm porcelain tiles with better control
Better results start before the blade touches the tile. On exterior porcelain, control comes from the combination of blade stability, proper cutting method, and enough support to keep the tile from moving during long or edge-sensitive passes. That is especially important when the project includes corners, borders, and repetitive perimeter work.
Pre-cut planning for layout, support, and marking
Before cutting, identify whether the piece will finish as an exposed edge or a hidden adjustment. That decision affects blade choice, finishing expectations, and how much tolerance the cut can accept. On thick porcelain, stable support is critical because movement during the pass increases the chance of drift and edge damage.
Straight cuts, miter cuts, and edge finishing workflow
Not every blade should be used the same way on 2cm porcelain. The continuous-rim Porcelain blade is designed for accurate miter cuts and rapid straight cutting on porcelain surfaces. By contrast, Arrowhead blades are optimized for fast straight cuts and are explicitly not recommended for miters, so they belong in production straight-cut work rather than finish-critical edge work.
Why wet cutting should be the default recommendation
For 3/4-inch thick porcelain, wet cutting should be the default recommendation because water prevents overheating and helps remove dust generated during the cut. Wet cutting blades are typically used with electric tile saws that cool the blade continuously and provide high-quality finishes, while dry cutting is not recommended for long cuts under continuous pressure or full-depth single-pass cuts.
- Use wet cutting first when the job includes long runs, exposed edges, or dense 2cm porcelain.
- Choose a thicker blade body when blade stability and cut cleanliness matter most on outdoor pavers.
- Use a continuous-rim porcelain blade for miter work instead of a straight-cut-only option.
- Add reinforcing flanges for miters whenever the saw accepts them to improve blade stability on the edge.
Common mistakes to avoid on the jobsite
Most problems with 2cm porcelain start with a mismatch between material demand and tool capability. Dense porcelain is less forgiving than many standard ceramic products, so weak setups show up quickly through chipping, wandering cuts, and slower production. On outdoor jobs, those errors multiply fast because exposed edges and repetitive cuts leave less room for correction.
Forcing thick porcelain through a light-duty setup
One of the most common mistakes is treating 3/4-inch thick porcelain like regular interior tile and forcing it through a light-duty cutter or a low-stability blade. That usually leads to more vibration, rougher edges, and lower consistency across repetitive cuts.
Using the wrong blade for the finish required
Another mistake is choosing a blade for speed only when the job really requires edge quality or stable miters. The catalog clearly separates straight-cut-focused blade designs from continuous-rim porcelain options that are suitable for miter work, so the finish requirement should drive the choice, not just feed rate.
Assuming every thick porcelain can be snapped the same way
High separation force helps, but it does not erase material variability or internal tension. Even in the right force range, thick porcelain can respond differently depending on the product, so sample cuts remain the practical way to confirm whether score-and-snap is efficient for that specific tile.
Blade care and cutter maintenance for consistent performance
High-performance cutting on 2cm porcelain depends on maintenance as much as initial setup. Once the blade starts to overheat, drift, or lose sharpness, both finish quality and jobsite efficiency drop fast. Keeping the saw aligned and the cutting system properly cooled matters even more on dense outdoor materials.
Cleaning, cooling, and checking blade condition
Blade temperature directly affects cut consistency and tool life. Wet cutting helps control both by cooling the blade continuously, which is one reason it remains the preferred approach for thick porcelain and finish-sensitive work.
Why thicker blades outperform lighter options on outdoor porcelain
For outdoor pavers, a thicker blade body gives better stability, reduces deflection, and helps keep the cut cleaner on dense material. That makes it the stronger recommendation when the job includes long straight runs, exposed edges, and repetitive perimeter cuts where consistency matters most.
Where VIP fits in the workflow
A VIP-style blade can still give a good straight-cut result on hard porcelain, but it is not the first choice when the job includes miter work or when the priority is maximum stability on demanding outdoor runs. For mitering, the better approach is a wet setup, a blade designed for that finish, and reinforcing flanges when the machine accepts them.For U.S. tile pros, the best answer is not one tool but a system decision that matches blade, saw, and method to 3/4-inch thick porcelain on real outdoor jobs. That is why the most reliable workflow usually starts with wet cutting, a thicker blade for stability, and a manual cutter only when the material proves compatible with score-and-snap performance in the field.

Post a comment