
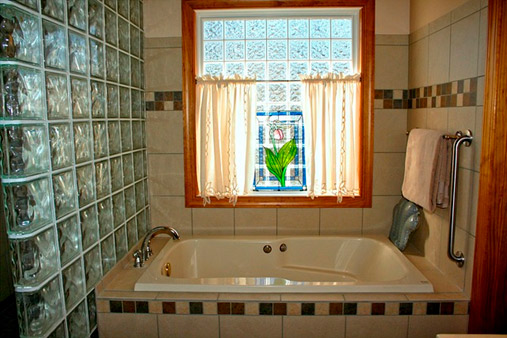
While tiling around a window can be tough, if you do it right you can get an entire window finished in just four hours. Tiling around a window is one of the best ways to add a unique and beautiful feature to your home. It’ll frame your windows and give a depth to any room that makes it feel brighter and more spacious, so it’s definitely a worthwhile tile installation.
But some people dread the idea of tiling around a window because they believe it is a tough job. While there is a certain amount of effort required for tile installation, if you follow some simple steps you can achieve your perfect look for an affordable price.
For the best tips and tricks to start you off on your window tiling journey keep reading below.

Measure the Length and Width of Your Window
This is the first step you should take before even purchasing tiles. Knowing how long and wide your window is will help you decide how much material you need.
What you need will depend on the size of the tiles you are going for. You’ll also need to measure the space surrounding the window to make sure your tiles will fit.
As well as measuring your window, you need to measure the size of your tiles. Don’t panic if you can’t find tiles that are the right size. You can sand them down to make sure they fit how you would like.
Select the Best Material
You want a tile that is strong enough to hold up against being placed around a window. Tiles are usually quite durable as long as they are placed correctly. The range of designs and colors available to you will depend on your choice of tile.
There are a few different types of tiles you can choose from. Each has its own advantages and disadvantages.
Granite Tile
Granite is an excellent material to go with. It’s very durable and will stand up well against damage and weathering.
If you’re tiling the windows in your bathroom, you should know that granite tile is very water resistant. Water won’t be able to slip through any cracks, which means you don’t have to worry about fluid building up behind your tiles.
However, granite tile can weigh quite a lot. This means you must make sure you have the right kind of agent binding your granite tiles to your window trim.
Ceramic Tile
Ceramic tiles are another great option for tiling your window. They are waterproof and strong, making them a perfect fit for around your window.
Ceramic tiles also offer a wide selection of designs. This gives you the ultimate freedom of choice and lets you get creative with whatever pattern you want.
Glass Tile
Glass tile is one of the best options available to surround your window. Because they are translucent, they can provide a nice flow from window to wall that lets in the most sunlight possible.
However, as you might have guessed, glass tiles are very breakable. They often need to be installed by a professional to avoid cracks or damage throughout the tiling process.
Glass tile can also be more expensive to buy. It’s important to work this into your budget if you choose to go with a glass tile.

Porcelain Tile
Porcelain tiles are a great choice for anyone who wants to keep their home as neat as possible. They are liquid and stain resistant, so keeping them clean is easy.
Porcelain tiles also tend to last for a long time as long as they are well cared for.
However, they are also quite heavy tiles. Sometimes professional installation is required to get them in a precise pattern that will hold up against the weight of these tiles.
Tile Your Window in the Most Efficient Order
You will start with tile cutting the bottom of your window. Make sure you have a tool called a wet tile cutter on hand. These are used to cut tiles and will be ideal for the corners of your window.
After this initial step, start tiling the sides. This is generally straightforward to do. Begin at the base of one side and work your way up, repeating on the opposite side when you’re done.
Tile the top in the same way you tiled the bottom, marking and cutting as you need.
If you aren’t using a trim, make sure to use the best kind of primer to give your window the most support. If you have decided to use a trim, it is better to have your tiles already lined up so that you can determine the best trim fit.
Take Care of Cracks or Bumps Before They Become a Problem
Cracks and bumps can ruin the finished look of a tiled window. This includes cracks in your tiles and bumps in the mortar.
To avoid cracks in your tiles, ensure you always buy high-quality material. Check each tile before you place it on the mortar.
If you do notice a crack, see if there is a way to fill it without taking away from the beauty of your tile. Make use of a sander to buff away smaller cracks. But only do this if it will blend seamlessly with the color of your chosen tile.
To ensure your mortar has a smooth finish, you simply need the right tools. You’ll want to invest in a tool called a brick jointer. The name of this tool may not be familiar, but you’ve likely seen one before.
Brick jointers are simply long tools with a handle and a flat edge. You hold the handle and use the flat edge to smooth the mortar on your wall down. This gets rid of any surface bubbles or bumps, leaving you with a smooth finish.

Make Sure Your Pattern Is Even
Ensuring you start with an even tiling pattern means you’ll end with one too. It can be a tricky task to get the right pattern, especially for those new to tiling windows. But there are plenty of ways to do this successfully.
One of the best ways to guarantee an even pattern is to draw out your layout before getting started. This works almost like a blueprint that you follow to make sure your desired pattern is achieved. Make sure your idea is feasible and won’t go over your budget.
You can discuss your tiling pattern ideas with an interior designer or even someone working in a tile store. They’ll provide helpful suggestions to make sure you get the design you want.
Always take your time when you begin setting your tiles in place. Check them all carefully as you apply them to ensure they are where you want them to be. Remember, it’s easier to remove one wayward tile during the process than it is to remove all of them at the end.
You should also make sure you fit any corner tiles in tightly. Corner tiles are often the first ones to experience structural withering, such as chipping or falling away. If you fit them tightly enough, they should stand up to all sorts of damage and last for a long time.
Tiling Around a Window Is a Great Way to Customize Your Home
Once you get started tiling around a window, you’ll see just how easy the process is if you follow the above steps. As long as you take your time and ensure you’ve don’t the right research getting your window tiles the way you want them will be a breeze.
A tiled window is one of the best features to add to your home. Not a lot of people brave the effort needed to do it, so you’ll have a stunning and unique window that sets itself apart.
If you need more information on window tiling and the best types of tile, make sure to check out this web page. You can find all the information you need about how to get started with window tiles. You can also contact the customer service team if you have any questions.

Post a comment