
Tiling corners with trim is a big part of a completed tiling project. But what are the steps you’ll need to take to finish your tile installation with style and safety?
Today we’re diving into the process, from picking your trim material, to installation, to sealing.
You’ll not only solve the puzzle of those tricky corners, but you’ll also make sure your tiled spaces are both stunning and durable!

Overview of Tile Trim Options
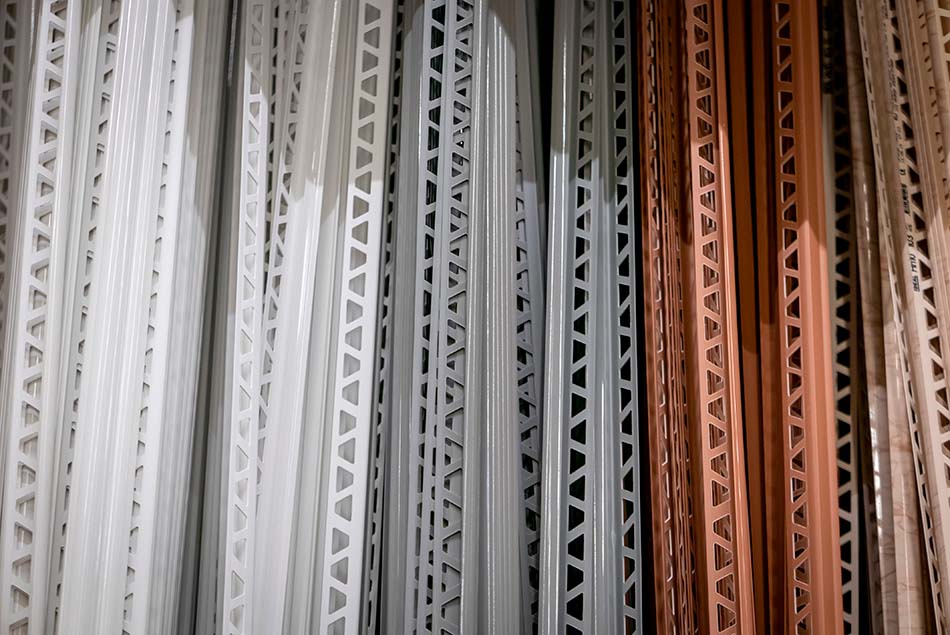
When it comes to tiling corners with trim, each material and style serves both a protective role and adds a decorative touch. Ceramic, metal, and PVC are the most common materials used for trim.
Ceramic trim matches well with ceramic tiles, offering a seamless look. Metal trim, including aluminum and stainless steel, brings a sleek and modern edge to your space. It’s also very durable.
PVC trim is a cost-effective and versatile choice. It comes in various colors and is easy to work with, making it great for DIY projects.
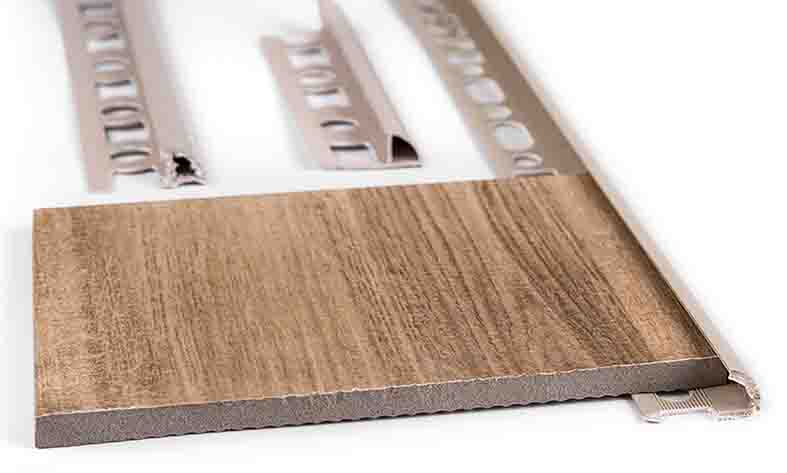
The style and shape of the trim also play a big part in the final look of your tiled area. Some trims are rounded to create a smooth transition between tiles, while others have a square or angled edge for a sharper, more defined look.
The right choice depends on the design you’re aiming for and the level of protection you need for your corners.
Your tile thickness of your tile grout line width are important too. They affect how your trim will fit and look in the end. Picking the right trim can turn those tricky corners into the highlight of your room’s design.
Selecting the Right Trim and Finish
The material and style of trim should match the design of your tiles and the overall feel of the room. For a sleek, modern kitchen, metal trim might be your best bet. It adds a clean, sharp edge to your tiles and can handle the hustle and bustle of kitchen life.
If you’re tiling a cozy bathroom, ceramic trim could be a better choice. It blends smoothly with ceramic tiles, creating a seamless look.
When you’re picking out trim, think about the colors and patterns in your space. The right trim can either complement your tiles or become a statement piece on its own.
If your room has a lot of color, you might choose a simple, single-color trim to keep things balanced. On the other hand, a bold trim can add a splash of personality to a more neutral space.
The finish of the trim also matters. A glossy finish can reflect light and make a room feel brighter and more open. A matte finish, however, can offer a softer, more understated look.
Areas that see a lot of water, like showers and backsplashes, need trim that can handle moisture. Metal and PVC trims are great for these spots because they resist water damage.
In places with lots of foot traffic, like hallways, durability is key. Metal trims are tough and can take a lot of wear and tear.
Lastly, keep in mind the thickness of your tiles and the angles of your corners. These details affect how the trim fits and looks once it’s installed.

Preparing for Installation
The first thing you’ll need to do is measure the areas where you’ll be adding trim. Use a tape measure to get the length of each corner where the trim will go.
Next, gather all the tools and materials you’ll need for the installation. This list usually includes tile adhesive and a notched trowel. You’ll also need a saw to cut the trim, and a level to make sure everything is straight.
Depending on your trim material, you might need a specific type of saw. For example, cutting metal trim requires a different saw blade than cutting ceramic or PVC trim.
Once you have your measurements and materials ready, mark your trim pieces where you need to cut them. A pencil works well for this because you can erase the marks if you need to adjust them.
When marking your trim, consider any unique angles or curves in your space. These might require special cuts so the trim fits just right.
Cutting and Fitting Trim Pieces
Once you’ve prepared and have all your measurements, it’s time to start cutting. Each type of trim material requires a different approach.
For instance, ceramic trim can be cut using a tile cutter or a wet saw, which allows for precise cuts without chipping the material. Metal trim, on the other hand, may require a hacksaw or a special metal cutting blade to ensure a clean cut.
PVC trim is the easiest to work with. A simple utility knife or fine-tooth saw can do the job well.
When cutting your trim, always wear safety gear like goggles and gloves. Make your marks clearly on the trim where you need to cut, using a pencil for visibility. It’s important to cut slowly and carefully to avoid mistakes that can waste materials.
Next Steps
After cutting, it’s time to fit your trim pieces around the corners. This step is crucial for making sure your trim not only looks good but also functions to protect the edges of your tile.
You may need to make slight adjustments to your cuts to get a perfect fit, especially if your walls are not perfectly straight or if the corner angles are not exactly 90 degrees.
Before applying any adhesive, place the trim pieces in their intended spots to check their fit. This dry fitting process helps you visualize the final look and make any necessary adjustments without the pressure of the adhesive setting too quickly.
Sometimes you might need to sand the edges of the trim slightly for a smoother fit or trim a tiny bit more off for a perfect match.
Installing Trim in Tiled Corners
The first step is to prepare the surface. Make sure the area where you’re going to install the trim is clean and free of dust or debris. Any dirt or moisture can prevent the adhesive from bonding properly.
Next, choose the right adhesive for your trim material. There are different adhesives available for ceramic, metal, and PVC trims.
Applying the adhesive correctly is key to a secure fit. If you’re working with a tile adhesive, use a notched trowel to spread it evenly on the back of the trim. These notches help create suction when the trim is pressed against the wall, ensuring a strong bond.
Carefully place the trim in the desired position on the wall. Press it firmly to make sure it adheres well.
Next Steps
Using a level, check that the trim is straight and adjust as necessary before the adhesive sets. This might seem like a small detail, but even a slight angle can throw off the entire look of your project.
For metal trims, you might also need to use nails or screws to secure them in place. If this is the case, drill holes into the trim at marked intervals.
Make sure to use fasteners that are suitable for the environment. For example, in wet areas like bathrooms, use stainless steel screws to avoid rust.
Once your trim is in place, allow the adhesive to dry completely. This drying time can vary based on the type of adhesive you use, so refer to the product instructions for guidance. Rushing this process can lead to trim that’s not securely attached, which could cause problems later on.
Finishing and Sealing Tiled Corners with Trim
After installing the trim, the next step is finishing and sealing the tiled corners.
Choosing the right type of sealant is important. In areas exposed to water, using a waterproof caulk or grout is essential to prevent water from seeping behind the tiles and trim. This can cause mold and damage over time.
For other areas, a standard tile grout might be sufficient. It’s available in various colors, so you can match it to your tiles or trim, or choose a contrasting color to add an accent to your design.
When applying grout or caulk, use a caulking gun for a smooth, even application. Carefully fill the gap between the tile and trim, smoothing the sealant with a wet finger or a caulking tool to ensure it’s evenly distributed.
Wipe away any excess with a damp cloth before it dries to keep your work area clean and to avoid any bumps or lumps in the finish.
Let the sealant dry completely according to the manufacturer’s instructions. This drying time is crucial for creating a waterproof barrier that protects your tiled corners.
Once dry, you might notice a slight difference in color or texture, but this is normal and adds to the overall look of your project.
Tiling Corners with Trim Mastery
By carefully selecting, preparing, and installing tiling corners with trim, you can significantly enhance the durability and aesthetic appeal of your tiled spaces.
RUBI is a leading manufacturer of equipment and tools for laying tiles and construction. Let us help you with information about all your tiling needs!

Post a comment