
Knowing how to tile a kitchen wall can significantly enhance the aesthetics and functionality of your space. Beyond just adding style, tiles also provide a durable and easy-to-clean surface that withstands the demands of a busy kitchen environment. However, to achieve a professional finish, there are careful steps that you should take. Take the time to prepare properly, select your tiles carefully, and ensure a precise installation. These are all crucial steps. In this guide, we’ll walk you through each stage of the process, from preparation to care and maintenance.

Preparing the Kitchen Wall:
Before you begin tiling, it’s essential to prepare the wall surface properly. This involves removing any existing wall coverings such as wallpaper or paint.
It’s important to prepare the wall properly and remove these coverings so that you ensure a strong and successful bond between the tile, adhesive, and the wall itself.
Use a scraper to peel away wallpaper or paint, you can also use a steamer to help with this process. Make sure that you clean the surface of the wall with a brush and a damp cloth so that no debris or dust remains.
Additionally, inspect the wall for any signs of moisture or mould. Addressing these issues before tiling is crucial to prevent future damage to your tiles. If you detect moisture or mould, consult a professional to identify and resolve the underlying problem. Leaving the wall with moisture or mould on it can cause a tiling failure, resulting in your tiles falling off the wall, which can potentially hurt someone.
Selecting Kitchen Wall Tiles:
When choosing tiles for your kitchen wall, consider both aesthetic and practical factors. Try selecting tiles that complement the overall design scheme of your kitchen while also being durable and easy to clean. Ceramic and porcelain tiles are popular choices for kitchen walls due to their versatility, resilience, and easy-to-clean properties.
Pay attention to tile placement and spacing, as this can affect the type of tiles that you want to use. Certain tiles lend themselves to specific patterns, while other tiles are best to use in a simplistic format.
Lastly, consider your starting points carefully. This can be a difficult part of the process, but it is vital for a neat and aesthetic finish.
Not every room is symmetrical, and because of this you will need to start by choosing which part of the room you want to appear the most symmetrical. This is your focal point, and also your starting point.
Learning how to tile a kitchen wall this way will ensure that the tiles align neatly and symmetrically around the room and along the wall.
Cutting Kitching Wall Tiles

As we mentioned above, not every room is perfectly symmetrical. This means that you will often need to make some adjustments to your tiles by cutting them. The most common ways people do this is either with a manual tile cutter, a wet saw, or an angle grinder,
Manual Tile Cutters
Here at RUBI we have many manual tile cutters for you to choose from. This means that we have something for everyone, from beginner novices, to seasoned professionals. You can view our extensive range here.
Tile Saws
Some tiles, due to how that have been made and processed, can be difficult to cut on manual tile cutters. This is where wet tile saws come in. They come in a range of sizes, from small table top saws, to larger standing saws. These can be a better option for some professionals who deal with larger tile formats, thicker tiles, and tiles that are hard to cut on a manual tile cutter.
One downside is that they do take up more space than a manual tile cutter, and they can take longer to set up. They benefit though, is that you will always be getting the best finish to the edge of your tile.
Angle Grinder Blades
An angle grinder is the middle ground between tile saws and manual tile cutters. When it comes to knowing how to tile a kitchen wall, an angle grinder could be a good choice. They allow for intricate cuts to be made, such as around a socket, which could be a common cut to make in this area of the home.

Make sure that you choose the correct angle grinder blade before you get started. At RUBI we have a vast range, which you can view here, but they key thing to note is the size of the blade itself. Typically, angle grinders come in two sizes: 115 and 125 size (or 4.5inch and 5 inch).
Now that you know which tool is best for you for cutting your tiles, it’s time to learn how to install them.

Installation Process:
- Prepare Adhesive: Mix tile adhesive according to the manufacturer’s instructions. Use a paddle mixer such as our new RUBIMIX E-10 Energy CAS Electric Mixer.
- Cut Your Tiles: Make any necessary cuts to the tiles by using whichever tool you have chosen. Remember, measure twice, cut once!
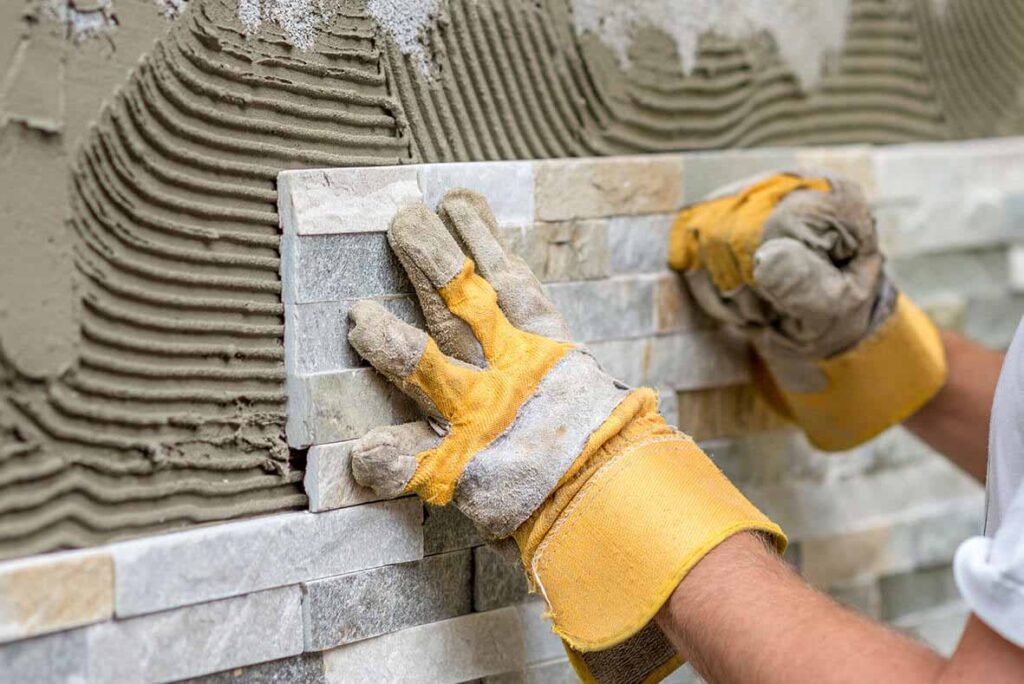
- Spread Adhesive: Using a notched trowel, apply the adhesive evenly onto the wall in small sections. Work from the bottom up, and the centre out, ensuring full coverage and maintaining consistent thickness.
- Press Tiles into Place: Carefully press each tile into the adhesive, using spacers to maintain uniform spacing between tiles. Use a level to ensure tiles are straight and even, levelling clips can also help with this.
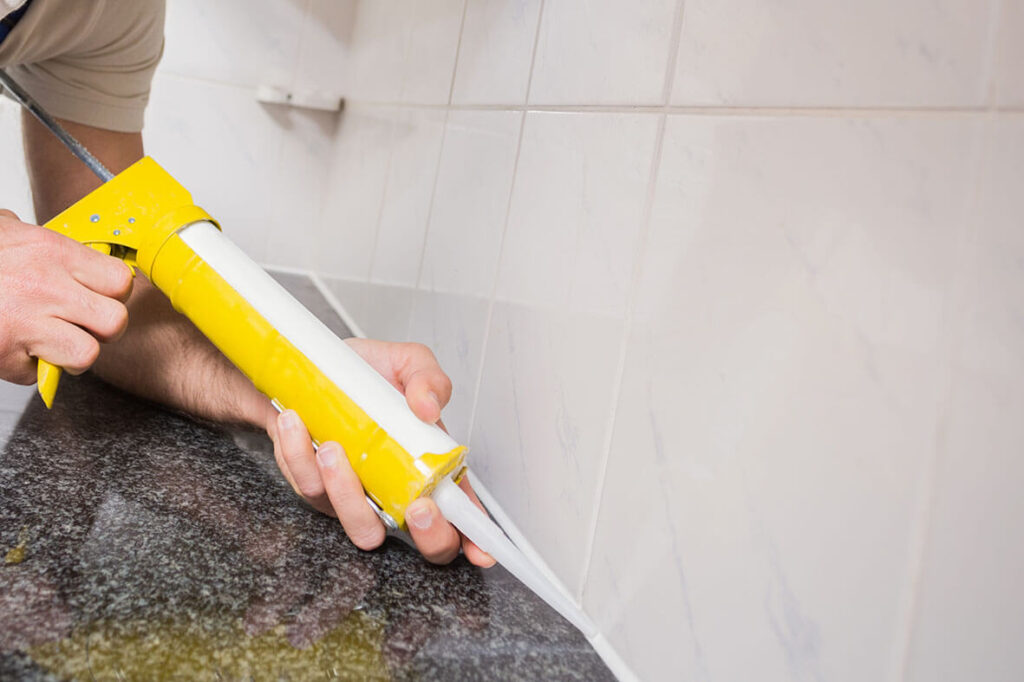
- Sealing edges: Seal cut edges with a tile sealant to prevent moisture infiltration.
Grouting Process:
- Select Grout Colour: Choose a grout colour that complements your tile selection. Consider factors such as contrast, ease of maintenance, and overall aesthetic impact. There are also different types of grouts available. Epoxy grout is a popular choice at the minute due to its easy to clean aspects.
- Mix Grout: Mix grout powder with water according to the manufacturer’s instructions until you achieve a smooth, lump-free consistency.
- Apply Grout: Using a grout float, apply the grout diagonally across the tiles, ensuring that all joints are filled completely. Work in small sections to prevent the grout from drying too quickly.
- Clean Excess Grout: Once the grout begins to set, use a damp sponge to gently wipe away excess grout from the tile surface. Rinse the sponge frequently to prevent smearing.
Caring for Your Tiled Wall:
After completing the tiling process, allow the adhesive and grout to cure fully. Follow the manufacturer’s recommendations for drying times.
Regular maintenance is essential to preserve the appearance and longevity of your tiled wall. Clean the surface regularly with a mild detergent and water solution to remove dirt and grease buildup. Avoid using abrasive cleaners or harsh chemicals, as these can damage the tiles and grout.
Inspect the grout periodically for signs of wear or damage, such as cracking or discoloration. Repair any damaged grout promptly to prevent moisture infiltration and tile movement.
If you do find mould on your tiles or grout, you can clean this away by using a mould cleaner. In places where there is a lot of moisture in the air, such as in bathrooms and kitchens, mould can develop on tiles, grout, and silicone. Lithofin Mildew Away is a ready to use cleaner designed for targeting mould in these places.
In conclusion, knowing how to tile a kitchen wall is a rewarding home improvement project that can enhance both the beauty and functionality of your space. By following proper preparation techniques, selecting suitable tiles, and executing precise installation and grouting methods, you can achieve a professional-quality finish that stands the test of time. With regular care and maintenance, your newly tiled kitchen wall will continue to impress for years to come.

Post a comment