
Are you considering adding tiles to your bathroom? Smart thinking. When added to your kitchen or bathroom, tile can drastically increase your home’s value. If you install tile flooring yourself, your ROI can surpass 100%. How do you tile inside corners, though? Let’s explore how to tile inside corners for your next tile installation.

WHAT ARE THE INSIDE CORNERS?
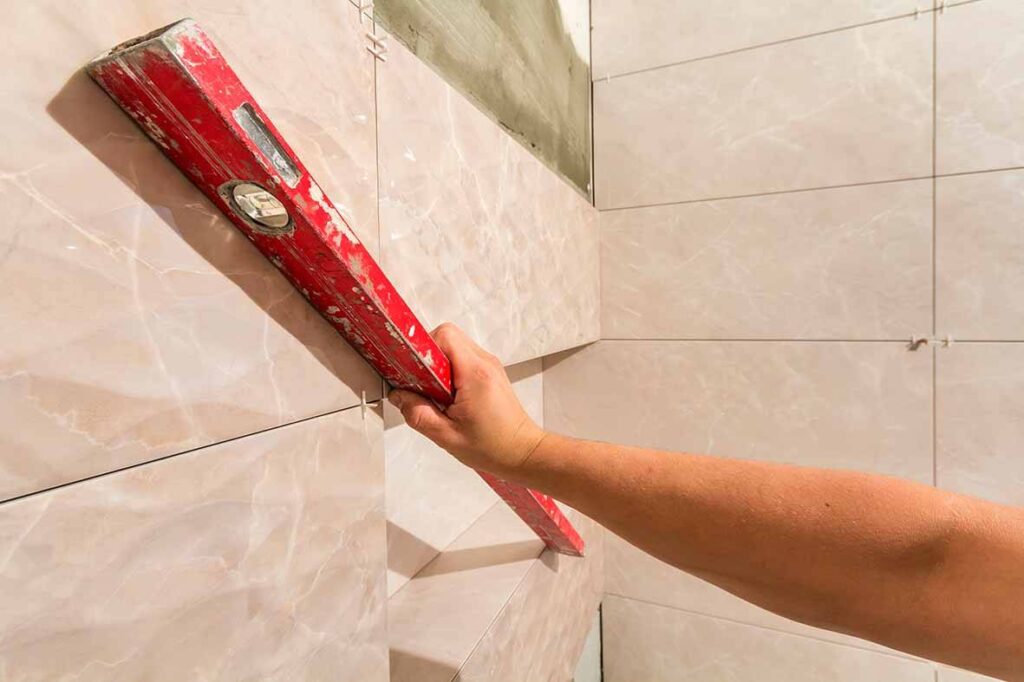
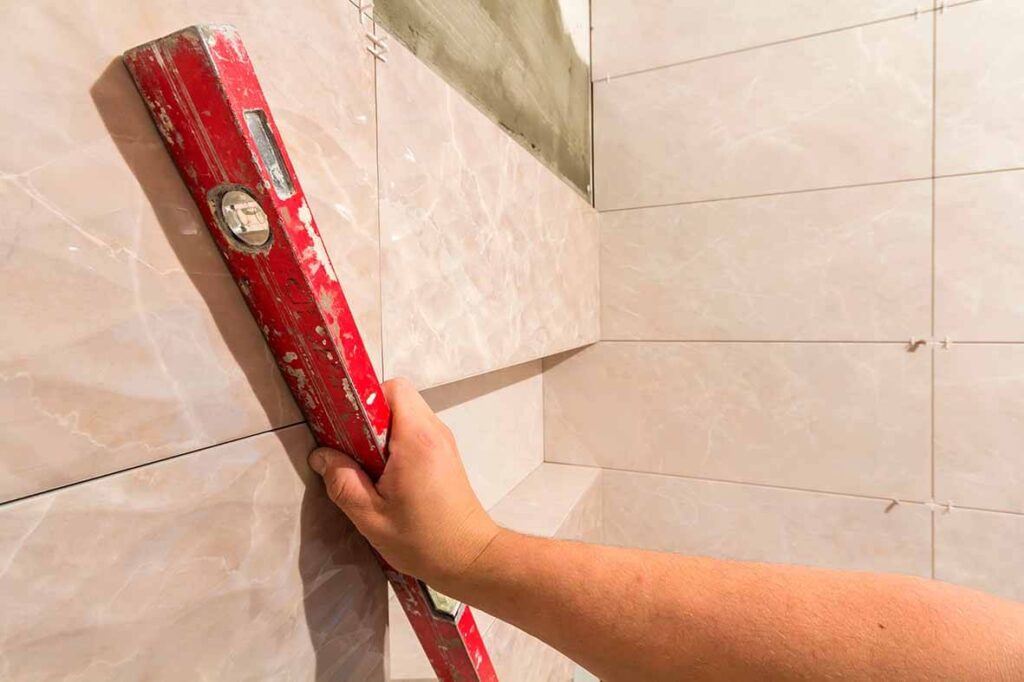
An inside corner is a place where two walls meet.
When you tile your floor, you should start from the centre of the room and move outward. However, the tiles might not fit perfectly, which means you will need to cut them.
Cutting tiles for inside corners can be challenging, though. In addition, adjacent walls can move against one another, and this can crack your grout lines long-term.
This is why it’s critical to understand how to install tiles in corners correctly. Following tiling best practices can help you add a lasting, professional touch to your bathroom.
REMOVE OLD FLOORING AND CUT THE NEW TILE
If you’re removing old flooring, like a wood floor, you can use a circular saw to seamlessly cut into your floor. A chisel can be used to remove flooring from tight grooves, and a clawhammer can be handy for ripping up floor panels next to your walls.
Use gloves and safety glasses to protect yourself during this step.
Once your old floor is gone, you can begin laying your new tile by applying adhesive to the back sides and setting the tiles in place. You’ll want to use grout and spacers during this process (more on this later). Start from the middle of the floor and move toward the edges.
To cut tiles for your inside corners, you can use either a manual tile cutter or a wet saw, depending on the type of tile you are using. For ceramics, a manual tile cutter is sufficient, but for tougher materials such as natural stone you will need to use a saw. A grinder and diamond blade is also a good bit of kit to keep for any tricky cuts that you may need to make.
When using a saw, be sure to dry each tile’s back side once you have cut it. This will keep water from going through the tile’s adhesive bond or your inside wall (more on adhesive next).
HOW TO TILE INSIDE CORNERS
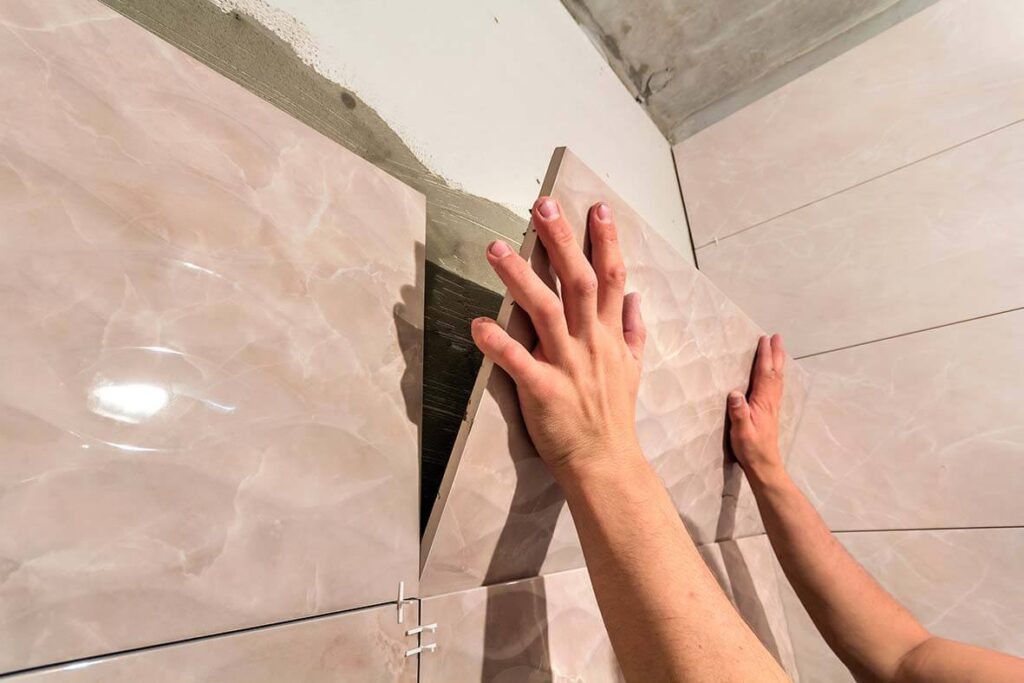
Place glue in your inside corner with a trowel. Apply this adhesive in a relatively thin layer. The layer of adhesive still needs to be large enough that you can see your trowel lines, though.
Then, apply a similar layer of adhesive to the back side of the tile you want to place in an inside corner. Next, position the cut tile in the corner. Make sure the edge you cut with the saw or cutting board points to your interior corner.
Once you’ve applied each adhesive layer, clean your trowel using a damp cloth or a sponge. Then, wipe the trowel off.
After you have installed all of your corner tiles, allow the glue to dry for about one hour. Then, tile the rest of the floor.
USING GROUT
Knowing where to use grout is an important part of knowing how to tile inside corners. If you are installing a natural stone tile floor or wall, place grout between the tiles and put a quality grout sealer on your grout lines. This will keep your grout from sticking to your tiles.
Your grout lines should be 1/16-inch to 3/16-inch wide, depending on your tile size and the kind of grout you’re using. Follow the grout manufacturer’s instructions to create the perfect grout line size.
If your grout lines are too small, this may cause issues with installing the tiles. You may also face tile contraction and expansion issues long-term.
USING TILE SPACERS
When applying grout, you’ll need to use tile spacers. These are small plastic pieces you must place between your tiles to create consistent and constant spacing between the tiles.
These spacers help with positioning and will also keep your tiles from moving when the glue is wet. The gap these spacers create should be filled with grout to give the floor surface a symmetrical, attractive finish.
APPLYING THE GROUT
To apply the grout, spread it on your tiles, and press the grout into every tile line. During this process, you’ll need to wipe any remaining grout with a wet sponge. Then, scrape any residue off the floor’s surface.
You don’t have to grout your corner lines. Leave them open.
Grouting the areas where adjoining walls come together is a common mistake. If you do this, the grout may crack over time. The grout might also nudge a tile out of place.
Also, note that each corner should have at least a 0.25-inch space.
Once you’re finished with the grouting process, remove your tile spacers. Then, wait for a couple of days. This will give the grout plenty of time to dry.

FILLING IN THE CORNER GAPS
Once your grout is dry, you can apply caulk to your un-grouted corners. Applying caulk is recommended for mosaic and porcelain tiles, as it is cost-effective and easy.
Caulk is important because it forms a flexible, waterproof seal. The caulk will keep water from penetrating your walls.
Caulk should be used in a shower corner and in any area where tiles meet each other. It should also be used where tiles meet other hard surfaces, like a seat, shelf, door, fixture, window, wall, or tub edge.
Caulking is especially important if you’re tiling a kitchen countertop or backsplash. You don’t water to start seeping through your wall fixtures or fittings.
Make sure a one-eighth-inch space is between each tile before you start the caulking process. You may use acrylic-latex or silicone caulk.
The acrylic-latex option is the best choice if you’re looking for an inexpensive caulk. In addition, it will easily adhere to wood and a variety of other materials, both nonporous and porous. You may also paint over this type of caulk.
Acrylic caulk is simple to apply and clean as well. Simply use water and soap to keep it looking pristine.
Silicone caulk is more expensive than its acrylic-latex counterpart. However, it offers flexibility and ultraviolet protection. It also resists water more effectively.
Silicone can hold up in extreme climate conditions and temperatures as well. It is additionally the best choice if the gaps they are filling in may contract and expand over time.
After applying the caulk, let the caulk sit for 24 hours so that it sets in well.
CAULKING AND GROUTING CONSIDERATIONS
Always use caulk and grout products that are the same hue as your tiles so that the caulk and grout blend seamlessly.
Also, note that if you’re installing a non-porous or synthetic tile floor or wall, no grout or grout sealer is needed.
SEAL YOUR EDGES
After you’ve applied caulk to your un-grouted corners, you can seal the edges using a sealant.
You may use a cartridge gun to apply the sealant. Attach the sealant’s nozzle to the gun, and cut the sealant’s tip off.
Begin from an end of your tiled floor and move toward the opposite end, applying a straight sealant line as you go. Keep your cartridge gun steady during this process. In addition, move the gun at a consistent speed.
Then, smooth out any sealant irregularities using wet fingers. Be gentle, though, as you don’t want to wipe your newly applied sealant from your tiles’ surface.
Let the sealant dry for a day.
ADDITIONAL METHODS FOR FILLING THE EDGES
Caulking isn’t the only method available for filling in your corner gaps after you’ve applied tiles to your inside corners. Let’s go over a few other options.
BULLNOSE PARTS
Tiles often come with bullnose parts that match different tile sizes. If you have them, you may use these to finish your corners. They will help your tiled area look smooth and refined.
TILE MOLDING
If your tiles don’t have bullnose parts, you can mold your tiles instead.
Tile molding is available in your local home improvement store and is made of natural stone or porcelain. It’s a thin material with an attractive design. It’s the perfect solution for giving your wall edges a finished appearance.
Tiles typically come with tile molding. However, you may choose a molding option that better matches your tile. Alternatively, you can choose a contrasting molding colour.
Either way, when applied properly, tile molding can give your tiles a cohesively striking and clean look.
ALUMINIUM EDGE OPTION
Yet another option for filling in your corner gaps is to use aluminium edges.
These decorative finishing pieces come in various styles and finishes. They are versatile, working for both outdoor and indoor walls. They are also cost-effective and simple to install.
Use aluminium edges to give your space a clean and contemporary look. Choose a colour that matches your wall well.
TILING A SHOWER NICHE
As you tile your shower area, you may want to create a niche — a recessed wall shelf for storing items like shampoo and soap.
To tile the niche, you’ll first need to create a sill using the main tile. Put thin-set mortar on the bottom of your sill tile. Then attach the bottom of the sill to the niche, sloping it 1/16 inch toward your shower or tub to prevent water collection and mildew issues.
Afterward, put thin-set mortar on your back wall, and embed your tiles in the back wall’s thin-set mortar. Use grout between the tile lines. Horseshoe shims can be used to align your grout joints and make them look uniform.
HOW WE CAN HELP WITH YOUR TILE PROJECT
If you’re wondering how to tile inside corners, you’ll first want to cut your tiles to fit the corners and apply adhesive to the corners and the tiles’ back sides.
After laying the tiles, apply grout between the tile lines if you’re working with natural stone. Don’t put grout in the corners, though. Instead, fill in the corners with caulk or another finishing piece, like tile molding.
At Rubi, we take pride in offering a wide range of high-quality tools for construction/remodelling projects, including tile installation projects. For instance, we offer worktables, trowels, and spacers. Place your order today!

Post a comment