When learning how to tile, various considerations come into play. One of these considerations involves choosing the ideal format and design to complement the room. After deciding on the type of tile, such as rectangular tiles, a pivotal question often arises: how should you go about installing them? Investing in high-quality ceramics and cutting-edge adhesives makes little sense if the installation process compromises overall aesthetics. That’s why, in this article, we’ll explore the four most prevalent techniques for laying rectangular tiles to ensure a visually appealing and durable result.


HOW TO LAY RECTANGULAR TILES
When using square tiles, the process is usually straightforward. They are generally laid with a continuous joint (i.e. forming a cross in the joint). The only thing we have to decide is whether to lay them straight or at a 45 degree angle.
With rectangular tiles it is very different. There are quite a few more options, some of which are inherited from the installation of wood cladding.
Let’s take a look at the most common rectangular tile installation techniques.
RECTANGULAR TILE INSTALLATION: CONTINUOUS JOINT METHOD
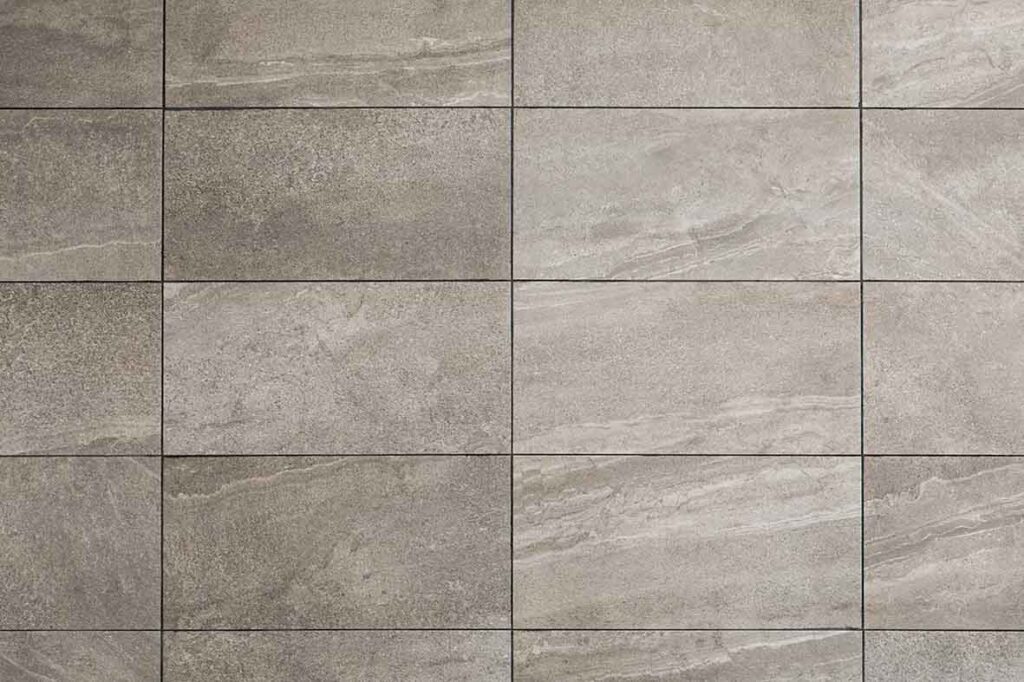
If you are wondering how to lay elongated tiles, this technique is the simplest. It consists of doing precisely what you would do with square tiles. All four corners will form a cross and you can use a spacer to achieve a perfect installation.
This type of installation is suitable for tiles with a uniform color or those featuring an imitation mosaic surface structure. In the latter case, adjusting the joint relative to adjacent tiles wouldn’t be practical.
The continuous joint method is typically used with wide rectangular tiles, often placed horizontally. Nevertheless, a vertical wall installation can create a visually appealing effect, giving the illusion of added height to the wall. For smaller tiles, this approach can give a vintage look.
INSTALLING RECTANGULAR TILES USING A MATCHING JOINT
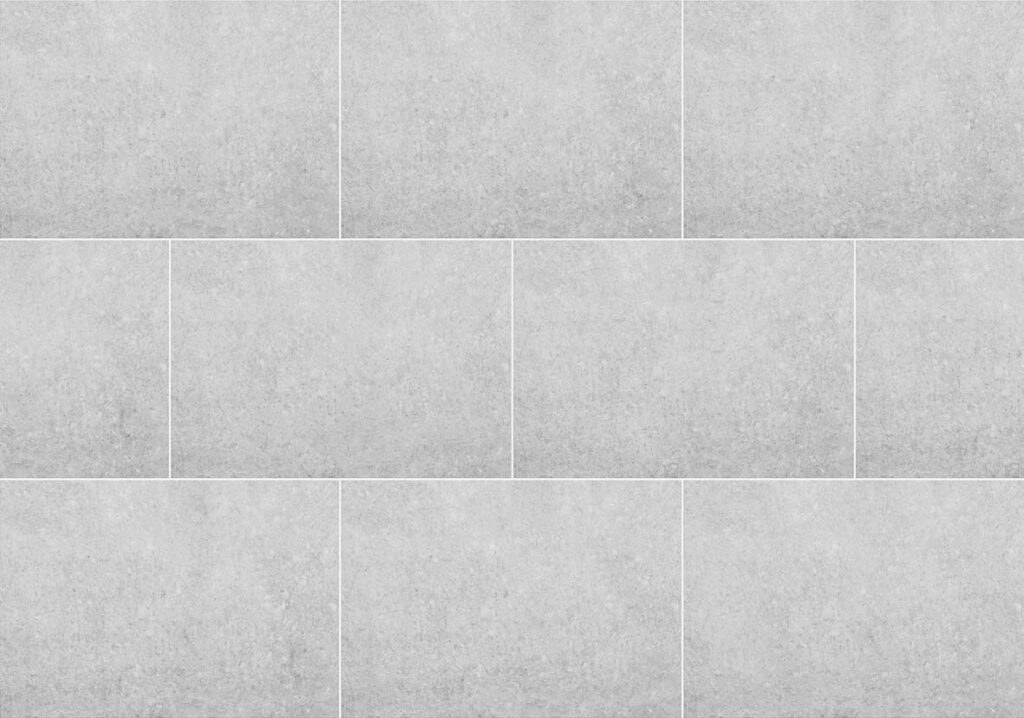
This type of installation consists of moving the joint so that it coincides exactly with the middle of the surrounding tiles. In this style, the joints form the shape of a “T”.
Fortunately, “T” spacers are available so your joints will always have an perfect finish. This technique requires more work than the continuous joint tile installation. You will have to measure very carefully to place the joint right in the middle of the previously laid tiles.

This technique is used for laying small tiles, often referred to as ‘metro’ tiles. Named after their frequent use in iconic underground stations like those in New York, London, or Paris, this method adds a touch of urban chic to your tile installation.
The offset joint technique includes a type known as the “staggered joint,” where the joint isn’t aligned with the center of the upper and lower tiles. Instead, it’s intentionally shifted to one side, creating an effect reminiscent of the way wooden cladding is installed. This is a good method if you are considering how to lay rectangular imitation wood tiles.
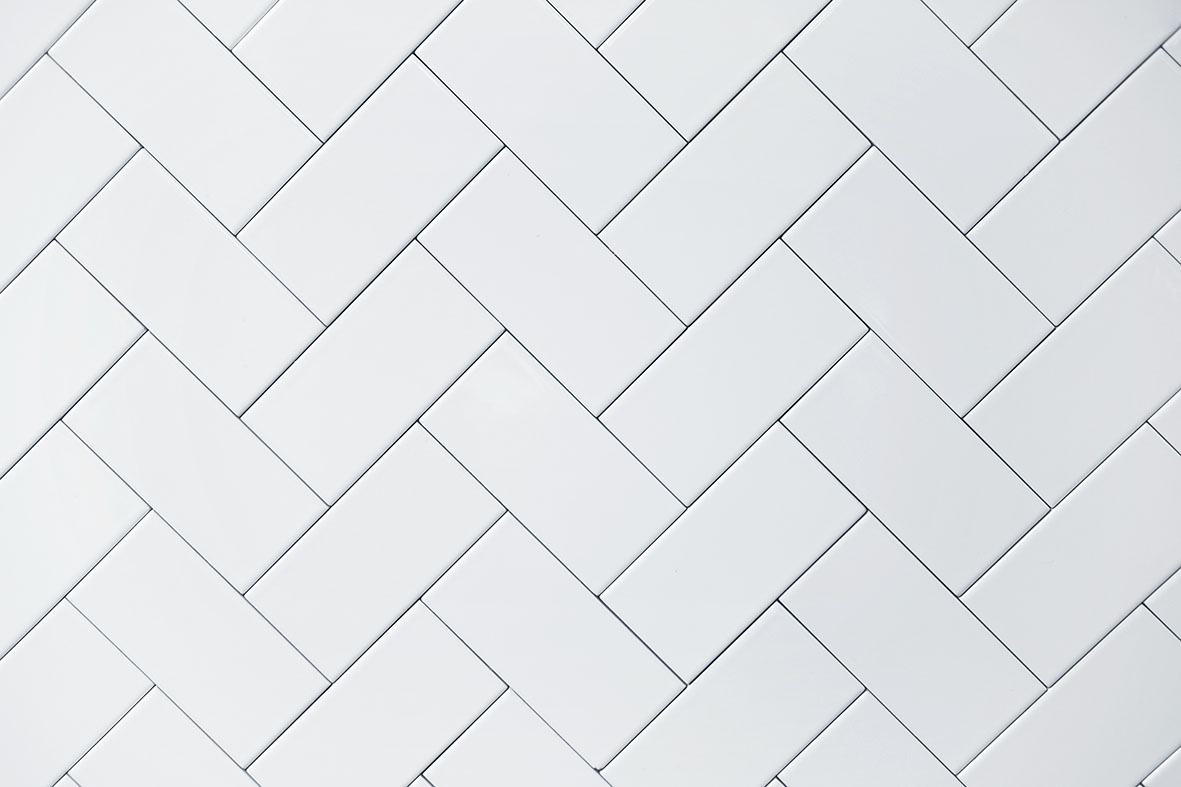
LAYING HERRINGBONE RECTANGULAR TILES
Derived from wood cladding practices, this technique involves laying tiles to form an ‘L’ shape, creating the visual impact of two opposing sets.
This style is especially appealing when there’s a noticeable contrast between the length and width of the tile, especially when using tiles that mimic the look of wood strips.
Today, there are highly convincing imitations available that faithfully replicate wood grains, knots, and even imperfections.
INSTALLING RECTANGULAR TILES USING A CROSSHATCH LINE
Another technique borrowed from wood installations, this method is exclusive to tiles with a length exactly twice their width. The technique consists of laying the same number of tiles horizontally and vertically, alternating them so that squares are formed. It is a less common style, but it provides a different aesthetic that can bring freshness to a design.
All these techniques can be combined with others to create a unique effects. For example, a very fashionable finish is to combine faux wood tiles with a vintage-looking area of hydraulic tiles. If this is the case, herringbone or grout installation techniques should be used.
In conclusion, if there is one thing that is vital when laying rectangular tiles, it is the joints.
When installing wood flooring, the joints are typically hidden beneath the skirting boards, which results in minimal gaps between the individual pieces. However, it’s not advisable to install tiles without any joints at all. To achieve a superior finish, it’s best to use a grout that closely matches the predominant color of your tile.
Thank you for reading our article! We hope that you enjoyed learning more about the different techniques available for laying rectangular tiles.

Post a comment