
The main objective of all the tools manufactured by RUBI is to facilitate professional’s work when it comes to handling, cutting, and laying all types of tiles. To this end, RUBI applies over 70 years of experience in the sector to manufacturing tools, such as the tile levelling system, to make life easier for tile fitters.
As all professional tilers will know, tile lippage is one of the worst things that can happen during a project. A slightly uneven floor can cause huge problems and compromise the whole project. One of the most common mistakes that contractors and DIYers often make is not using a tile levelling system to avoid tile lippage. That’s why in today’s blog on how to tile, we will be taking you through how to use a tile levelling system and our top tips for achieving an even finish!

TILE LIPPAGE IN TILE LEVELLING SYSTEM
Lippage occurs when one tile edge is higher or lower than the adjacent tile that’s been laid. If this issue is not rectified during installation, the error can be obvious. Uneven tiles can draw the eye and ruin the whole aesthetic of the room. They may cause weak points in the adhesive, which can damage the tiles. They can also become a dangerous tripping hazard.
There are many different factors that can cause lippage. One of the most common problems when tiling onto a surface, is that the surface itself isn’t completely flat. Before we get onto tile levelling systems, lets take a look at how to level a floor.
LEVELLING A FLOOR
- Work out the depth of the biggest dip and purchase a self-levelling compound that will be able to go to that height. You may need to do this in two parts if it isn’t able to adjust the depth in one go.
- Make sure that the area you will be levelling is clean and free of dust.
- Prime the floor and follow the manufacturer’s instructions on mixing, laying, and drying times of the product.
- If you are installing on to a wooden floor, check out this blog on how to prep it.

TILE LEVELLING SYSTEM
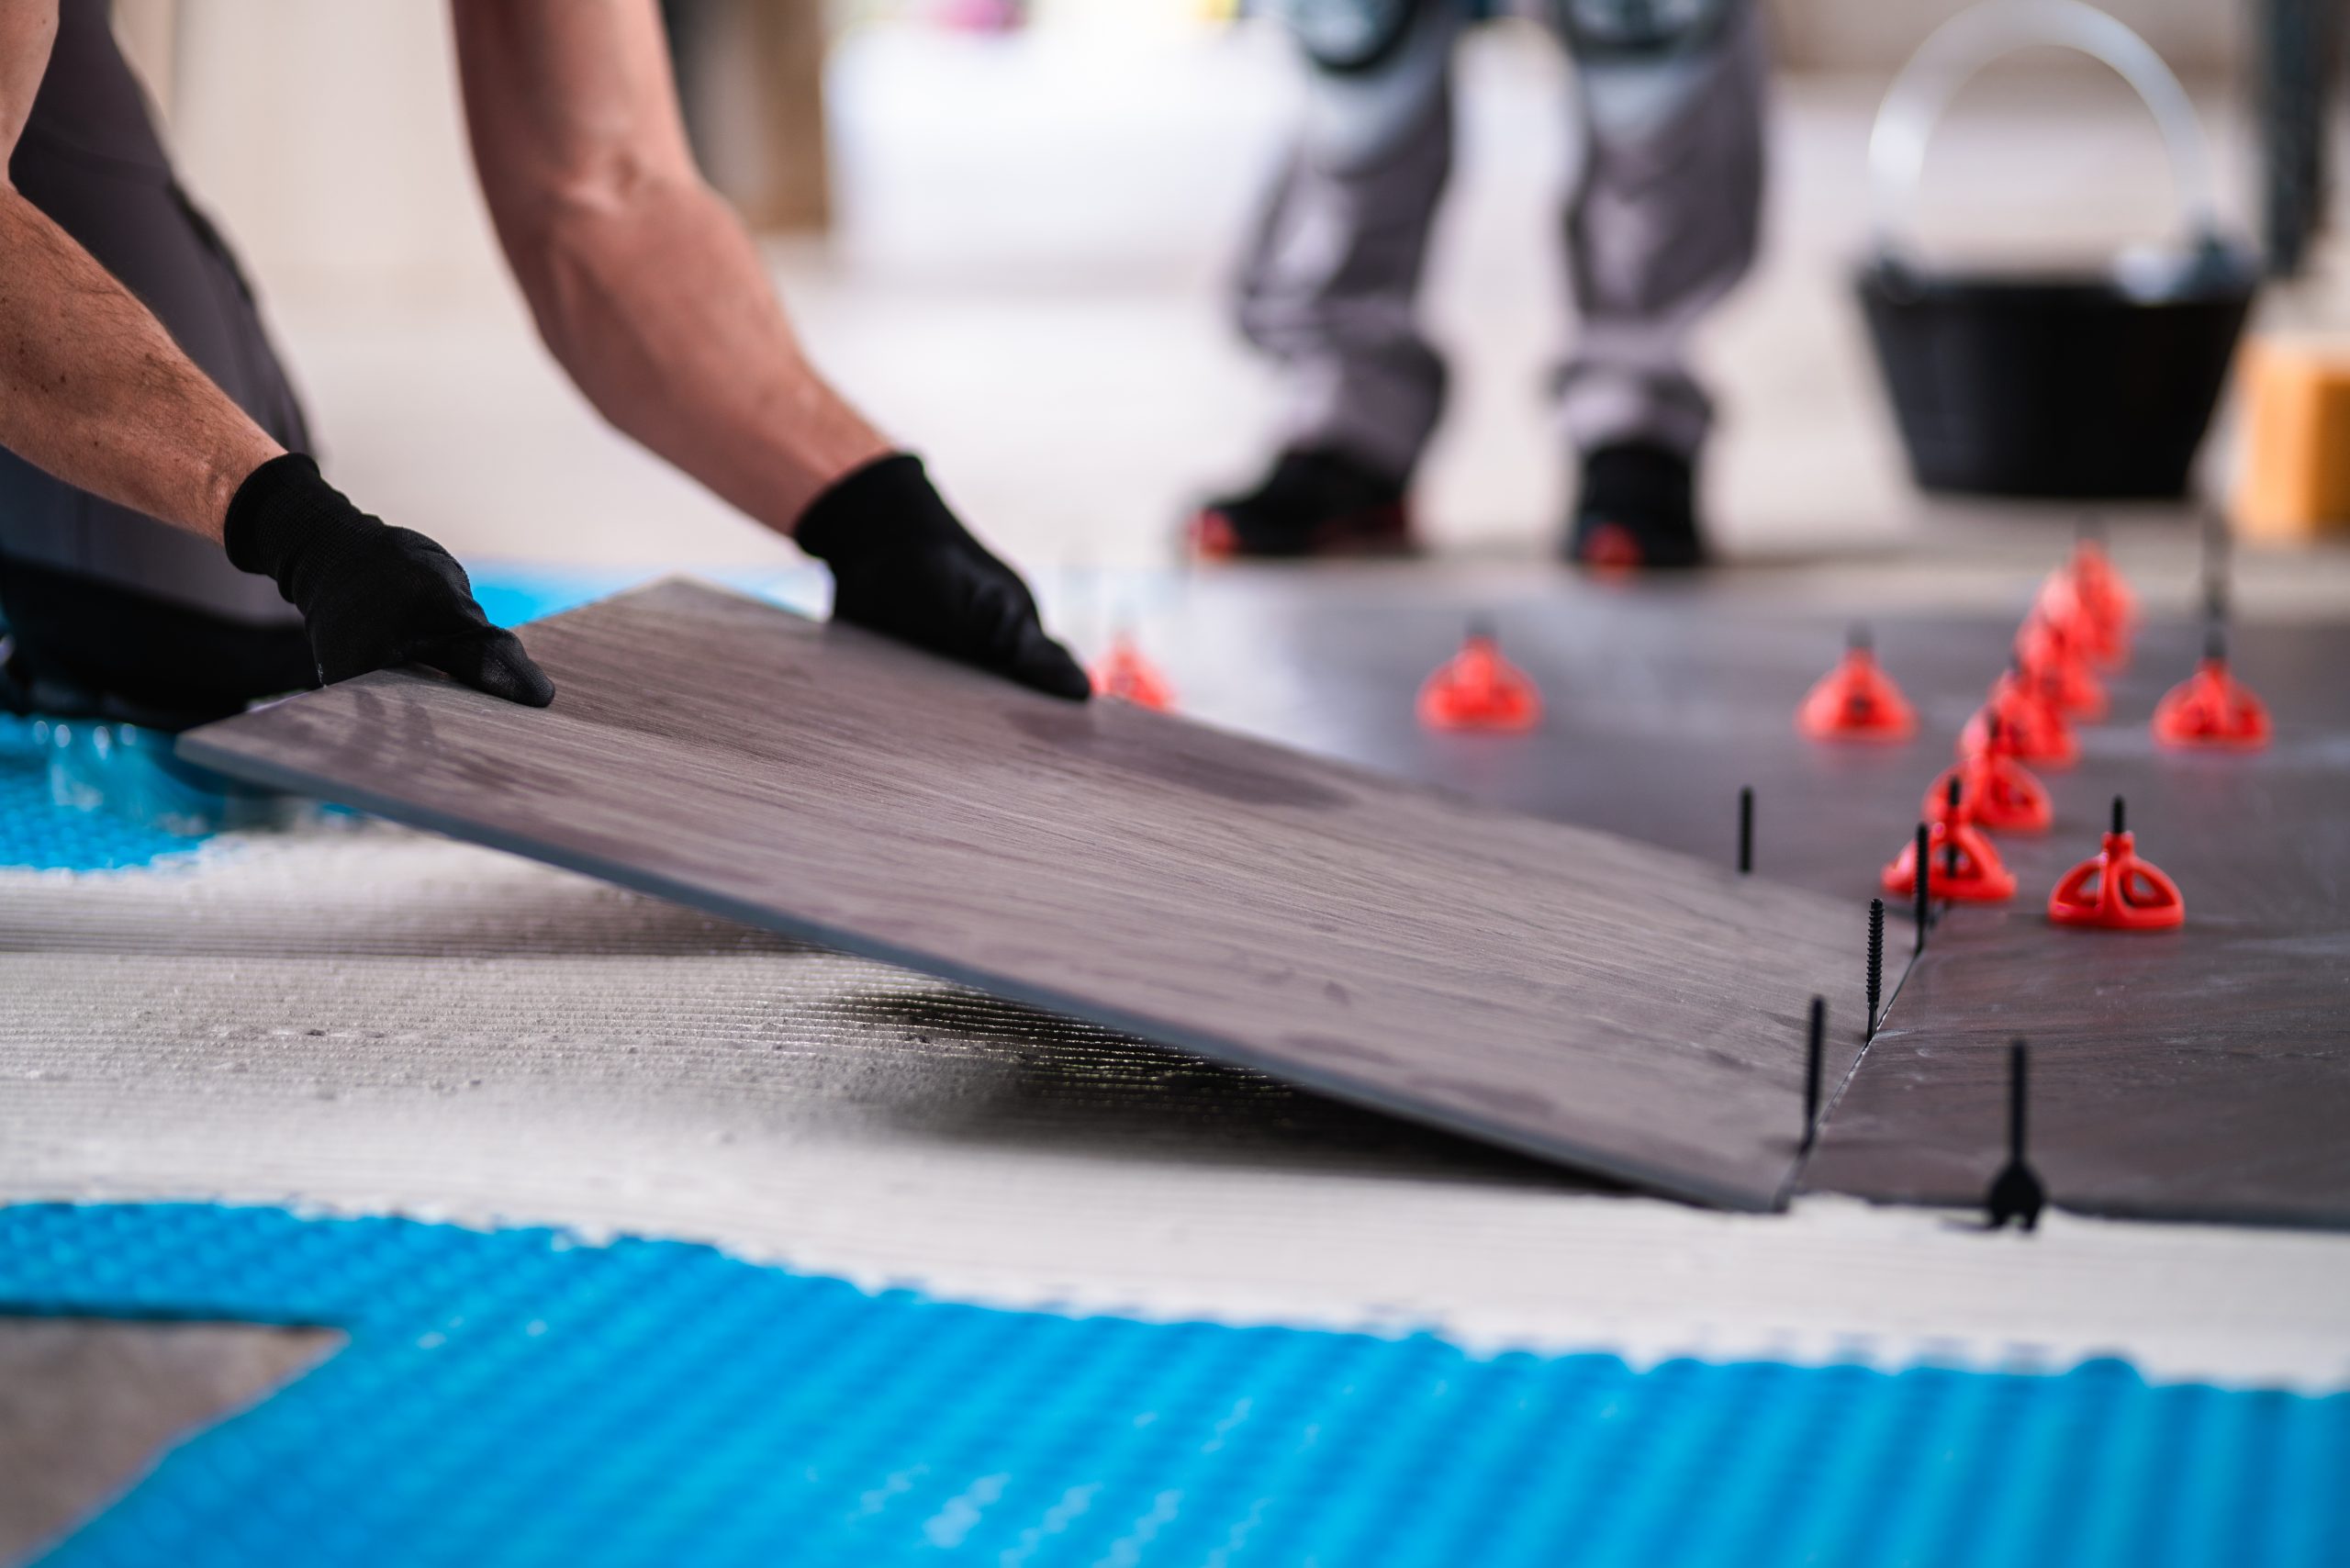
Tile levelling systems are a very common on-site tool for levelling and preventing lippage during tile installations. They help interlock the tiles, ensuring they remain level once laid, and have a smooth, flat surface while the adhesive dries. The levelling system helps lower the tile that sits higher until it is level with the adjacent tile.
A complete levelling system consists of two or three main components: strips, caps or wedges & pliers. These components are used to prevent the tiles from moving as they set, which will leave you with a level surface.
Once the adhesive has dried and you are ready to remove the strips, simply use a rubber mallet to knock the strips and caps out of the grout line. Make sure to knock your clips in the same direction as the grout joint to achieve the best break and leave no parts of the clip remaining.
*REMEMBER levelling systems are designed to help level the tiles and not space them. We recommend also using slightly larger spacers than the clips in the corners of the tiles.
TYPES OF TILE LEVELLING SYSTEMS
TILE LEVEL QUICK
The TILE LEVEL QUICK system helps prevent tiles from moving while they set and improves the resulting surface flatness. Pliers allow you to regulate the pressure according to the thickness of the tile. This allows you to apply the necessary pressure at all times. The ergonomic design of the pliers give professional tilers greater ease and comfort when tightening the cap.
DELTA LEVEL SYSTEM
The DELTA level system uses strips and wedges to achieve a fast, easy, and intuitive levelling installation. The wedges are inserted into the strips and tightened using a pair of ergonomic pliers. Once the installation is complete (similar to the LEVEL QUICK system) the strips are removed by impact (i.e a rubber mallet), to strike the strips away from the tile. The wedges are reusable, so they can be placed back into the bucket after they’ve been removed and then they can be reused on your next project.
*Remember to always knock the strips in the direction of the grout joint!
CYCLONE LEVEL SYSTEM
The CYCLONE range is RUBI’s latest levelling system. This kit is particularly easy to use and is less dependent on the user’s skill and experience than other levelling systems on the market. This system has a reusable threaded cap to create a large, round base that ensures homogeneous pressure around your tiles at all times and achieves a perfectly levelled surface.
The CYCLONE LEVEL SYSTEM cap has been specially designed to maximize ergonomics during manual tightening, requiring no extra tools for tensioning or breaking, as well as offering the best possible visibility of the tiles and joints when tightening.
*REMEMBER to always keep the base of the caps clean to ensure you do not scratch the surface of the tile.
We hope you found our guide on how to use a tile levelling system useful!
For more tiling tips and tricks on how to tile, take a look at more of our blog articles here.
I’ve been doing a lot of tile work lately and I am interested in your products.
I would say that to avoid tile breakage, it is very important for homeowners to choose a tile installer who is experienced and has excellent craftsmanship. The type of materials used and the tiling techniques also play a big role in the construction project.