
Are you wondering how to combine tile and wood flooring in your home because of a new home improvement project, but are unsure of where to start? Combining these two materials can create a unique and stylish look in any room. And studies show that, regardless of your chosen flooring, high-quality flooring can increase your home’s value. However, finding the right balance between the two can be tricky. There are several factors to consider when learning how to combine a tile installation and wood flooring. One of the most significant considerations is the type of wood you will be using, as certain types of wood may not be suitable for pairing with certain types of tile.

Additionally, the color and finish of the wood and tile should complement each other to create a cohesive look. When it comes to installation, however, it’s essential to ensure that the transition between the two materials is seamless and properly finished. Without proper installation, tile and wood flooring can look mismatched and unprofessional.
Ultimately, your home can stand apart from the rest with the right combination of tile and wood flooring. Keep scrolling for more tips on creating a seamless look when combining these materials in your home.
What to Consider Before Installation
Mixing these two types of flooring can create a unique and stylish look, but it’s important to do it right to ensure a smooth and seamless transition between the two materials. Here are a few things to consider before you start your project.
Design
Before you start thinking about how to combine tile and wood flooring, you need to think about the space’s overall design. Consider the style of your home, the color scheme, and the lighting. Choosing the right materials that complement the design will help ensure a cohesive, harmonious look that blends well.
Durability
When selecting tile and wood flooring, consider the durability of each material. Tile is highly durable and easy to maintain, while wood is softer and susceptible to scratches and damage. If you have pets or kids, choosing a more durable tile or wood option is essential.
Moisture
Another factor to consider when combining tile and wood flooring is moisture. Tile is highly resistant to moisture, making it ideal for areas prone to water exposure. However, wood flooring can swell or warp if exposed to moisture for prolonged periods. As such, using tile in areas such as the bathroom or kitchen while using wood flooring in areas such as the living room is advisable.
Transition
Another critical factor to consider when combining tile and wood flooring is the transition point between the two materials. Choose a transition element that seamlessly blends the two materials. This could be a chic tile border or simple molding, depending on the look you’re going for.
Ultimately, combining tile floor with any type of wood floor can elevate the look of your home, but it’s important to consider these factors before starting the project. By selecting the right materials and transition elements, you can create a cohesive and stunning flooring design that delights and impresses.

Tile and Wood: Tools You Need
Before you can even begin to install your dream flooring (which we’ll get into below by offering tips for expert DIY floor installation), you need to ensure you have all the necessary tools. Installing tile or hardwood flooring can be a DIY project, but to do it successfully, it’s essential to have the right tools to ensure that the finished product is both beautiful and functional.
Here are the essential tools you’ll need to install both tile floors and wood floors in your home.
Tile Flooring Tools
Just a reminder as you explore the tools below: both tile and wood flooring require a few additional tools, such as a measuring tape, level, and pencil. With these basic tools, you’ll be well on your way to installing beautiful new floors in your home.
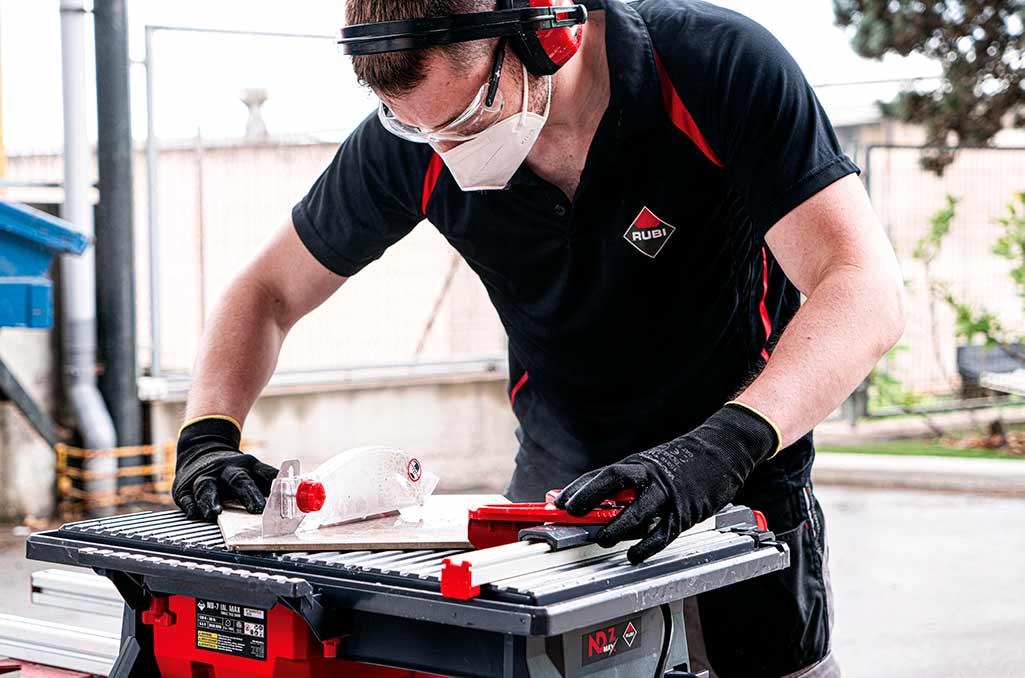
- Tile Saw: A tile saw is a power tool that is used to cut tiles. It’s an essential tool for any tile installation project because it allows you to make straight cuts accurately.
- Level: A level is used to ensure the surface you’re working on is flat. It’s important to have your tiles level; otherwise, you could have uneven gaps that make your floor look shoddy.
- Tile Spacers: Tile spacers help keep tiles evenly spaced from each other during installation, ensuring that you end up with a professional-grade finish.
- Grout Float: A grout float applies grout and fills the gaps between tiles.
Finally, anytime you’re working with power tools, it’s important to wear protective equipment like gloves, earplugs, and eye protection.
Wood Flooring Tools
Again, remember that you’ll also need safety equipment and general tools like a measuring tape, gloves, etc. However, to install wood floors, you’ll also (likely) need the following:
- Miter Saw: A miter saw is a versatile tool that can cut straight or angled cuts. It’s perfect for making precise cuts when installing hardwood flooring.
- Hammer and Nails: Hardwood flooring usually requires nail guns or air compressors. Hammers and nails are an alternative to these methods that can effectively install wooden floors.
- Pry Bar: A pry bar is necessary for removing existing flooring or trim pieces before installation. It’s also handy for removing nails or staples stuck to the subfloor.
- Chalk Line: A chalk line ensures that all your boards are laid in a straight line. It works by snapping a chalk line on your baseboards, indicating the exact position of your flooring planks.
- Tapping Block and Pull Bar: These tools ensure that your hardwood boards fit snugly together without any gaps. The block is used to tap each plank into place while the pull bar pulls planks together tightly.
Always work safely when installing floors and follow the manufacturer’s instructions. If you’re uncomfortable with any of these tools or processes, it’s always best to consult a professional to ensure everything is installed correctly and safely.
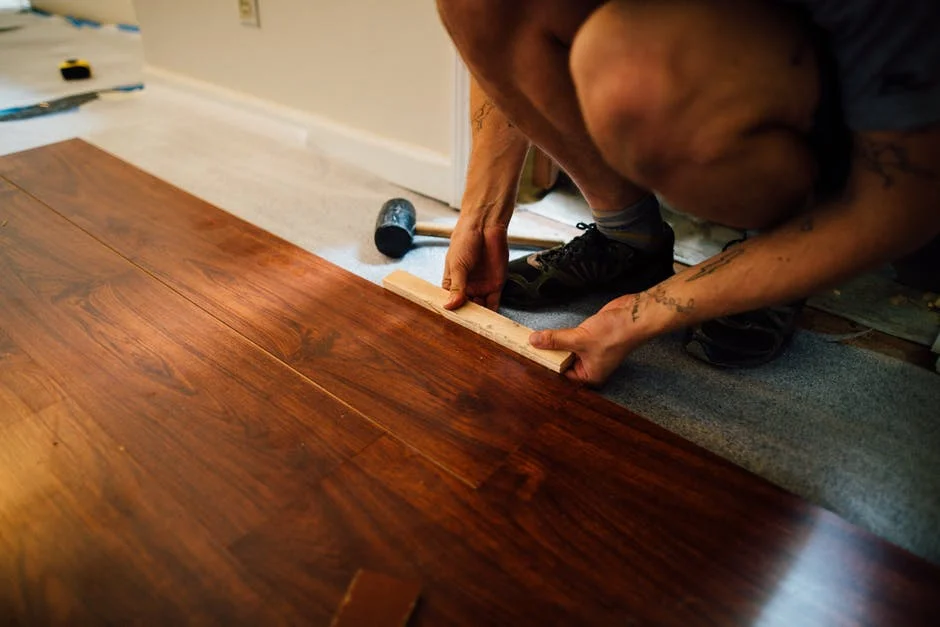
How to Combine Tile and Wood Flooring
With the right tools, you’re ready to combine tile and wood flooring. Assuming you’ve prepped the area and taken out the older floors you’re going to replace (if that’s the case), the first thing to remember is to avoid aligning the patterns.
This means avoiding square tiles that butt up against square parquet flooring. Instead, opt for different lengths and widths of tile, and be sure to alternate the pattern to provide contrast to the wood floor. Where can you try this out? Consider this a great project idea for a cool entryway.
Another important tip is to ensure the flooring materials’ depths are as close to the same as possible. This is especially important when combining tile and wood flooring since the two materials have different thicknesses. It can create a tripping hazard and an uneven aesthetic if they’re drastically different.
If you want to get creative, consider lacing the tiles into the existing wood flooring in a way that appears organic. It doesn’t need to be perfect but should appear to have flowed together naturally.
Overall, mixing tile and wood flooring can add character and warmth to any home. With careful planning and a little creativity, you can achieve a beautiful and unique look that reflects your personal style. Don’t be afraid to explore new options; always remember to work with a professional for the best results.
Other Tips to Consider
Still having trouble combining tile and wood flooring for a seamless and beautiful result? Here are a few additional tips.
Try to use a transition piece or edge-protection profile. This not only protects your investment but also provides a natural break between the two materials. By creating two distinct and separate spaces, the eye is naturally drawn to the flooring itself. This creates a cohesive visual experience for anyone in the room.
Another tip to consider is to use tile in areas that are prone to moisture, drips, and stains. By creating an inlay in the middle of the room with tile, you can enjoy the benefits of a functional and durable tile surface without having to tear out your entire existing hardwood floor.
To achieve this, simply leave the wood floor around the room’s outer edges and carve out a square or rectangular space in the middle where the tile inlay will go. It’s also worth using similar colors and tones when selecting your tile and wood flooring. By choosing complementary colors and materials, you can create a harmonious and cohesive space.
Get Rubi Tools
Learning how to combine tile and wood flooring doesn’t take a lot of work once you understand the basics of how to combine the two materials. By using transition pieces or edge-protection profiles, creating inlays in high-moisture areas, and selecting complementary colors and materials, you can achieve a seamless and stunning finish.
However, to successfully intertwine these two types of flooring, you will need the right tools. We can help with that. While we specialize in tile installation tools, our blog is filled to the brim with tips and tricks for all your flooring installation projects. Whether you’re a seasoned DIYer or just starting out, we’ve got you covered.
And with our top-of-the-line tools, you can be sure that you’re getting the best of the best. Ready to get started? Check out our other articles and browse our selection of installation tools today. Your perfect flooring is just a few clicks away.
Post a comment