

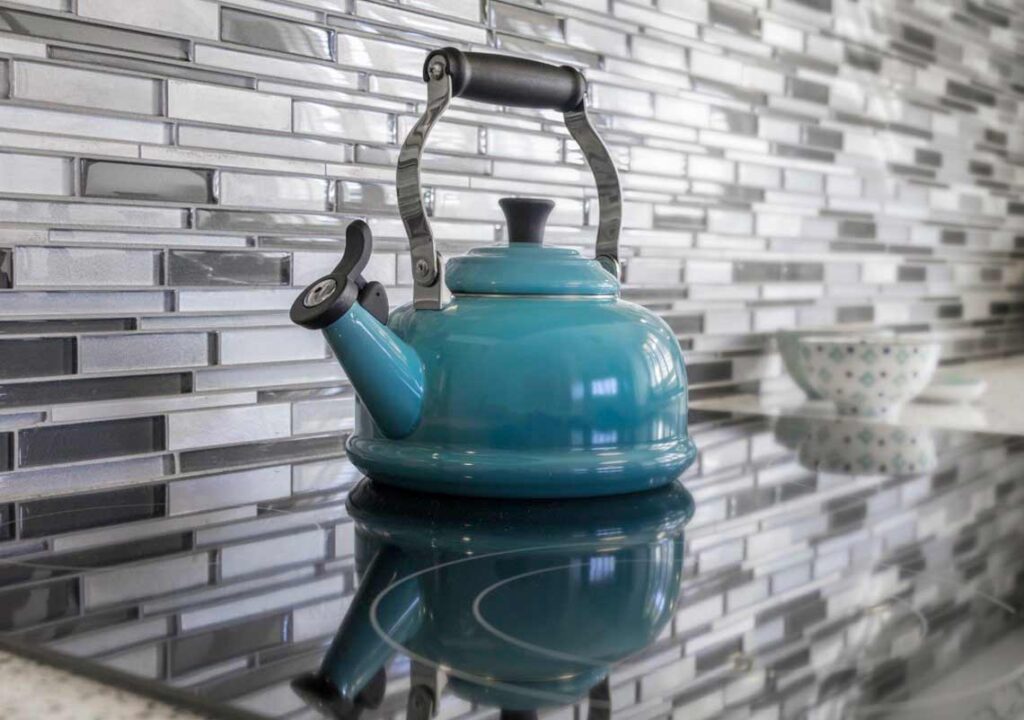
Repainting your kitchen could cost you from $900 to $3000. One way to minimize that cost is to cut and install a suitable backsplash tile. Cutting backsplash tile can be challenging to do on your own. Check out this thorough guide on how to cut backsplash tile so you can do your tile installation correctly.

Right Tools for the Job
Before making any cuts, it is always a great idea to dry fit first. Arrange the tiles near the area to be covered.
Check that your tile layout corresponds to the measurements of your wall. For instance, if your backsplash is 6×2 feet, your tile layout should be 6×2 feet as well. Include the tiles that will obstruct cabinets, corners, and edges.
These will be cut to size later. Remember to include the grouting gaps between the tiles; use a spacer if you have one.
How To Cut Backsplash Tile
When it comes to cutting Backsplash Tile, there are a few DIY-friendly tools that are essential for a professional finish.
Here are a few that work best and instructions on how to use them.
Manual Tile Cutter
A manual tile cutter is a low-cost solution for cutting tile. It’s also useful for diagonal cuts and cuts at various angles.
They will not, however, cut curves or bevels. The cost for a Snap Cutter is around $150 – $200.
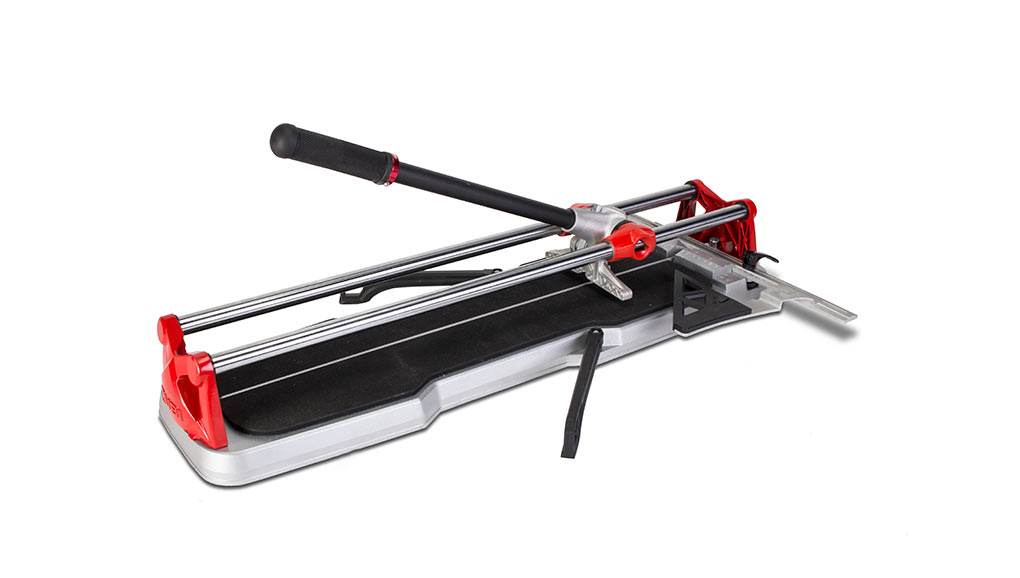
How to Use a Manual Tile Cutter
Step 1. The first step is just to place your tile. Place it firmly against the cutter’s edge. You should raise the handle and tilt the pressure pad out of the way. Check that the cutting wheel contacts the tile at the bottom edge where you intend to cut it.
Step 2. It’s time to score your tile after it’s been safely placed in the equipment. Move the tungsten carbide scoring wheel across the tile from top to bottom. Make your way from one end to the other. You should score twice to ensure that the marks are visible. Do not be overzealous with your scoring because it may result in a crack.
Step 3. It’s now time to snap-cut the tile. Lift the handle, let the pressure bar pad fall down onto the center of the tile, apply pressure to the handle, and it will snap a crisp line.
Step 4. Remove the tile from the cutter. After you’ve cut your tile, use a rubbing stone to smooth down any rough edges. These are reasonably priced and widely available at your local hardware store.
Tile Nipper
For finer work like cutting curved sides, narrow corners, or notches in smaller tile, a specifically developed hand tool known as a tile nipper, or tile snips, will be ideal.
Although they are most usually used with ceramic tiles, they can also be used to cut thinner porcelain tiles.
A basic design similar to vice grips make them easy to operate, and inexpensive, usually costing less than $20.
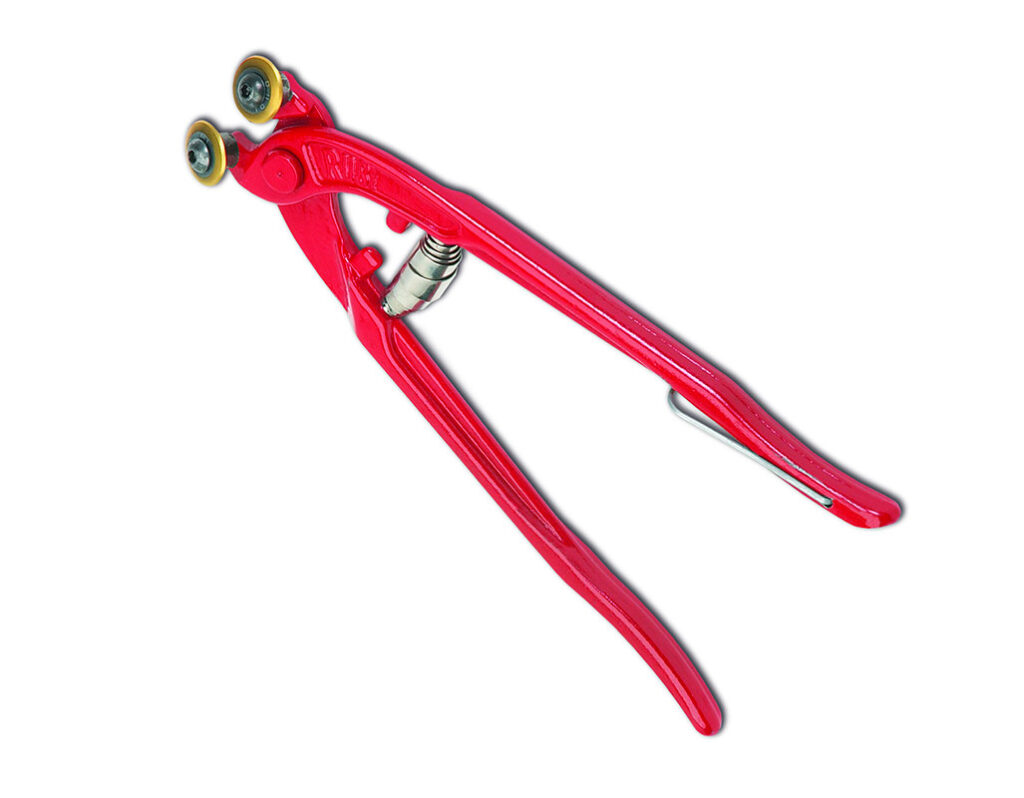
How to Use a Tile Nipper
Step 1. Mark a cutting line on the glazed face of the tile with a fine marker or pencil. Then, score the tile along the cutting line using a snap tile cutter. The purpose is to score the glazed face of the tile with a boundary line for the area you’ll remove with the nippers. As you snip sections off, the tile will break in a nice, straight line.
Step 2. Begin at the waste area’s corner, holding the nipper at a little angle, and work out and across the tile, removing small portions of tile with each nip. Do not take large chunks of tile because they may snap unpredictably and not where you would like them to. Patience is your friend here.
Step 3. While making your way across the tile, gradually cut away the waste area. When you’re around 1/8 inch of the cutting line, flip the tool over so the jaws are cutting parallel to the cutting line.
Step 4. As you finish the cut, use the nipper tool to take tiny bites with the cutting edges up to the specified cutting line. In most cases, the glazed surface will cleave exactly at the scored line. Then, using a rubbing stone, smooth any rough edges of the cut.
Watersaw
The watersaw or wetsaw is one of the more expensive but by far the most user-friendly pieces of equipment. Depending on the size of the area you are working on and the number of tiles to cut, wetsaws may or may not be the tool to use for a regular home backsplash.
This tool comprises a table, an electric motor, and a diamond blade saw with a water pump that keeps the Blade clean and sharp while removing unwanted materials after the cut. This machine can be purchased for as little as $100 and up to around $500.
While this may sound excessive for DIY, if a watersaw is in your budget, one would make a world of difference.
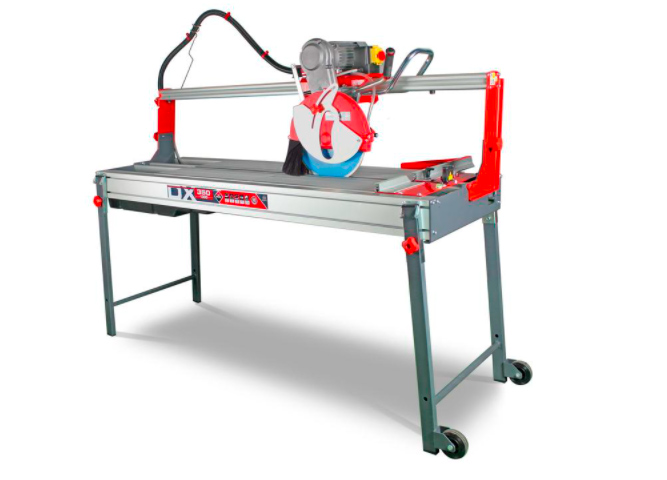
How to Use a Water Saw
Step1. Put on your personal safety equipment, which should include eye protection. This is a MUST.
Step 2. Mount the diamond blade on your wet saw according to the manufacturer’s instructions, fill the tank with water and turn on the pump to ensure that water flows effortlessly over the Blade.
Step 3. Place the tile in front of the wet saw blade so that your cutting mark is parallel to the Blade.
Step 4. Turn on the wet saw and gradually slide the table with the ceramic tile into the Blade (or slowly slide the cutting head through the tile if using a masonry saw). Don’t push it faster than it wants to go, and don’t press from side to side if your cut is crooked. Should this be the case, pause the saw, correct the tile, and then continue cutting.
How to Choose Porcelain Floor Tiles
With the various types of porcelain tiles available, the application area is one of the most important factors to consider when purchasing porcelain tiles.
Each room in your house has various needs. For example, porcelain tile in a hallway or living room must be more durable than in other areas. A bathroom tile, like a kitchen tile, must consider moisture and water, as well as anti-slip qualities. The method for determining tile quality will vary depending on the application.
Both glazed and unglazed porcelain is available in various colors, and glazed porcelain is frequently printed with high-quality printers and can be printed with a variety of designs. Another factor to consider is size; floor tiles are often larger, counter tiles are smaller, and wall tiles can be any size.
Porcelain floor tile, like other types of ceramic tile, is one of the most durable flooring solutions available. Porcelain is a hard, dense, and solid material resistant to most significant loads and can even be utilized in commercial settings. However, the hardness of porcelain might make it slightly more fragile than regular tiles, making them more susceptible to fracture. When used on floors, this material should have a PEI (Porcelain Enamel Institute) rating of at least 5, making it acceptable for high-traffic areas like living rooms and heavy equipment use.

What is Porcelain
Porcelain tile is often glazed and constructed of clay that has been fired to extremely high temperatures. The covering keeps liquids and moisture out of the clay. The glaze is not absorbed into the tile and acts as a robust spill-resistant coating because it is baked on during the manufacturing process. This makes them ideal for flooring.
Due to the sheer tile’s toughness, it can be cut with sharp, precise edges. This means the corners and sides can be grouted together incredibly closely.
Thinner grout joints mean less maintenance and a more visually appealing overall appearance. Porcelain tile can be utilized on floors, walls, baths, backsplashes, and many other areas of your home.
There are numerous porcelain tile options available. However, depending on where the tile will be installed, each variety has different characteristics to consider. Porcelain tile is divided into five abrasion grades based on its wear resistance.
- Class 1 is not recommended for use on floors or in high-traffic areas; it is better suited for walls or aesthetic value
- Classes 2 and 3 are for light to medium use areas with little or no exposure to scratching dirt, such as kitchens and toilets, and are more appropriate for residential use
- Class 4 is typically utilized in high-traffic home sections, such as entryways and corridors
- Class 5, the highest grade, is for heavy traffic and commercial use.
Porcelain tiles are available in four general types:
Unglazed Porcelain Tiles
Unglazed porcelain tiles are made by injecting dry colored powdered clay into a mold, then pressing and firing it. This method of manufacturing produces porcelain tiles with unique patterns. Unglazed porcelain usually does not require additional treatment, and sealing may not be necessary.
Glazed Porcelain Tiles
Glazed porcelain tiles are produced in gloss, matt, and semi-polished finishes. These tiles can be made in various ways, and the glazes can be plain or patterned, with a gloss or matt finish. A porcelain tile that has been glazed does not require any additional treatment or sealing.
Digitally Printed Porcelain Tiles
Another type of glazed porcelain is digitally printed porcelain. This is the most recent tile production method, which allows natural materials to be shot and digitally printed into the tile to produce images that appear natural. These tiles do not require sealing.
Full Bodied, Double Loaded, and Color Bodied Porcelain Tiles
Full-bodied, double-laden, and color-bodied porcelain tiles are a form of tile in which the tile’s color and design run all the way through the biscuit, with a single color from the surface to the base of the tile. Two layers of clay are compressed together to create double-laden tiles. These tiles work well in high-traffic areas.
Have the Tile of Your Life
Now that you know how to cut backsplash tile and which tools to use for the job, you can get right to it. It’ll be the best decision you make for your home.
Just don’t forget to get suitable tiles from the best tiling experts in the biz.
Happy tiling!

Post a comment