
59% of homeowners plan to remodel or update their properties this year with bathrooms and kitchens topping the list of spaces to get a makeover. The right kitchen or bath remodel or tile installation can even increase the value of your home.
One quick and cost-effective home improvement project is to add a new backsplash. It enhances character and style in your kitchen or bathroom space. This design element is actually one you can do yourself. Do you know how to tile a backsplash?
Follow these tips to lay backsplash tile like a pro!

How Tile a Backsplash: Complementing with Color and Texture
The backsplash is the part of a kitchen or bathroom design that ties everything together. Your tile backsplash should complement your cabinets, counters, and color palette.
You can go for a style that adds a pop of color or something neutral which blends in with your existing design. Don’t be afraid to mix and match colors or materials to create a unique style.
Tile plays a big part in adding new textures to your kitchen or bath. You should also consider maintenance for kitchen backsplashes. Glass, porcelain, and ceramic are all simple to keep clean.
From a budget standpoint, ceramic and porcelain are more affordable, averaging about $2 to $7 a square foot. On the other hand, glass and natural stone can be as much as $30 a square foot.
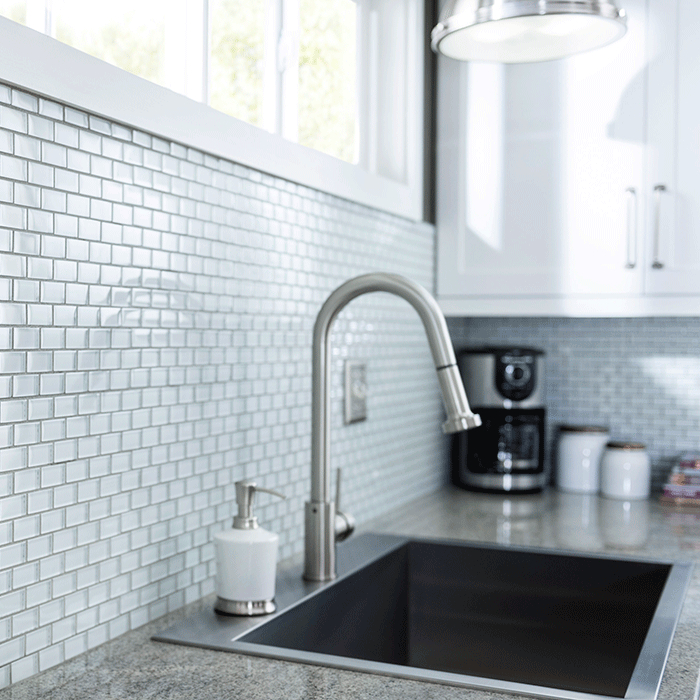
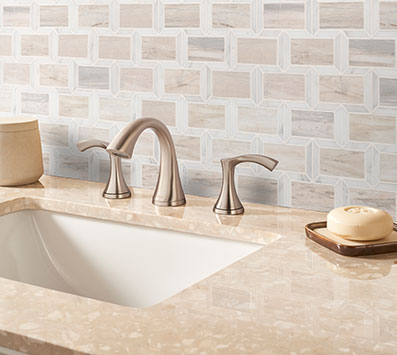
All-white or creamy natural stone is a popular choice for most kitchen and bath designs. It offers an elegant backsplash that updates the home while remaining timeless.
Determining Your Layout
Before installing your backsplash, you’ll want to determine the layout. This includes the number of rows and pattern style, like horizontal or herringbone. Then you can decide how many tiles you will actually need to buy.
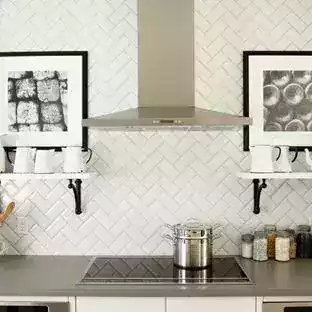
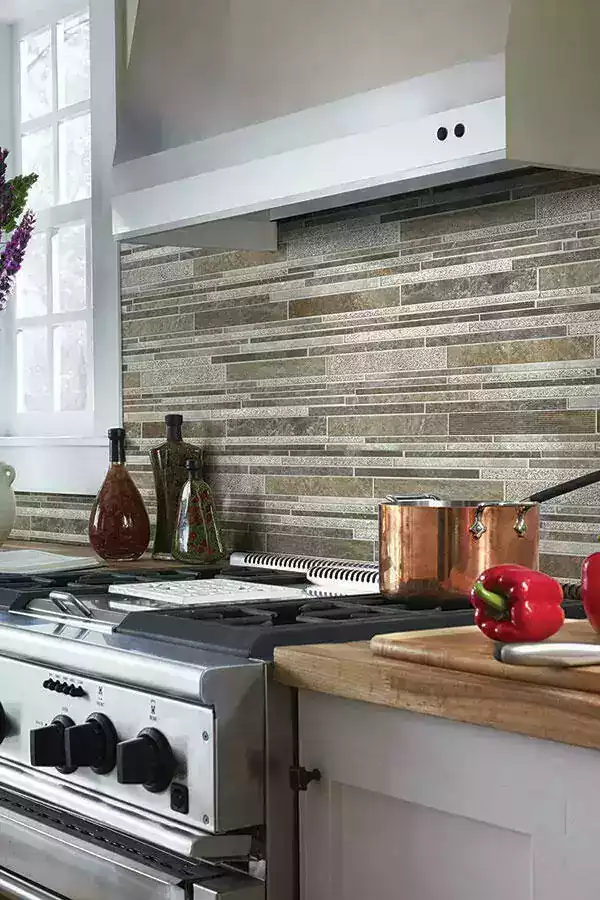
Consider installing a different pattern or tile type around your stove for a nice design element. This will accent it more as it draws the eye towards your cooking station. Adding in an expensive tile here will also create a more decorative focal point.
Be sure to follow a grid layout when planning backsplash tile. Depending on the individual tile size, you’ll likely need 3 horizontal rows to fill the space. You’ll also want to decide whether to add a border to your design.
The height of most backsplashes goes from counter to cabinet. Yet, you can get creative and use open shelving as a stopping point instead. Or it can travel up all the way to the ceiling, creating more of an accent wall.
Smaller kitchens can get enhanced with a wraparound backsplash. This pulls focus and draws the eye around the kitchen, giving an illusion of more space.
How Tile a Backsplash: Confirm Spacing and Symmetry
For professional-looking results, symmetry is key. This will involve cutting the edge tiles for a perfect fit. But more on how to cut tiles below.
It helps to do a trial run run of your tile layout before the actual installation. Here you’ll want to pay special attention to the spacing between the tiles as well as between cabinets and countertops.
Use tile spacers between tiles so you can determine the number of tiles per row. Be sure to leave enough room for grout. Spacers come in all different sizes and shapes to fit your project.
You also want to make sure you’re working on a perfect level for cabinets and counters. This will ensure the tile gets laid in a straight line.
If working with a surface that isn’t level, you’ll need to create your own reference point to lay the tiles. It should be centered with the natural focal point of the wall.
Getting the Right Tools for the Job
Professional grade products make all the difference when it comes to installing a tile backsplash the right way. The job calls for a tile cutter or tile saw depending on the project size and type of tile material you need to cut.
A tile cutter takes longer, making it best for smaller projects. It also cannot cut all types of tile materials, like glass. Yet a tile cutter is less expensive, easier to move, and simpler to operate.
A tile saw offers a cleaner, smoother, and more precise cut. It’s good for all types of tile materials. Yet it is harder to maneuver and needs more skill to use.
With a tile saw, you’ll have more control and diversity in the shape and style of your tile cuts. Here is more on how to choose the right tile saw for your projects.
You’ll also need a notched trowel to add your tile adhesive. Go for one with a comfortable handle and ergonomic grip.
How Tile a Backsplash: Cutting and Drilling Tiles
You’ll likely need to cut the bottom, end, and top tiles to make them fit perfectly within your backsplash area and around electrical outlets. You may also need to smooth down tile edges afterward, depending on the cut.
A diamond drill bit is another important tool for installing a tile backsplash. It will allow you to drill a clean hole into the tile without breaking or damaging it. Here are some tips on how to drill through your tiles.

Readying Your Surface
Start by removing all outlet and switch cover plates. If adding a backsplash to a painted wall, you’ll want to use an 80-grit sanding sponge against the surface. This helps the mastic or mortar stick better to your wall.
Confirm which tile adhesive you’ll be using for your walls. Mastic often gets used for backsplashes while mortar gets used for installing floor tile.
You can buy a pre-made product or mix your own using powder and water. If using mortar, it’s best to use a tile mortar mixer tool to get the right consistency.
If going with glass for your backsplash, be sure to use a white colored mastic. This will keep it from showing through the glass.
Apply the mastic then go back to create a smooth ridge finish. Do this by working in a horizontal motion. Mastic is quick to dry, so work in sections rather than applying the product to the entire area.
Laying Your Tiles Down
Follow a simple and consistent technique for how to tile a backsplash. For easy installation, begin with your vertical border.
Start in the center and work your way out from both sides. Go row by row to stay consistent. Apply a bit of pressure to adhere the tile to the mastic.
It also helps to continue to double check your work to ensure it’s in a straight line. Use a level as you complete each row.
Be sure to place in spacers between tiles and at the edges of your backsplash as well as between rows. This will help maintain symmetry for your grout.
After your full rows are complete, you’ll need to measure for your corner and edge tiles. Then use your tile cutter or saw to cut them to size. Let your work dry for a day before grouting.
Grouting, Sealing, and Finishing Touches
Sealing your tiles will help maintain them and protect them from water and cooking messes. Porous material tiles should get sealed to keep them from getting stained over time.
Tiles should also get sealed before applying grout. Grout should be able to breathe and you can clean it using special tools. It’s also best to reseal tiles every 18 months.
Be sure the tiles are clean before adding a sealer. Paint your sealer over the surface of the ungrouted tiles. Let it sit for 10 minutes then buff away the remaining sealer.
Getting the Grout Right
Unsanded grout is recommended for backsplashes. You can choose either pre-made or make your own grout product. Many different grout colors are also available to complement your backsplash design.
Before grouting begins, wipe the tiles down first. You want to be sure you’re working with a clean surface. Take the spacers out right before you apply the grout.
Use a rubber grout float to apply the grout to your backsplash. Move in a diagonal motion across the backsplash surface. Be sure the grout fills all joints between tiles.
Be careful not to grout the section where the tile sits near the countertop. You will need to caulk this part later on.
Maintaining Your Backsplash
Afterward, go back and clean the backsplash using a sponge and water. This will remove any grout from the tiles. Do this in a gentle diagonal motion without removing any grout from inside the joints.
The grout should take about 45 minutes to set but check the time of the packaging. Then buff and shine the tiles with a cloth. You can also use tile polishing pads to get a nice sheen.
Then apply caulk around the border of your backsplash. Make a clean line between counters, cabinets, and corners. You may also want to get some grout cleaning tools to help keep your backsplash clean.
Getting Professional Results for Your Backsplash Tile Project
Installing your own backsplash tile is simple when following these steps. The right tools combined with attention to detail will leave you with a stunning kitchen or bathroom backsplash design.
As we said before, an updated kitchen or bathroom can increase your the value of your home. Learn more about what tile trends you should consider for your future projects.

Post a comment