
The global ceramic tiles industry is valued at an estimated $240 billion. Tiles are a popular material for good reasons. A tile installation can instantly add value to a property, help keep areas cool, and are perfect for humid environments like the kitchen or bathroom. Where people tend to struggle though, is figuring out how to install wall tile.
Wall tile installation can get a bit pricey. But, with the right guidance, you can learn how to install wall tile with relative ease at an affordable price. If you’re interested in learning the basics, consider reading ahead!


Getting Started
While it might seem surprising, most of the work for wall tiling involves ensuring that the surface is properly prepared, and that the supporting structure is appropriate for tiling.
In many cases, people attempt to tile on unstable or otherwise flawed surfaces. This can lead to very unsatisfactory results but, more importantly, can risk injury for the person laying the tile.
But, before jumping in and installing ceramic tile, the first thing you should do is gather all the necessary tools. If this is your first time installing wall tiles, some of the tool names and equipment might seem confusing at first. Don’t fret if you feel a little lost at first.
Wall Tile Installation Tools
There are a myriad of wall installation tools that you’ll need to get the job done right. A few of them have some better, but more expensive, alternatives. You’re usually better off going with the more expensive equipment, but they’re not entirely necessary.
Learning How to Install Wall Tile
Some of the equipment that you’ll need for tiling your bathroom or kitchen is quite specialized for the job. However, before jumping into the more complicated tools that you’ll need, here’s a quick list of the basics.
- Knee pads
- Protective gloves and goggles
- Pencil and tape measure
- Calculator and level
- Dustpan and broom
- Damp and dry cloth
- Rubber mallet
- Masking and adhesive tape
- PVA adhesive
With these basic tools you’re ready to get into the more complicated equipment. There are a few others, but they’ll be mentioned in their respective sections.
Thinset
Besides the tiles you’re going to install, one of the first things that you want to get is thinset or alternative adhesive. If you choose thinset, it can be a pre-mixed thinset or a dry thinset mortar for mixing. The prior is better, as it will save you a lot of time that you would otherwise spend measuring the water-to-thinset ratio.
If you’re keen on saving money, or have to tile a large kitchen or bathroom, you should pick the dry thinset for mixing. In this case you’ll need multiple 3-5 gallon buckets and a mixing paddle or corded drill with mixing attachment.
Tools for Application
Next, you’ll want a notched trowel for spreading mortar. These come in many shapes and sizes, and they usually have varied notch sizes on either side. For best results, find the ones that most comfortably fit for you.
You’ll need a rubber grout float for spreading grout over tiles. It’s important that the grout float be made of a soft material, as it prevents scratching the tiles during application.
Cutting Tiles
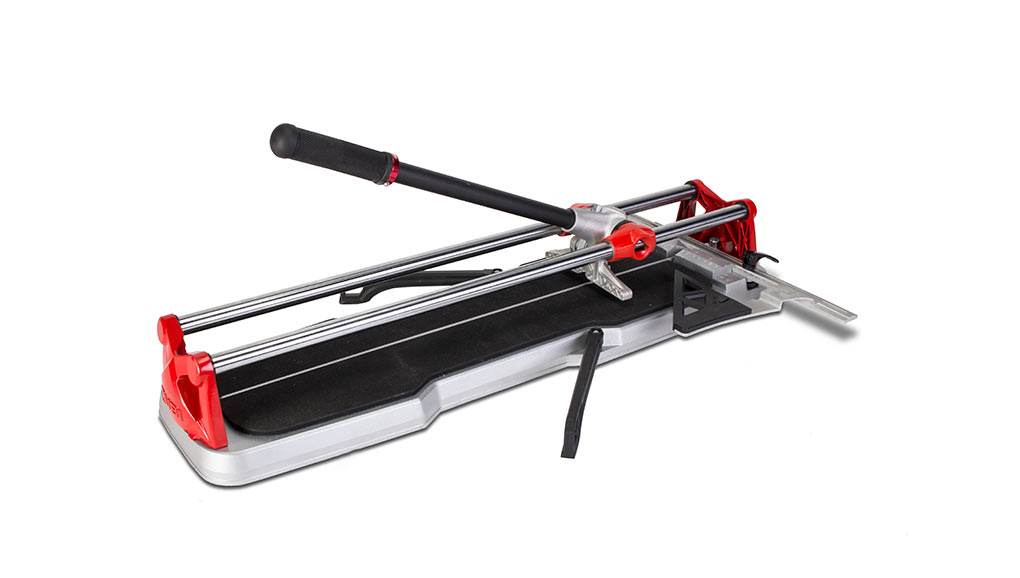
If you have to cut your tiles, you will need a wet tile saw and a rail, or a manual tile cutter. The prior option is great for precise cuts in ceramic, natural stone, and porcelain tiles. The latter is optimal for simple projects that don’t require precise cuts.

Spacers and Backing Material
Finally, and before jumping into the process of wall tile installation, you’ll want to grab some spacers and backing material.
Spacers are essential for properly spacing tiles. They’re especially important for inexperienced individuals in regards to tiling. The best option is to pick plastic tile spacers that all share the same width.
Backing material is sometimes optional. It’s important for areas or surfaces that have high levels of moisture due to leakage or similar cause. This material is especially important, though, when it comes to bathroom wall tiling for the shower and sink areas.
Preparing the Surface
Before applying the adhesive, you need to ensure that the surface is in proper condition and prepared appropriately. Doing this is quite simple.
First remove any prior adhesive or substances from the surface. Then, and before following through with the tiling process, ensure that it isn’t dusty, and prime it with a diluted PVA adhesive.
Adhesive Application
Once the surface is properly prepared, you’re ready to start applying the best adhesive for your project. Using the gauging trowel, place the adhesive on the surface and use the smooth side of the notched trowel to spread this around an area of about 1m².
Next, draw a serrated edge back and forth through the adhesive to create ridges. These ridges are essential for maximizing surface area and adhesion properties.
Setting the Wall Tiles
Now it’s time to place the first wall tiles. Here, you’ll use a thin piece of wood to support the first row of tiles and ensure that they’re straight. After this, you’ll use your tile spacers to maintain and support the next rows of tiles.
The next tiles are placed with a soft twisting motion followed by the placement of spacers on all ends where the next tiles will be placed. You may have a few oddly shaped tiles to place, and in this case you can adjust the spacers by turning them in different directions.
If you feel like the lines formed between the tiles are uneven or not straight, you can also use a tape measure, string, or laser level, to check and correct where needed. If they don’t look straight to you, then check. The more tiles you lay, the more clear it will be that they are crooked and the more work it will be to fix the issue.
As much as possible, make sure that the mortar doesn’t rise up between the freshly laid tiles as their placed. If this occurs consistently, then it means that the bed is too thick. You can adjust accordingly by picking the proper sized trowel.
Additionally, consider using bullnose tiles for the working area’s perimeter. These tiles have rounded edges, and make it much easier to achieve a clean finish and avoid an overall messy aesthetic.
Grouting
Next you’ll have to choose the right grout for your project and then mix it appropriately. This of course depends on the result you’re looking for, and you’ll have to follow the directions on the packaging for the grout.
Typically, though, this mixture involves a bowl or bucket, water, and the powder from the grout packaging. You should expect the consistency to reach something akin to toothpaste.
It’s essential to keep in mind that the mixture is usable for approximately 20 to 30 minutes after being mixed. So, you should mix the amount you believe that you’ll use in that amount of time.
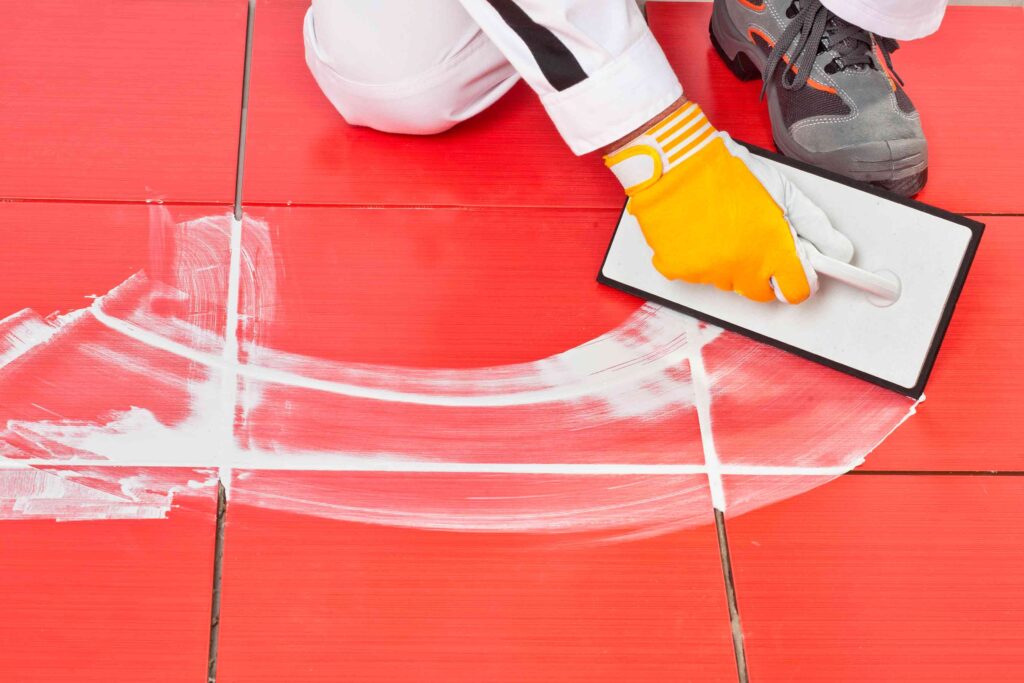
Spreading the Grout
Once the mix is ready, it’s time to spread the grout with a grout float. This should be done in an area of 3×3 tiles. If you can do more within the 20 to 30 minutes it takes for the grout to solidify, then feel free to do so.
Once you’re near the end of the allotted time to spread the grout, consider using the grout float to remove excess grout. This will save you a lot of time in the following steps.
Grout Cleaning
After some time, the grout will cure and solidify. In order to optimize the wall tiling process, you will want to properly clean the grout. To do so, use a damp sponge or cloth and wipe across smaller areas while rinsing the cloth or sponge frequently.
Grout Curing
The grout will fully cure between three to six hours depending on the type of grout you purchased, and the mixture measurements you used. It’s important to ensure that the tiled area is dry and clean, and remains that way for the duration. Once the grout is cured, you can remove any residue that remains on the tiles.
Grout Sealing
Finally, it’s time to seal the grout. After ensuring that the tiles are placed properly, the grout is applied appropriately, and all residue has been removed, it’s safe to apply a grout sealer.
It’s essential to seal the grout after installing the tiles, and to follow up every 6 months to seal it again. Luckily the process is simple.
Sealing the grout involves using a spray or brush with liquid grout sealer and applying it across the glazed and finished tiles. After applying the liquid or spray, use a cloth or rag and rub it in with a circular motion.
Finishing Your Wall Tile Installation
Learning how to install wall tile comes with quite a few benefits. Luckily, it’s relatively simple and people often do a great job on their first try. It’s worth highlighting that it’s important to check that the working area’s surface is stable, solid, and that it presents no otherwise noteworthy flaws.
Make sure you gather the right equipment, as well. Otherwise, you can run into serious trouble while mixing and applying the adhesive, or properly applying the grout. The final steps, involving grout cleaning, curing, and sealing, don’t require all that much effort, though. Once you’ve practiced a few times, you can start to get creative with unique mosaic designs, or interesting color combinations!
Reach out or browse our catalog for tiling ideas, tips and tricks, and the latest tile trends. We’re also invested in providing all the tools you might need for your wall tile installation!

Post a comment