
Did you know that, according to NerdWallet, homeowners spent over $500 billion between 2017 and 2019 on home improvement projects? Additionally, between March and August 2020, 61% of homeowners had taken on these types of projects.
If you’re one of the many Americans choosing to do a home improvement project and you want to use wet tile technology, you might be stressed about how to do this properly.
Even though you’ll save money by doing this yourself, you don’t want to damage the tile or your home while completing this project. You might also be worried about putting yourself in danger when using the wet tile saw.
That’s why we’ve put together this guide on how to use a tile saw. In it, you’ll learn everything you need to about using one (preferably a RUBI tool) properly.
We hope that with this guide, you can use this machinery correctly to successfully complete your tile installation project while saving money. Read on to learn more about how to use a tile saw.

1. Wear the Right Protection
Before you get started with using the wet tile saw, you need to wear the right protection to keep yourself safe from debris and other potential dangers. Make sure you wear hand gloves, a face mask, and goggles.
2. Prepare the Wet Tile Cutter by Connecting It to Water
Whether you’re using the best wet tile saw on the market or you’ve chosen to rent one, you need to prepare it properly so you’re using it safely. To do this, you have to connect it to a water source the right way.
First, make sure that both the saw and water are turned off before you connect them.
You can use the water that’s already in the collection tray, or if you prefer, you can empty it and refill it with fresh water.
If you choose to use old water, make sure the water source has a filter in place. Otherwise, you could end up with water that contains unwanted particles.
Once you’ve decided how to set up the water source, you can connect the wet tile cutter to it.
3. Prepare the Wet Tile Cutter by Connecting It to Electricity
Now, you’ll need to connect the wet tile cutter to electricity. Note that there are two electrical connections:
- One that leads toward the main outlet
- An internal connection needed for running the re-circulating pump
If you’re able to place the saw right by a power source or connect it to an outlet that has 120 voltage, do this. Because it can be dangerous to have water near electricity, you need to create a drip loop when connecting your wet tile saw to the electric source.
When you create a drip loop, you’re placing the loop lower than the outlet and the saw. This prevents the dangerous situation where water drips along the electrical cord and toward the main power source.
4. Store Wastewater in the Right Place
When using the wet tile saw, you could easily end up making a mess and getting the water everywhere. For this reason, if you’ve decided to use new instead of old water, you should operate the water machine outside.
Another option is to use a small hose and run it to the bucket. This will help you avoid creating puddles and will make it easy to clean any debris before you run the water again.
5. Turn on the Water First
Before you turn on the wet tile saw, you need to turn the water supply. What happens if you don’t get this order right? You could end up creating a lot of damage, not only to the tile you’re going to cut but also to the wet tile saw.
After you turn on the water, adjust the water flow correctly using the water lever and faucet.

6. Check the Water’s Flow on the Saw
Before you start using the wet tile saw, you need to check how the water flows on it. If it isn’t flowing on it the right way, the saw won’t work properly. The whole point of having water flow over it is to reduce friction, which will keep your tile as well as the blade from being damaged.
7. Mark Where You’re Cutting
Before you cut the tile with the saw, you need to mark where you will cut. This way, you won’t accidentally cut the wrong area. To make the mark, just use a pencil. To maintain a straight line, using a scale can help.
Be careful while you do this. As the saying goes, measure twice, cut once.
8. Keep Your Hands at the Right Distance
One of the most important tips when it comes to cutting tile with a wet tile saw is keeping your hands at the right distance. Never have your hands near the line of the blade. Always keep them on the sides of the wet tile saw.
Additionally, don’t hurry while you’re cutting the tile. As well as being safer, this will also make your cuts more accurate.
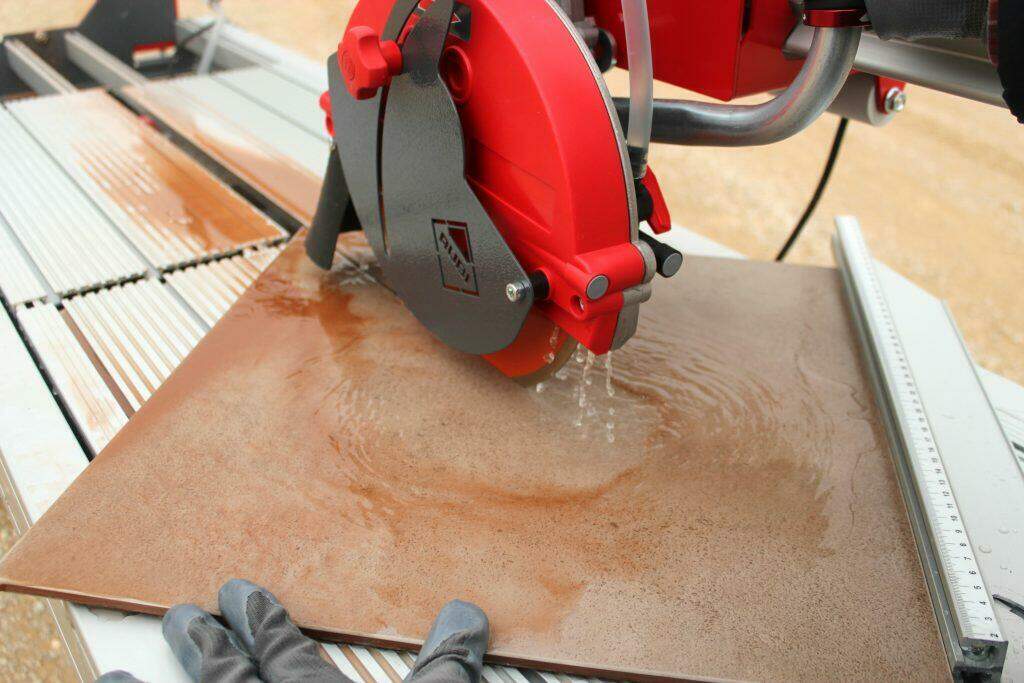
9. Observe the Blade When You Turn on the Power
At this point, you’re finally ready to turn on the power. As you turn on the wet tile saw, observe the blade. The water should be dripping while the blade rotates at the correct pace. If anything looks wrong, turn off the saw and check that it’s working properly.
This will protect you and prevent any unwanted damage to the tile. If you notice that there’s a part that isn’t working or you don’t know what’s wrong, call up a professional. Fixing the saw yourself is dangerous.
10. Push the Tile, Not the Blade
Once you’re ready to start cutting, be aware that the proper way to cut the tile is to push the tile toward the blade. Some people mistakenly push the blade toward the tile, which can damage the tile or the wet tile saw, so avoid making this mistake.
Keep in mind that you should push the tile slowly and smoothly. If it isn’t cutting smoothly, chances are there isn’t enough water going through the wet tile saw.
Stop your work, check that everything is connected properly, and re adjust the water as needed. After you’ve observed the movement of the blade, start cutting again.
If there’s still resistance, there might be something wrong with the wet tile saw. In this case, call up a professional so they can fix it for you.
11. Check the Bucket Regularly
While you’re using the wet tile saw, you should check the bucket regularly for any impurities in the wastewater. If the impurities get stuck, this could negatively impact the sawing process. If you notice them, turn off the saw and disconnect all the electricity.
Then, take the bucket outside to empty it. Return and start over, taking all the precautions we mentioned above.
12. Clean Regularly
In addition to checking the buildup of impurities in the bucket, you also need to clean the area regularly. This way, you won’t accidentally slip on any water, knock against any piles of tiles, or stumble because of debris build-up.
By cleaning regularly, you’ll avoid any dangerous accidents.
13. Be Safe When Finishing Up
When you’ve finished cutting the tile, you should shut off the wet tile saw before shutting off the water. Watch the blade, wait for it to stop spinning, and then place it safely to the side. Now, you can shut off the water.
Next, make sure the area is dry and unplug the electrical equipment. This way, you won’t be cleaning up the area with the potential of putting the electricity in contact with water.
Finish cleaning up, being careful to not accidentally knock into the blade (placing it somewhere safe away from the area will help).
Need More Information?
Now that you’ve learned some tips and best practices for using a wet tile saw, you might need more information. Maybe you want to learn what the best wet tile saw for your project is, or maybe you’re looking for other tile renovation projects.
Whatever information you need, we can help. At RUBI, we’re experts when it comes to tile cutting and home improvement projects!
To learn more about how we can help, check out our tips and tricks now.

Post a comment