
There are many signs that you should regrout your tiles. For instance, if you have noticed mold, loose tiles, or your grout is discolored, you should regrout it. New grout can completely change the look of your tile.
Do you want to learn how to regrout tile floors, tile bunnings, kitchen or bathroom tile, or really any tile installation project? Keep reading to get some helpful tips and tricks!

Removing the Old Grout
Before you can add new grout to your tiles, you need to remove the old grout from the seams. Many people wonder how to regrout tile without removing old grout. While it is possible, it is best to remove the old grout first!
Not only will this make your tiles look newer and more professional, but it can also provide a better surface for your new grout. Removing old grout will allow the new grout to bond better to the tiles.
There are a few ways that you can remove old grout. You can do it manually with a grout removal tool, which looks like a screwdriver with a blade. This tool allows you to saw into the old grout.
You can also remove grout with power tools. Oscillating tools, such as the RUBI Scraper, are a great and efficient way to remove grout from your tiles.
Cleaning the Tiles
Next, you want to make sure you clean your tiles. Grout is what helps join your tiles together and fills in the empty space between them. Because tiling can be a dusty job, you want to make sure you clean your tiles before you begin grouting.
Cleaning your tiles will remove dust and the remaining grout fragments. If you don’t remove these fragments, they can prevent your new grout from properly setting and creating a strong bond.
You can clean the joints of your tiles by vacuuming, scraping off any old grout, and wiping dust off with a wet rag.

Choosing and Mixing New Grout
After your tiles are clean, you want to choose and mix your grout. There are a few things you should consider to choose the best grout for your tiles, like the type of grout, the color of grout, and more.
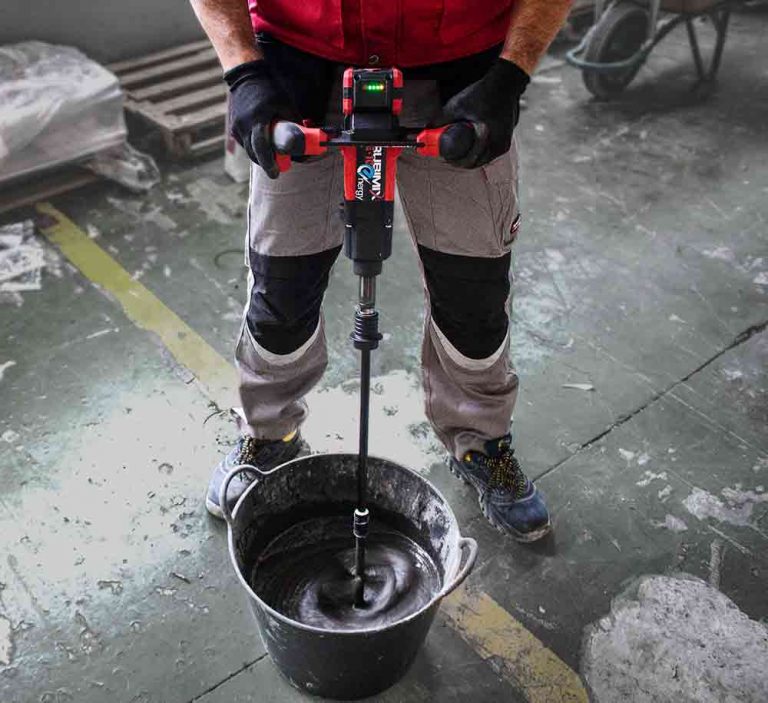
Then, you need to mix your grout. You can generally mix this in a bucket and use it for your entire project. Some grouts come as a powder and require that you add water. Epoxy resin grouts come with two separate components that you mix together.
Depending on the type of grout, this ratio will vary. However, every type of grout should come with a recommended mixing ratio. Then, you can tilt the mixing bucket and use an electric mixer (RUBI offers many options) to stir the mixture into the right consistency.
Finally, let the grout rest for a few minutes before you begin applying it.
Distributing Grout into the Tile Joints
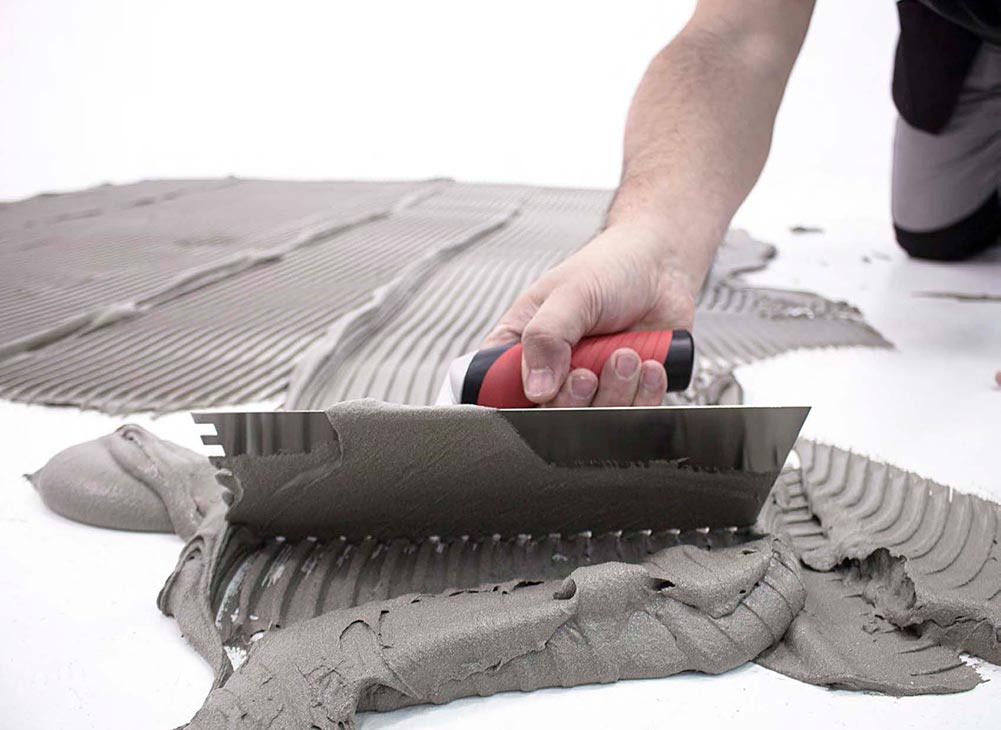
Once your grout is properly mixed, begin applying it to your tiles. First, you can add the grout to the tiles with a plastic trowel. Then, you can use a grout float to get it into the joints.
Using a grout float is the easiest way to get the material deep into the tiles. A grout float is meant to force the grout into even the smallest cracks and crevices. When you are using it, it is important that you hold it at a 45-degree angle to the surface of your tiles and that you grout diagonally to avoid pushing the grout back out of the joint.
Holding it at this angle will give your grout the best distribution and will ensure that it gets into each crevice of your tiles.
Cleaning off the Excess Grout
Before you allow the grout to harden, you want to make sure you remove any excess. There are a few steps that you need to take. First, you want to clean off the excess grout that was not used in the tile joints.
You can use your grout float for this. Simply skim the extra grout off the tiles and scrape it back into your mixing bucket.
Then there will still be residual grout on the surface of your tiles. You can use a damp sponge to remove it. You should also repeat this step the next day to remove any grout that may have stayed behind after the first cleaning.
If you don’t clean off the excess grout, it will stay visible on the surface of your tiles and create a haze and will make your tiles look dull and dirty.
When you wipe it with a sponge, you should rinse the sponge often until the sponge is clean even after wiping the floor.
Let the Grout Harden
It is important that you let the grout harden before you do anything else. If you are tiling a floor, you should wait for at least 24-48 hours before you walk on the tiles.
Waiting for your grout to harden allows the tiles to adhere and completely dry. If you do not wait long enough, the tiles could be loose or crack.
You should also make sure that you give your grout plenty of time to harden before you clean the tiles.
Learn More About How to Regrout Tile Today
Tiling is a great way to improve your home, but you may have to replace grout every 8-10 years. However, this is something that you can do on your own! If you are regrouting tile, it is vital that you use professional tools and materials.
Do you want to learn more about how to regrout tile and what products you should use? Rubi can help! We offer professional quality tiling tools and can help you with any project.
Contact our team today to learn more about tiling your home or to buy products for your project.

Excellent article on tile grout. What ratio for grout quantity would I use for regrouting tile?
Hello. It depends on the grout. Just check the instructions on the can and you’ll be good to go.