
As a pro tile installer, tile lippage is one of the worst things to happen to you. A slightly uneven floor or material problem can compromise the entire project of tile installation if you’re not careful. One of the most common mistakes contractors and DIYers make is not using a tile leveling system to prevent tile lippage. Not only that the difference in height between the edges of the adjacent tiles is aesthetically unappealing, but it can also turn into a tripping hazard.

What Is Tile Lippage?
Installing tile seems like a straightforward process, but if you are a pro you know there’s more to it than it meets the eye.
You’ll need much more than trowels and spacers to align the tile properly. By setting the tiles at different levels, you risk creating lippage.
Tile lippage is the vertical displacement between the edges of two adjoining tiles. Simply put, the tiles are set at different levels, meaning that they are spaced evenly in width, but not in height.
Not only that it looks bad, but lippage can also lead to numerous problems. Damaged tiles are one of the most common one as carts or other objects hit it as they run over the edges. Lippage can also be a safety hazard, especially for people who use a walker.
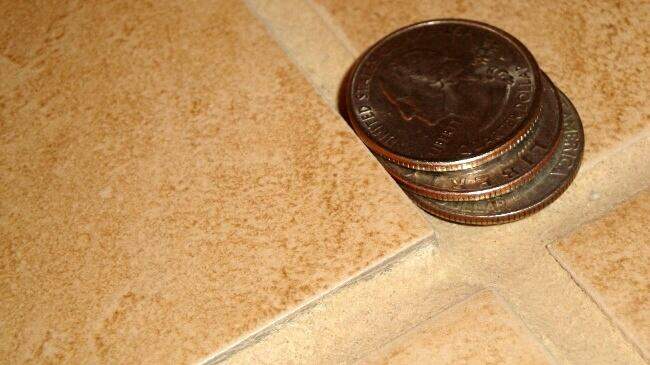
However, not every warpage qualifies as lippage. According to the American National Standards Institute (ANSI,), the allowable lippage for grout joints that are less than 6 mm (1/4 in.) wide is 1 mm (1/32 in.) plus the built-in tile warpage. The allowable lippage for grout joints that are 6 mm or wider is 2 mm (1/16 in.) plus the warpage.
A lot of factors can cause lippage, starting with the surface flatness and ending with improper thinset mortar coverage. So, before we teach you how to use a tile leveling system, let’s take a look first at how to level a floor for tile.
How Do I Level the Floor for Tile?
The number one rule when installing tile is that the result needs to be flat. Sure, other aspects, such as plumb, for instance, are important too, but they can be unattainable sometimes due to pre-existing conditions. Flatness, on the other hand, is non-negotiable.
So, how do you ensure that the subfloor is as smooth and even as possible? It all begins with leveling floor for tile.
Before we start, it’s important to note down the tools you will need. If you’re a small independent contractor, who is just starting out, keep in mind that you won’t find these materials at the local home improvement store. You’ll need to find a tile supply shop and head there to purchase everything you need.
Here are the tools and supplies you will need for tiling uneven floor:
- Contractor line or chalk line
- Square-notched trowel (make sure to choose the right size for the task at hand. As a rule of thumb, the less flat the tile is, the more mortar you’ll need. The more thinset you need, the larger the trowel size should be.)
- Grinder
- Mortar
- Bucket
- Sponge
- Brush
Now, that you have everything you need, here’s how to level floor for tile.
Step 1: Find Dips and Peaks
This simple trick will help you identify peaks and dips regardless if the room is 20 x 20 or 4 x 5.
Have a colleague hold one end of the chalk line and stretch it across the room with both ends on the floor. Look for any variations in the floor’s height. Move the chalk line across the entire room and mark any peaks and valleys you find with a contractor pencil.
Step 2: Determine the depth of the dip
Once you’ve identified the valleys, you’ll need to know how deep they are. You can do this by using your trowel and holding it next to the chalk line. If the valley is deeper than your trowel notch, then you’ll need to use a bigger notch. More often than not a 1/4 x 3/8 in. square notch trowel is what you need when installing 12 x 12 in. tiles.
Step 3: Remove Any Dirt and Debris
Use a brush to remove any dirt, debris or drywall compound from the floor. Next, clean the floor with a sponge to eliminate dust.
Step 4: Mix Mortar
It could be argued that mixing mortar is an art. If you want to achieve a strong bond and long-lasting results, you need to know how to get the right consistency.
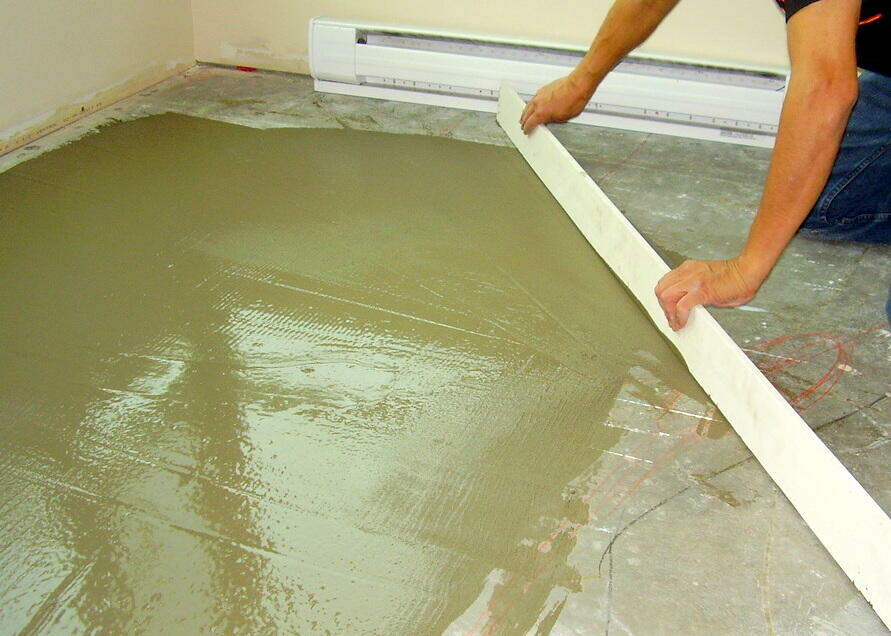
Step 5: Fill the Dips
Use your trowel to spread the thinset over the dips marked on the floor. Pull it across the subfloor trying to leave even tracks. Use the straight edge of the trowel to remove any excess thin set.
Step 6: Grind Peaks
Use a grinder to level any humps in the floor’s surface. As a rule of thumb, grind from the middle to the edges to ensure you get a smooth result.
Step 7: Final Filling
Wait for at least 24 hours for the thinset to dry. You can also use fast-drying mortar, although it’s a bit more expensive. Check the floor again to make sure it’s flat and leveled evenly. If some of the dips are deeper than 1/8 of an inch, then you need to repeat step five. If everything looks fine, then you can move onto the next step of the project: installing the tiles.
Managing Lippage: How a Tile Leveling System Can Help
[embedyt] https://www.youtube.com/watch?v=gNAevqFSH9g[/embedyt]
Making sure there are no peaks and valleys in the subfloor surface is paramount. But, sometimes, even if the floor is even, you can still get lippage due to irregularities in the thickness of the tile material.
That’s where a tile leveling system can come to help.
It’s almost certain that you will need a good tile leveling system to prevent tile lippage, especially when dealing with large format tiles. Due to its design, a tile leveling system interlocks the tiles, ensuring that the surface remains smooth and flat while the thinset dries.
The interlocking design not only that minimizes the possibility of lippage, but it can also reduce or even eliminate settling from shrinkage. In addition to preventing lippage, a tile leveling system can also reduce the time of installation by almost eliminating the need to lift some of the tiles to add more thinset.
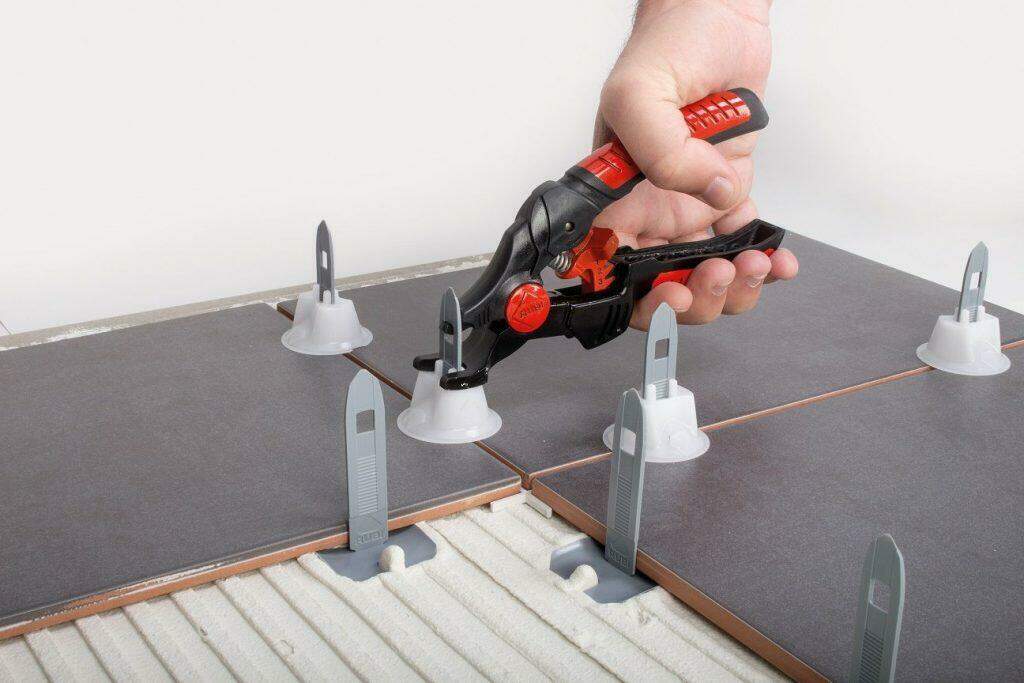
A complete system consists of three main components: strips, caps, and pliers. These elements work together to prevent the movement of tiles when the compound is setting in and to improve the flatness of the surface.
The tile strips guarantee rapid leveling. Due to their reduced thickness, the strips can reduce warpage to 1/16 in., the allowable lippage for grout joints.
The circular base of the tile caps ensures that the pressure is distributed evenly over the surface of the tile. Because the pressure is applied vertically, you don’t have to check the variations in height between the tiles constantly.
The role of the tile pliers is to provide the necessary pressure to the tile caps, thus making it easier for you to obtain a perfect leveling of the surface. The pliers can be used both horizontally (on the floor) and vertically (on the wall.)
If you don’t own a tile leveling system and you’re just now considering buying one, make sure that the pliers have an ergonomic design. Not only that the bi-material handles are lightweight and safe, but they’re also sturdy enough to withstand years of constant use.
The Best of Both Worlds
Use the described procedure to level the floor for tile and a good tile leveling system to get the best results.
Make sure that the surface is as flat as possible before installing the tiles. Adjust and hand set each tile to reduce the risk of lippage. Lift the tiles and add more thinset if necessary, remove mortar to push them down, and so on. Then use the leveling system to ensure and maintain a lippage-free tile surface.
Don’t use the tile leveling system to manipulate the tiles so that they stick to the surface evenly. Level the subfloor first, and then use the system to set the tiles. That way, you can obtain a lippage-free floor every time. After all, that’s your primary objective of your tile installation project.
You think a tile leveling system is a must-have tool for pro tile installers? Leave your comments below!

Post a comment