
Whether you’re learning how to tile or working in construction in general, one important thing to know is how to build a brick wall. It’s where everything starts. With a bit of skill, patience, and the right tools at hand, we will walk you through building a brick wall or small construction.

MATERIALS AND TOOLS TO BUILD A BRICK WALL
To build a brick wall it’s important to select the right bricks. There are a few to choose from. Baked earth, solid, adobe earth, refractory, hollow, and more.
But all types of bricks belong to three main categories:
- Weather resistant: can withstand direct contact with soil and moisture. Ideal for the construction of foundations, patios, garden walls, etc.
- Intermediate weather resistance: can withstand freezing temperatures and work above ground (but not in direct contact with it).
- Non-weatherproof: used for indoor work.
The next important step is to calculate the number of bricks you’ll need. The standard size of a brick is 9.2 x 5.7 x 19.3 cm. Don’t forget to factor in the space between the bricks for the mortar or adhesive, which should be between 1.5 – 2 cm.
Tip: Buy more than you think you will need to cover possible “shrinkage” (broken pieces).
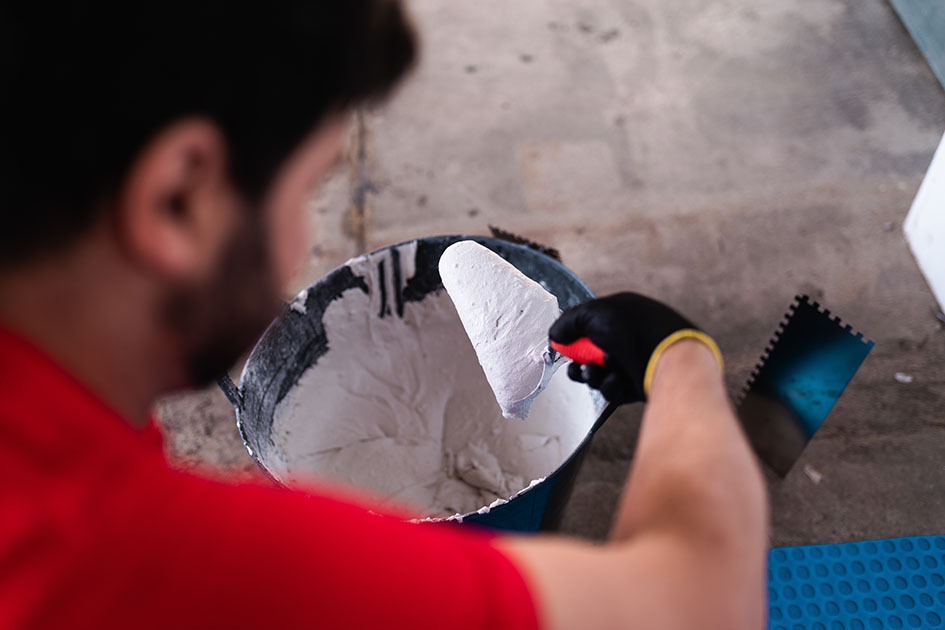
Apart from the bricks, to build a brick wall we need mortar to join them. Ready-made adhesives, such as powdered mortar can be bought and mixed on-site. These are mixed with water using a paddle mixer, instead of having to do the mixing with sand and cement.
Even if you buy the mortar in bags, you will need to make concrete or use cement (this option is easier) to make the foundation of the brick wall. As for tools, the basics that you are going to need are the following:
- Rope and clamps or nails (to create the guide ropes)
- Bucket to mix the mortar
- Electric mixer if we want to make a perfect and effortless mix
- trowel
- Hammer
- Measuring tape
- Canvas, plastic or plywood to place at the base of the wall and avoid staining the entire floor with mortar.
- Small torpedo level to check bricks individually
- Level of 120 cm approx.
- Shovel
BUILDING A BRICK WALL
STEP 1: DIG A TRENCH FOR THE FOUNDATION
You have to dig a trench where you will place the base of the brick wall, which you will later fill in with concrete or cement. Make a rectangular trench that is the length and width of the wall you want to make and approximately 30 – 40 cm deep. Depending on how tall you want the wall to be, you may need a deeper or wider trench. Make sure the base has good drainage away from the wall to prevent water from pooling around it.
STEP 2: DRIVE WOODEN STAKES INTO THE TRENCH
Drive the stakes in so that all the top points are level.
Consider the nominal height of the bricks (the height of the bricks plus the mortar), and then nail them so that they are all at that height, below the top of the trench. This way, the first row of the brick wall will be completely inside the foundation. Use a level to ensure the top tips of the stakes are completely level, leaving a 2-4 foot gap between the stakes depending on the length of the wall.
STEP 3: FILL THE TRENCH WITH CONCRETE OR CEMENT FOR A BRICK WALL
Fill it to the top of the stakes, leaving the space to the edge of the trench you measured for the first row of bricks. Make sure the top of the cement is smooth and level before it begins to dry. Concrete or cement takes 2-3 days to set.
STEP 4: BUILD THE SIGNPOSTS OR GAUGE BARS
These indicator posts or measuring rods will help you ensure the wall is level. For that, take 2 boards and mark them with nails in the place where each row of bricks should go, also known as courses. Always factor in the thickness of the mortar. Make sure you can nail the boards into the ground at both ends of the wall so they will hold without support. These should be the same height as the brick wall you will build.
STEP 5: LAY DOWN TARPS OR WOOD
Remember! At the base of the wall, place tarps or wood to catch the excess mortar as it falls.
STEP 6: LAY THE FIRST ROW OF BRICKS FOR THE BRICK WALL
Place the first course on the foundation to test the location, taking the mortar into account. Use the tape measure to make sure they are the correct distance apart and will fit snugly in the trench. Plan what the entire first row will look like before you start building it.
STEP 7: STRAIGHT LINE LEVEL
Join the first nail mark of both boards with a thread or rope that will act as a guide, allowing you to maintain a straight, level line with which you can work.
STEP 8: NEW ROW IN THE BRICK WALL
We will go up the nail as we build a new row. This will help us form the second row of bricks since the first will be buried in the trench. Don’t let the thread or string slack. It must be kept taut to build a level, solid wall without structural problems.

STEP 9: SOAK THE BRICKS IN WATER
Soak the bricks in water and wait until they no longer drip or the mortar may become too thin. If we do not soak them, they will absorb the water from the mortar. This causes problems in its setting. This is known as “drowning” of the mortar.
STEP 10: FIRST COAT OF MORTAR ON THE BRICK WALL
Using the trowel, place the first layer of mortar along the base of the footing. Add a little more than 1.5 – 2 cm as you will be gently pressing the brick into place, squeezing the mortar out.
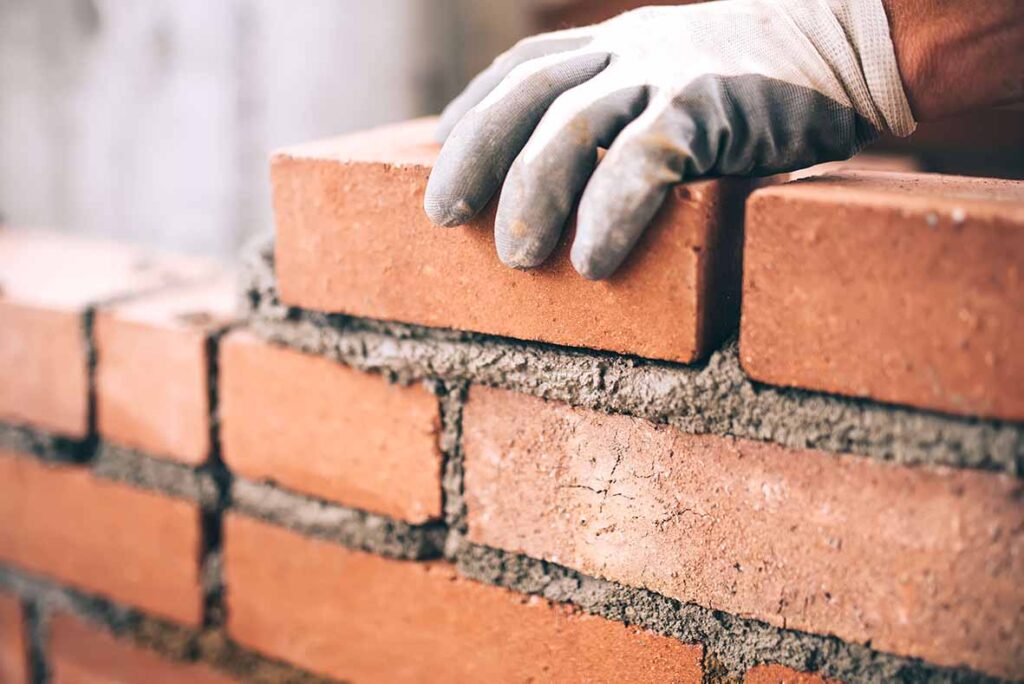
STEP 11: FIRST BRICK IN THE BRICK WALL
Lay the first brick and press it lightly, then use the level to check that it is level with the ground, and then check it with the guide string. Remove the excess mortar from the joint and use it for the following bricks. When you’re sure the first brick is in place, add some mortar for the next 2-3 bricks.
STEP 12: COATING
Take a batch of mortar and coat the end of the next brick, which you will push against the first brick. You must place a layer of uniform mortar of the thickness that we have mentioned. Press it against the first brick as you put it in place, and use the tape measure to make sure it’s the correct distance apart.
STEP 13 – PRESS THE BRICK LIGHTLY
Press down on the layer of mortar that you placed on the base. Use the level to ensure the bricks are aligned and at a uniform height. Press them down lightly to get them perfectly positioned. Then trowel off any excess mortar as you go. When pressing the bricks to get the 1.5 – 2cm joints the mortar starts to bulge out.
STEP 14: BRICK WALL ROW
Keep adding bricks until you have finished the row. Continue laying in the same manner, covering the base and one side with mortar, pressing and checking the alignment with the level. You have to be meticulous and use the level and tape measure with all bricks.

STEP 15: CLIMB THE GUIDE ROPE TO THE NEXT MARKER
You have to remember to move the rope each time you advance to a new row, so that you know how high it needs to go.
STEP 17: BEGIN THE NEXT ROW WITH HALF A BRICK AT EACH END.
You can cut them with the trowel or a hammer. This is how we avoid laying a row directly on top of the previous with the joints aligned. We need the joint to be running or to break the joint, and to do this, mortar the half brick and put it in position, then place a full brick next to it in the usual way. Repeat at the other end of the wall, so that you have already placed a half brick and a full brick on each side.
STEP 18: MAINTAIN THE ALIGNMENT OF THE BRICK WALL
To help you maintain alignment, you want to build the brick wall ends up to one layer above the one you are working on, so that it looks like there is a ladder at the ends of the wall. Then complete the bottom row, rebuild the ends one layer higher, and continue until you reach the top.
Remember to use the guide string along with the level to guarantee the bricks are aligned and at the correct height. The measuring bars will help you place the end bricks, as they will line up exactly with the marks placed on the end of the wall.
- Continue building the brick wall from the ends inwards. The ends of the wall should be built up to the layer above the row you are working on. This is important, especially if the wall has columns at either end. The procedure is the same for each row:
- Move the guide rope.
- Apply the mortar .
- Press a brick into either end of the wall with the help of the guide string and level to make sure they are at the correct height.
- Do the same for the row above the one you are currently building.
- Measure, place the mortar and build the lowest row (complete the layer)
- Repeat the process on the next row.
STEP 19: FILL WITH MORTAR
Fill any part of the wall that needs it with mortar. Use the trowel to fill any spots or gaps in the joints and ensure they are even. Now wait approximately 45-60 minutes before proceeding as the mortar needs to be slightly hardened before we move on.
STEP 20: PROFESSIONAL MORTAR FINISH
Use a trowel to give the mortar a professional finish. Butchers are little tools that help you get that curved, professional finish at wall joints. Firmly press the tool on the joints and slide it through the mortar leaving a perfect finish to the brick wall you have built.

thanks for the great article, keep up the good work
Your step by step instructions are great for do it yourself people. Thank you so much!
I appreciate you sharing this insightful information. want to see more of your creations!
Great job, what a excellent article! The way you’ve laid out the complexities
of construction work is both concise and practical.
It’s refreshing to see such timely posts that truly
helps experts in the field. I’ll be highlighting this on my construction blog because I know my audience will find
your advice extremely useful. Appreciate the great work!