
Ceramic tile is strong, easy to maintain, and highly cost-effective, making it an excellent choice for virtually any room in your home. Whether you are planning a bathroom remodel, a kitchen upgrade, or looking to refresh your living room, ceramic floor tiles offer a versatile and timeless flooring solution.
However, choosing the right material is only half the battle; proper tile setting is crucial for a long-lasting finish. In this comprehensive guide, we will explore what ceramic tiles are, compare them to porcelain, weigh their pros and cons, and walk you through a professional step-by-step guide on how to install ceramic floor tiles using the right RUBI tools.
What Are Ceramic Floor Tiles?
Ceramic floor tiles are made from a mixture of natural clay, sand, and water. This mixture is molded into shape and then baked in a kiln at high temperatures. Most ceramic tiles intended for flooring are coated with a protective liquid glass glaze before being fired for a second time. This glaze gives the tile its color, pattern, and resistance to stains and moisture.
Because they are highly resistant to scratches, stains, and moisture, they are well-suited for high-traffic areas and indoor residential environments.
Ceramic vs. Porcelain Floor Tiles: Which is Better?
One of the most common questions homeowners ask is: Which floor tiles are better, porcelain or ceramic? While both belong to the ceramic family, they are manufactured differently. Porcelain tiles are made from more refined clay and fired at higher temperatures, making them denser and less porous (with a water absorption rate of 0.5% or less).
Ceramic tiles, on the other hand, are slightly more porous.
- When to choose ceramic: It is generally more affordable, lighter, and much easier to cut, making it a favorite for DIYers and indoor projects (like kitchens, bathrooms, and living rooms).
- When to choose porcelain: It is highly recommended for outdoor use, commercial spaces, or areas subject to freezing temperatures where ceramic might crack.

Pros and Cons of Ceramic Tile Flooring
Before diving into a flooring project, it is essential to understand both the benefits and the drawbacks of the material.
The Advantages of Ceramic Tiles
- Cost-Effective: Ceramic is typically more budget-friendly than porcelain or natural stone.
- Easy Maintenance: The glazed surface makes it incredibly easy to clean, sweep, wipe, and mop. It does not harbor dust mites or allergens.
- Ease of Installation: Because it is less dense than porcelain, ceramic tile is significantly easier to cut and install.
- Design Versatility: Available in endless colors, patterns, and sizes—including realistic wood-look and stone-look options.
The Disadvantages of Ceramic Tiles
- Cold and Hard: Ceramic floors do not retain heat well and can be tough on your feet if standing for long periods.
- Grout Maintenance: While the tile itself is stain-resistant, the grout lines between them are porous and require regular sealing and cleaning to prevent discoloration.
- Not for Freezing Climates: Due to its higher water absorption rate, standard ceramic is not suitable for outdoor patios in freezing weather.
How to Install Ceramic Floor Tiles: A Step-by-Step Guide
Step 1: Assess and Prep the Subfloor
A successful tile installation starts with a flawless foundation. Your subfloor (whether concrete or wood) must be clean, dry, and structurally sound.
- Use a spirit level to check for dips or high spots.
- If installing over a wooden subfloor, you will need to install a cement backer board first to prevent the wood from flexing and cracking the tiles.
Step 2: Measure
Never start tiling from the wall. Rooms are rarely perfectly square.
- Dry-lay a row of tiles along both lines (using tile spacers) to see where the cuts will fall at the edges. Adjust your center line if you end up with tiny, awkward slivers of tile near the walls.
- Find the center of the room by measuring the walls and snapping two chalk lines that intersect in the middle.
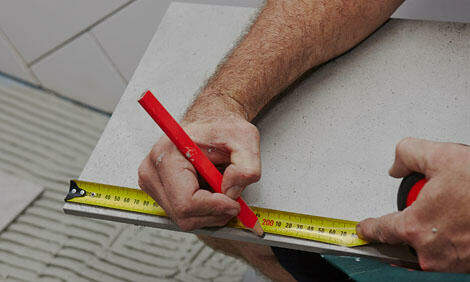
Step 3: Cut the Ceramic Tiles Accurately
As you reach the edges of the room, you will need to cut tiles to fit. Because ceramic is softer than porcelain, it is excellent for scoring and snapping.
- The Right Tool: A professional manual tile cutter, such as the RUBI TZ or TX series, is perfect for straight and diagonal cuts. It offers clean, fast cuts without the dust of a wet saw.
- For L-shaped cuts around pipes or door jambs, use an electric tile saw or an angle grinder with a continuous rim diamond blade.
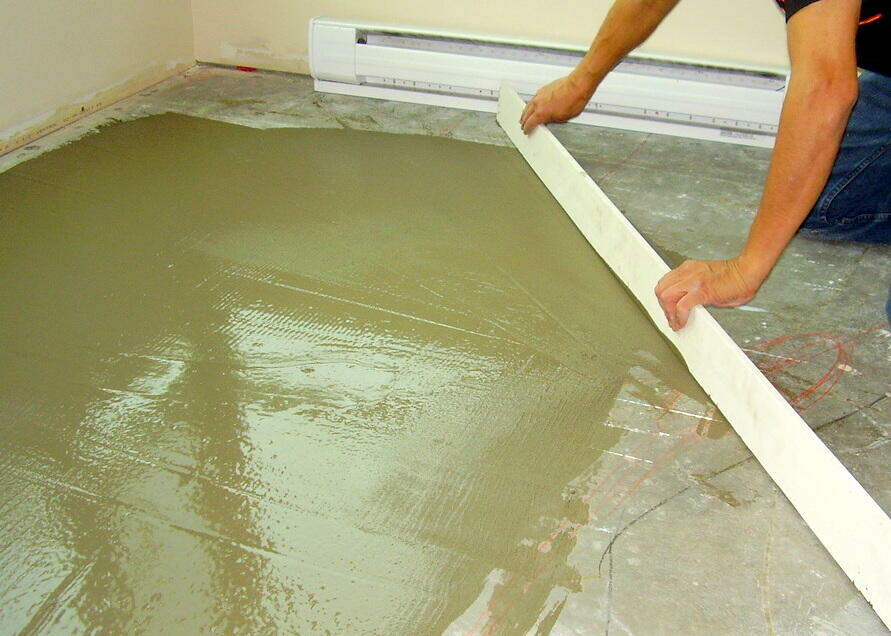
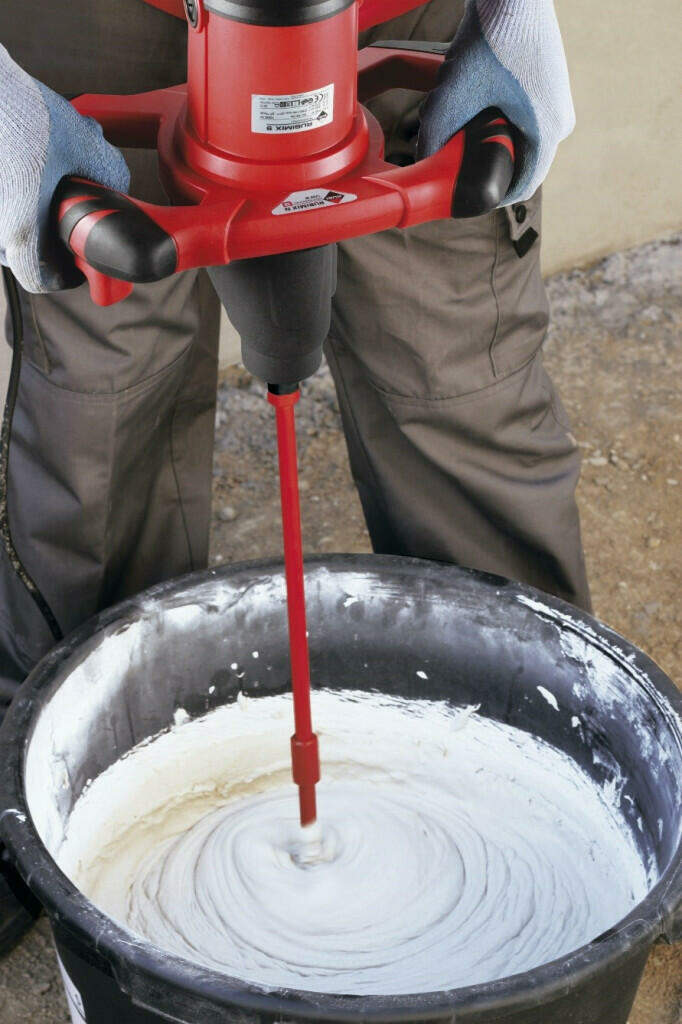
Step 4: Mix and Spread the Thin-Set Mortar

Mix your thin-set mortar using an electric mixer (like the RUBI Rubimix) to achieve a smooth, peanut-butter-like consistency. Let it slake (rest) for 5-10 minutes, then remix.
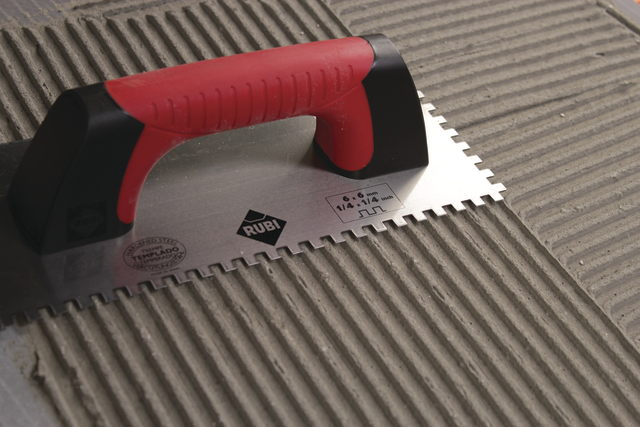
- Using a RUBI notched trowel, spread the mortar onto the floor. Hold the trowel at a 45-degree angle to create uniform ridges.
- Pro Tip: Always “back-butter” large ceramic tiles (applying a thin layer of mortar to the back of the tile) to ensure 100% coverage and prevent hollow spots.
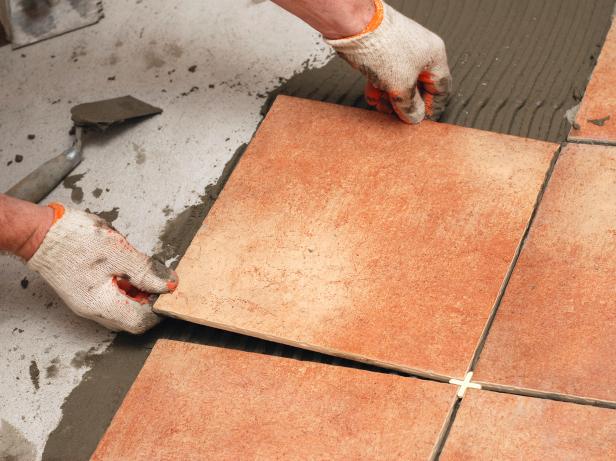
Step 5: Set the Tiles and Prevent Lippage
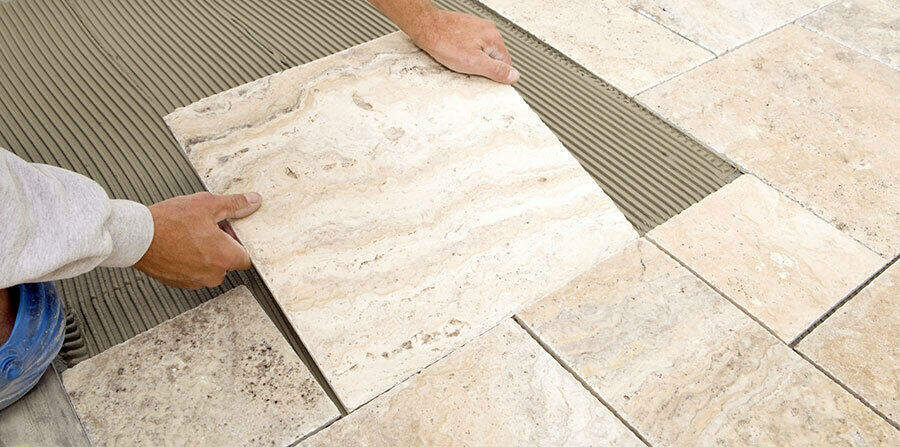
Place the ceramic tile into the mortar bed with a slight twisting motion to collapse the ridges and ensure a strong bond.
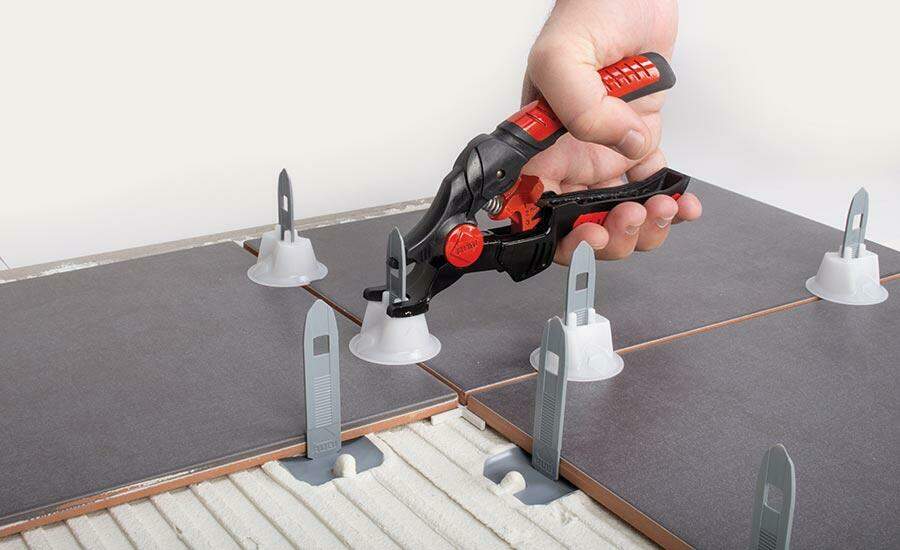
- Avoid Lippage: To guarantee a perfectly flat floor (especially with large format or wood-look ceramic tiles), use a tile leveling system like the RUBI Delta Level System. The clips and wedges will hold the tiles flush with one another while the mortar cures.
Step 6: Apply Grout and Finishing Touches
Wait at least 24 hours for the thin-set to dry. Remove the leveling clips and wedges.
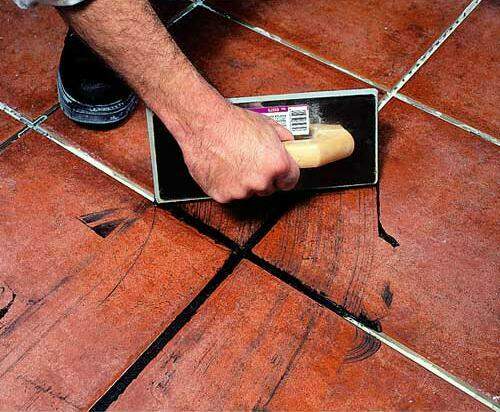
- Mix your grout and apply it using a rubber grout float, pressing it firmly into the joints at a 45-degree angle.
- Wait about 15-30 minutes for the grout to form a haze, then wipe it away using a damp (not soaking wet) tiling sponge and a RUBI washbasin. Wipe diagonally across the grout lines so you do not pull the grout out.

Common Tile Setting Mistakes to Avoid
- Skipping Expansion Joints: Always leave a 1/4-inch gap around the perimeter of the room (where the floor meets the wall). Tiles expand and contract; without this gap, they will crack. Hide the gap later with baseboards.
- Using the Wrong Trowel Size: The larger the tile, the deeper the notches on your trowel need to be to ensure proper mortar coverage.
- Adding Too Much Water to Grout: Soupy grout will dry weak, powdery, and is highly prone to cracking and staining.
Frequently Asked Questions about Ceramic Tiles (FAQs)
What is the best grout for ceramic floor tiles?
For high-traffic or wet areas (like kitchens and bathrooms), epoxy grout is highly recommended because it is waterproof, stain-proof, and doesn't require sealing. For standard rooms, a high-quality sanded cementitious grout works best for floor joints wider than 1/8 inch, provided you apply a grout sealer after it cures.
Can I just put new grout over old grout?
No, putting a thin layer of new grout directly over old, dirty grout will result in flaking and failure within weeks. You must remove at least half the depth of the old grout using a grout removal tool or a multi-tool before applying the new layer.
What cleans grout better than bleach?
Bleach can actually break down cement-based grout over time and strip away its sealant. The best, safest way to clean dirty grout is to use an alkaline tile and grout cleaner, or a natural paste made of baking soda and hydrogen peroxide. Let it sit for 10 minutes, scrub with a stiff nylon brush, and rinse thoroughly.

Post a comment