
With an impressive flexural strength surpassing 35 MPa and a near-zero water absorption rate below 0.5%, porcelain tiles stand as an undisputed champion in durability and moisture resistance. While wood flooring captivates with its organic charm and warmth, it often falls short in the battle against water damage, unless specially treated. Are you considering a new tile installation or just curious about how to install porcelain tile? Well, you’ve landed on the right page! Our comprehensive guide will shed light on the installation process, enumerate the essential tools and materials, and underscore the critical safety measures every DIY enthusiast or professional should know. So, let’s lay the foundation for a flawless porcelain floor, shall we?


Getting Started: Pre-Installation Tips
Before you roll up your sleeves and start laying down your porcelain tiles, preparation is key. This ensures a successful and lasting outcome. This phase sets the foundation for a flawless installation and involves several crucial steps. Let’s get started:
Assessing the Installation Area
When it comes to how to install porcelain tile professionally, start by scrutinizing your installation area. Whether it’s the floor or a wall, a pristine surface is vital. Check for any bumps, dips, or imperfections.
Ensure that the subfloor or wall is clean and free from dust and debris. Moisture can be a nemesis, so keep an eye out for any dampness or water issues.
Address these concerns before diving into porcelain tile installation. This groundwork lays the foundation for a smooth process, reducing hiccups when sealing porcelain tiles.
Gathering the Necessary Tools and Materials
Having the right tools and materials is essential for successful tile installation. Make sure your toolbox is stocked with the basics: tile cutters, spacers, levels, and trowels. Your choice of adhesive and grout should align with your specific tile and installation needs.
Consult the manufacturer’s recommendations. Get tile spacers to maintain consistent gaps between tiles. The size of the spacers depends on your desired grout line width.
Choose the right trowel size for spreading adhesive. The type and size vary based on the tile size and type of substrate. With the right gear in hand, you’ll tackle installation, smooth-cutting tile, and grouting tile.
Measuring and Layout
When installing porcelain tiles, precise measurement and layout planning are your secret weapons. Measure the Area, use a tape measure to calculate the dimensions of the space. Measure the length and width of floors or the height and width of walls. Record these measurements accurately.
Locate the center point of your installation area. This will serve as your starting point for laying tiles. Use a chalk line or laser level to mark this point.
Before applying adhesive, do a dry layout. Arrange tiles without adhesive to see how they fit. This helps you plan for any tile cuts, ensuring a balanced and visually appealing layout.
Draw reference lines that intersect at the center point. These lines will guide you when placing the first tiles. Ensure they’re level and plumb for a professional finish.
Determine your desired grout line width and use tile spacers accordingly. Spacers maintain consistent gaps between tiles, ensuring a polished look.
If your layout ends with a partial tile at the wall or a corner, measure and cut tiles to fit. Use a tile cutter for precision. Any professional tile installer knows that planning is the key to a stunning end result.

Surface Preparation
This is a pivotal step when learning how to install porcelain tile professionally. It ensures that your substrate-whether it’s a floor or wall-is ready to receive the tiles. It also provides a solid foundation for your project.
Here’s how to prepare the surface effectively:
Subfloor Preparation
This is a critical step in mastering how to install porcelain tiles. It’s all about ensuring your subfloor, the surface beneath the tiles, is in prime condition. Start by cleaning the subfloor, and removing all dust, dirt, and debris. A clean surface is essential for proper tile adhesion.
Check for unevenness. Fill low spots with a self-leveling compound and grind down any high points. A level subfloor prevents tiles from cracking or shifting.
Fix any cracks in the subfloor with suitable patching material. Cracks can telegraph through the tiles over time.
Moisture is a tile’s enemy. Test the subfloor’s moisture content, especially in wet areas. Use an appropriate moisture barrier if needed. Preparing your subfloor sets the stage for a successful porcelain tile installation.
Wall Preparation
This is a crucial step in achieving a flawless porcelain tile installation. Start by stripping off any existing tiles, wallpaper, or other wall coverings. You need a clean slate for your new tiles.
Inspect the wall for cracks, holes, or uneven areas. Fill these imperfections with an appropriate patching compound and smooth them out.
Lightly sand or scuff the wall surface to create a rough texture. This helps the adhesive bond securely with the wall.
Apply a suitable primer to the wall to enhance the adhesive’s adhesion. This step ensures a strong bond between the wall and the porcelain tiles.
Level and Check for Plumb
Use a level to ensure the wall is straight and plumb. Adjust as necessary to avoid misaligned tiles during installation.
Porcelain Tile Installation Techniques
Mastering the techniques for porcelain tile installation is essential for achieving a professional finish. Let’s delve into the key steps below.
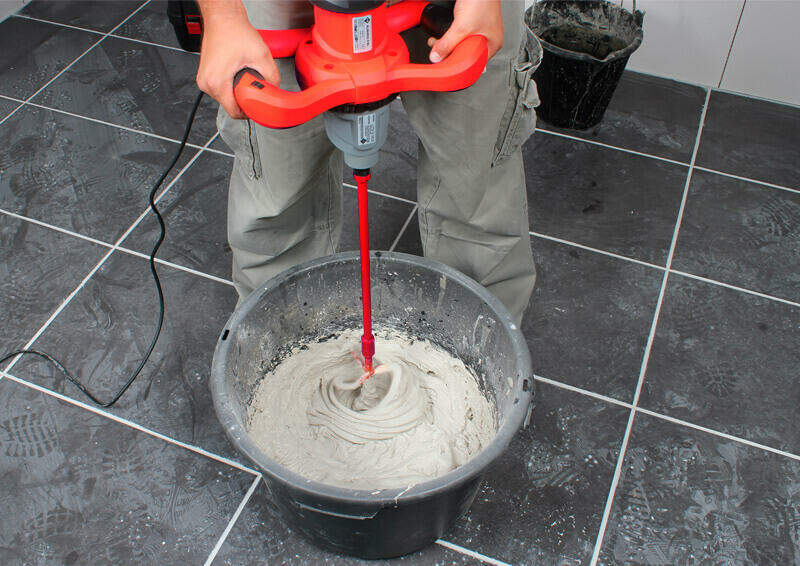
Mixing and Applying Adhesive
Follow the manufacturer’s instructions to prepare the adhesive. Achieve a peanut butter-like consistency for optimal bonding.
Use a notched trowel to spread the adhesive evenly on the subfloor or wall. Work in small sections to prevent it from drying too quickly.
After spreading, comb the adhesive with the notched edge of the trowel to create uniform ridges. This ensures better tile adhesion.
Begin placing tiles immediately while the adhesive is still fresh. Press them firmly into the adhesive, aligning them with your layout plan. Mastering this technique sets the stage for successful porcelain tile installation.
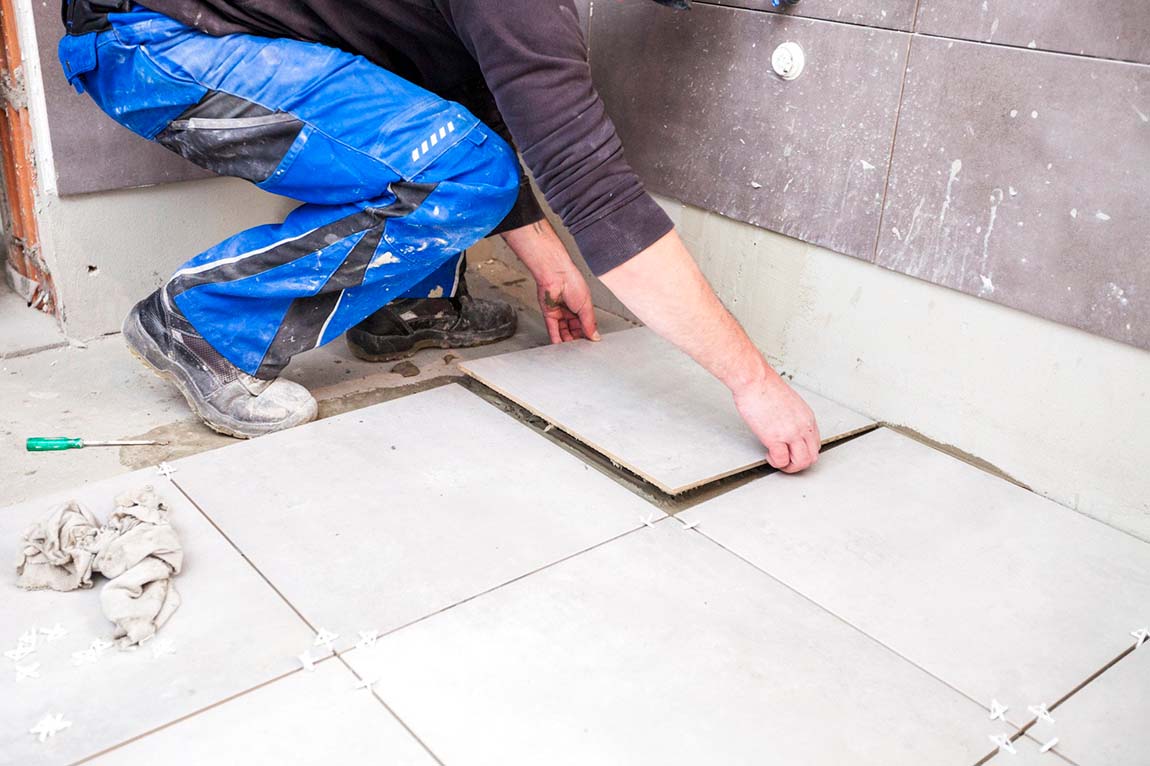
Setting the First Tile
This is a critical starting point for a flawless porcelain tile installation. Begin at the center point of your layout, marked during the planning phase. This ensures a symmetrical design.
Press the first tile into the adhesive with a slight twisting motion. This ensures good contact and prevents air pockets.
Use a level to confirm that the tile is both level and plumb. Adjust as needed to maintain a straight layout.
Continue laying tiles from this well-placed starting point, following your predetermined layout for a professional and visually appealing result.
Progressing Through Installation
As you progress through your installation, maintain spacing. Use tile spacers between each tile to ensure consistent gaps for grout. Spacing depends on your design and the recommended tile size.
When you reach edges, corners, or obstacles, use a tile cutter or wet saw to make precise cuts. Measure carefully to avoid errors.
Periodically use a level to confirm that tiles are staying level and plumb. Adjust if necessary to maintain a straight pattern.
Install tiles in manageable sections to ensure the adhesive remains workable. Continue until the entire area is tiled, always following your layout plan for a polished finish.
Adhering Tiles to the Wall
Spread thin-set mortar evenly on the wall surface using a notched trowel. Work in small sections to prevent drying. Comb the adhesive with the notched side of the trowel to form uniform ridges to enhance tile adhesion.
Begin tiling at your predetermined reference line. Press tiles firmly into the adhesive, aligning with your layout plan.
Use tile spacers to ensure consistent gaps between tiles for grout. Adjust tiles as needed for a straight and level installation.
Grouting and Sealing Porcelain Tiles
These are the finishing touches that elevate your porcelain tile installation. Blend grout to a thick, creamy consistency according to the manufacturer’s instructions.
Spread grout over the tile surface, pushing it into the gaps. Use a rubber float at a 45-degree angle.
Wipe off excess grout from the tile surfaces with a damp sponge. Rinse the sponge frequently.
After the grout has cured, typically 24-72 hours later, apply a grout sealer to protect against stains and moisture. Sealing your porcelain tiles enhances the durability and appearance of your tiles.
Caring for Newly Installed Porcelain Tile
Porcelain tiles are renowned for their durability and low maintenance needs. However, maintenance is still needed for the longevity and beauty of your tiles. After grout cures, clean the porcelain tiles with a pH-neutral tile cleaner to remove any residue.
Regularly sweep or vacuum to prevent dirt buildup. Clean with a damp mop using a tile-friendly cleaner. Stay away from abrasive or acidic cleaners that can damage the tiles or grout.
Periodically reseal grout to maintain its integrity and prevent staining. Wipe up spills promptly to prevent staining.
How to Install Porcelain Tile: Final Word
In the world of home improvement, knowing how to install porcelain tile is a valuable skill. With proper planning and the right techniques, you can achieve quality results.
Ready to embark on your porcelain tile installation journey? Don’t compromise on quality. Choose Rubi for the finest tools that ensure precision and longevity in every tile placement. Elevate your flooring game with us. Explore our collection now!

Post a comment