
Browsing through your local home improvement store shelves can feel wholly overwhelming. When it comes to your home improvement projects, certain things can get lost in the shuffle. Grout is often overlooked by home DIY-ers. But selecting the right grout and mixing it properly is essential to ensure your project looks its absolute best. Luckily, in this guide, we’ll help you explore how to mix grout. We’ll also dig into the different types of grout and how they may affect your tile installation’s final look.

The Different Types of Grout
There are several different types of grout. However, in general, there are two unique varieties: sanded and unsanded.
Choosing which type of tile grout will work best will depend on your project and what you hope to accomplish. In general, the grout you’ll want to work with will be dependent on the size of the tiles you’re using.
Sanded Grout
If you’re buying grout, it’ll be in its dry state when you purchase it. Sanded grout, in particular, features the following components:
- Cement
- Pigment
- Filler particles
- Sand
The addition of sand gives sanded grout a much more coarse and grainy texture. The appearance, too, will look a bit less smooth. This rougher texture makes it less than ideal for certain polished tiles, and you shouldn’t use it in close contact with delicate materials such as marble.
It is best to use sanded grout when the joints between your tiles will be greater than 1/8-inch. This is because the sand will hold better between these larger joints. It is also much less likely to give you visible cracks in the grout work.
To best use sanded grout, be sure you clean it off all tile surfaces after installation and before it gets the chance to harden. Once it has hardened or cured, you should coat it with some form of sealant so as to prevent staining and discoloration.
The curing of sanded grout usually takes about 72 hours. No matter the design of your tiles, you should be able to find a color that will work. Sanded grout is available in a wide variety of different colors.
Unsanded Grout
If you’re installing tiles, you need to utilize grout. But what do you do when you need a sleeker-looking grout that isn’t so coarse? Enter, unsanded grout.
Unsanded grout features all the same components as sanded grout, minus the sand, of course. This gives it a much smoother texture, but less binding power.
For joints less than 1/8-inch thick, unsanded grout is the best option. It’s also good for projects that feature more delicate materials, such as marble. Projects featuring mosaic tiles should also consider unsanded grout.
Unsanded grout will take just as long as sanded grout to cure, about 72 hours. However, unsanded grout may require a bit more effort to actually get the joints between the tiles because it is far more sticky than sanded grout. Take care to put forth this effort though, especially if you want your tiles to stick.
You can find unsanded grout in a wide variety of colors, similar to sanded grout. You should also finish the project in much the same way, by coating it to protect it. If the price of these products concerns you, worry not. Sanded and unsanded grout are usually both in a similar price range.

Grout Additives: What Should You Use?
You won’t always need a grout additive, though some form of sealant is typically recommended. You can get both primary and secondary sealants. Either way, you need to be protecting your grout. Grout additives allow you to add strength, color, or flexibility to your grout mixture. For certain projects, these additives are a necessity.
Mixed-in Sealants
Mixed-in or “primary” sealants are a liquid that typically takes the place of water in grout mixtures. The goals of mixed-in sealants are generally the same as secondary sealants that are applied after installation is complete. These goals include:
- Prevent moisture penetration
- Protect against stains
- Prevent mold and mildew build-up
- Preserve the color of the grout
Some sealants may also claim to strengthen the grout and provide it with more longevity. If you use a mixed-in sealant, there is often no reason to use a secondary sealant after installation. There are certain sealants designed for sanded and unsanded grout use. Be sure to check that your sealant and grout are compatible before you begin mixing the grout.
Latex Additives
If you want your grout to be a bit more flexible, latex additives are your new best friend. With a latex additive, you receive benefits such as:
- Improved flexibility
- Improved durability
- Stronger adhesion
- More freeze-thaw resistance
Latex additives are especially great for kitchen or bathroom grout, as they may allow the grout to cure harder and prevent moisture penetration.
Color Additives
Both sanded and unsanded grouts come in a wide variety of colors. However, these still may not be to your particular liking. If that’s the case, there are color additives you can buy to customize your grout’s appearance.
Color additives come in powdered form. They are easy to add to your grout and water or grout and sealant mixture. The amount of pigment you apply will change the color, though your grout will dry lighter than it appears in the mixture.
There are even special color additives, such as glitter or glow-in-the-dark powders that can make your grout look even more unique.
How to Mix Grout in 4 Easy Steps
Now that you know the basic components of a grout mixture, you’re finally ready to start mixing some of your own! To start, gather all your materials. This includes:
- Grout, sanded or unsanded
- Any additives
- Water (if you’re not using sealant)
- A bucket to mix in
- A grout mixer
Step 1: Combine the Materials
Start by putting an appropriate amount of water in your bucket first. Adding the water in first makes the grout a bit easier to mix, and makes it less likely you’ll leave clumps of grout sticking to the bottom of your bucket.
You can always add more water as you mix if the consistency is incorrect. It’s always best to use soft or distilled water, as hard water can leave behind an unappealing white residue.
Start small by only mixing a half or quarter of your grout powder to begin with. This way, if your ratios are wrong, you can easily add more. You should also add in your grout additives using the manufacturer’s recommendations.
The grout manufacturer should tell you how much of each ingredient to use, but start with a smaller amount and work your way up. Remember, you can always add more later, but you can’t take any away once you’ve added it.
Step 2: Tilt and Mix
To mix your grout, tilt your bucket to a 45-degree angle. This allows you a better view of the mixture, so you can ensure it’s been thoroughly mixed.
Use a grout knife or a small trowel to combine the mixture. You should keep mixing grout until there are no lumps. This is how you’ll know you’ve incorporated all the powder.
It’s best to hand-mix your grout, especially with smaller projects. This will prevent the formation of air bubbles and limit any unfortunate discoloration. Air bubbles may also weaken your grout, which ruins the integrity of your project.
Step 3: Make Necessary Adjustments
As you mix, be sure to check the consistency of your grout. You can make adjustments by adding more or less water and/or powder.
If you’re mixing grout for your walls, it should have a strong, thick consistency. It should be easily moldable and not too moist, similar to bread dough. Floor grout will be a bit smoother, like peanut butter.
The best grout will require a bit of effort to put into place. This lets you know that it’s strong enough to hold up your project.
You should add any additional powder or water gradually. Then remix it to ensure all ingredients are appropriately incorporated.
Step 4: The Slake and Final Mix
Once you’re pleased with the consistency, let the grout mixture sit, or “slake,” for about 10 minutes. This gives the chemicals in each ingredient time to bond and strengthen.
The grout will look a bit thicker after the slaking process is complete. Don’t worry and don’t add more water. Simply use your grout knife to re-mix the mixture once more before application.
Grout that hasn’t been properly slaked tends to be weaker. This creates a higher likelihood of cracks or chips in your project, giving them much less longevity.
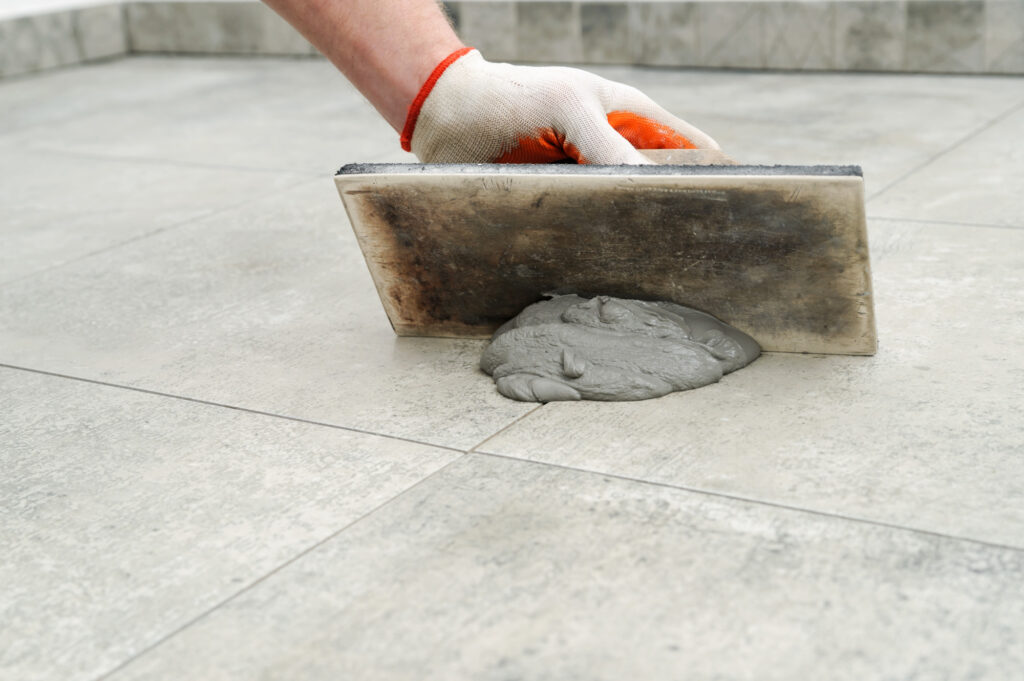
Once the grout has been slaked and re-mixed one final time, you can begin grout installation and tiling.
Perfect Grout Every Time
Now that you know how to mix grout, you can ensure that your projects look perfect every single time. The process is really quite simple once you better understand the components you’re working with. Remember, a little planning can go a long way in leaving you with a beautiful DIY project.
Download our free guide for more tips and tricks to help you complete all your tiling projects. With these simple tips, your DIY project will look better than the pros.

Post a comment