
One of the key aspects of a successful tile installation is to get the right mortar. Knowing how to mix mortar correctly is important to achieve the strongest bond possible and thus a long-lasting installation. Improper mortar mixing may cause issues to your installation or even lead to a complete failure. Here are some key steps to ensure a proper mix, and why they are necessary, regardless of the brand or type of mortar.
How to Mix Mortar Correctly
Firstly, you need to be familiar with the specific type of mortar you will use. While specifics vary between manufacturers, every bag will have instructions printed on it, so make sure to read them. You should at least know basic things like the mortar mix ratio or amount of water (most want somewhere around 6 quarts of water per 50lb. bag), slake time, pot life (time between mixing and when the mixture is no longer usable), and open time (time between spreading the adhesive and having the tile set). Provided you are aware of these things, there should be no real surprises if you follow the steps below.
To know how to mix mortar properly, you must understand these steps and the basics of how cementitious mortars actually work on a chemical and microscopic level. Mortars consist of a few basic ingredients: sand, Portland cement, lime, and (usually) various chemically manufactured additives which assist in the mortar mix being able to retain water for a longer amount of time. These additives can also provide different properties to the final product like flexibility, strength, faster curing times, etc. Most modern mortars have at least one type of additive.
Understanding How Mortar Works
Understanding the way that cement works and why it needs to be mixed in a certain manner and in different stages is key to ensure a successful result. Cement cures through a process called hydration. The dry cement molecules are inert, meaning they don’t do anything at all until they are mixed with water. Once water is added to the cement, the molecules use that water to grow small crystals. The more water available to the molecule, the longer and thicker the crystals grow.
When these cement molecules are all growing crystals next to one another, the crystals will grow around each other and interlock. This is how cement gets stronger, and why it gets stronger the longer it is exposed to water. In the case of a mortar, the crystals will not only grow around other crystals, they will also grow into the pores of the tile and substrate. This is how they achieve a bond.
When a modifier is added to the mix, it helps create a stronger bond to the tile than a mortar without modifiers. The more modifiers included in the mortar mix, the stronger the bond because the polymers allow the mix to retain water for a longer period. When the polymers are exposed to water, they dispersed evenly into the mix and surround the cement molecules and allow them access to water for a longer period (the water won’t evaporate through the polymers). This process produces a longer, thicker cement crystal than the mortar you would have without any type of modifier.
What Equipment Do You Need?
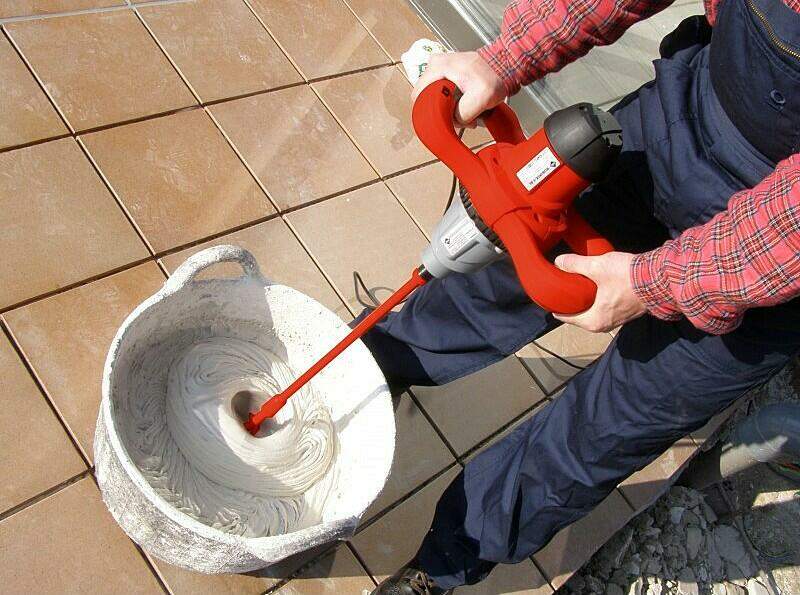
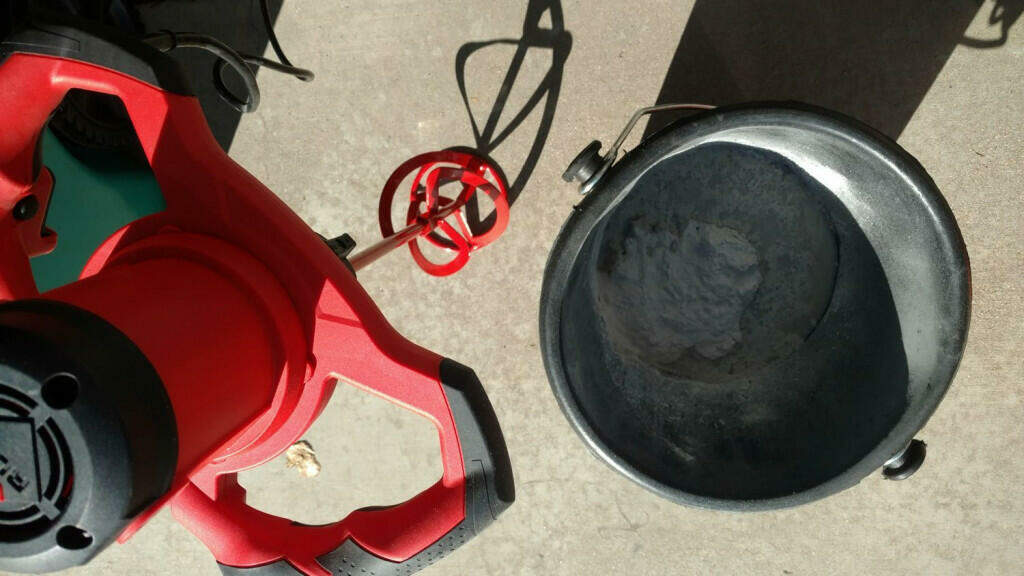
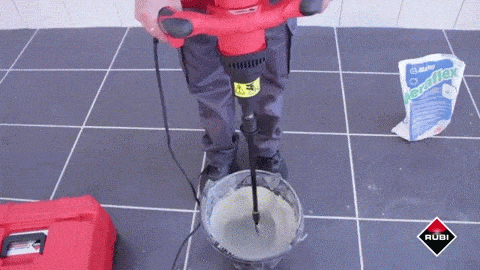
Wondering how to mix mortar the right way? Well, selecting the right tools for the job is among the first decisions you have to make. The mixing drill and mixing paddle are fundamental. Use a mixer with a low rpm. Most mortar manufacturers recommend a low rpm to ensure a minimum amount of air trapped in the mortar as well as a more consistent mix. You also want to use a spiral-type mixing paddle rather than the ‘egg-beater’ type. This also prevents excess air from being added into the mix. The Rubimix 9N plus has a low rpm and comes with the proper type of paddle. Combined with the Rubi’s rubber bucket, you have all the equipment needed to properly mix mortar for tile installation.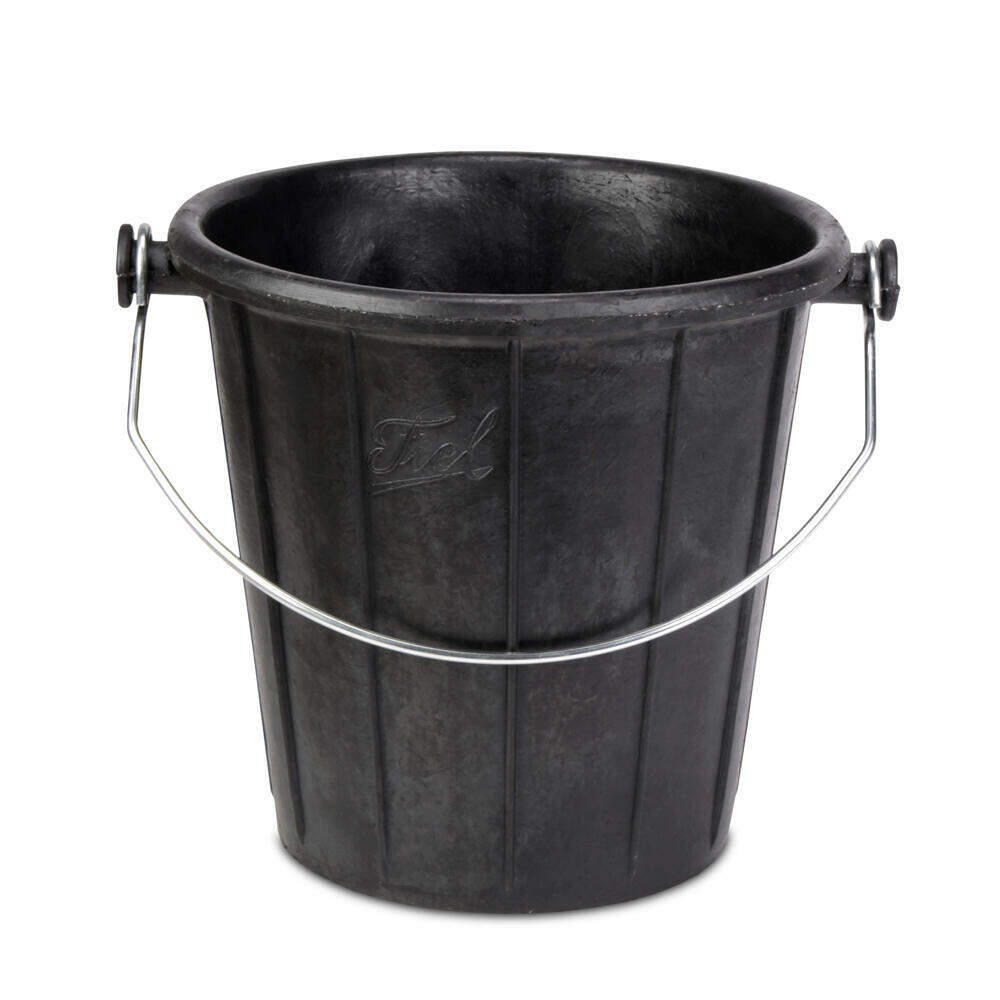

Initial Mortar Mix
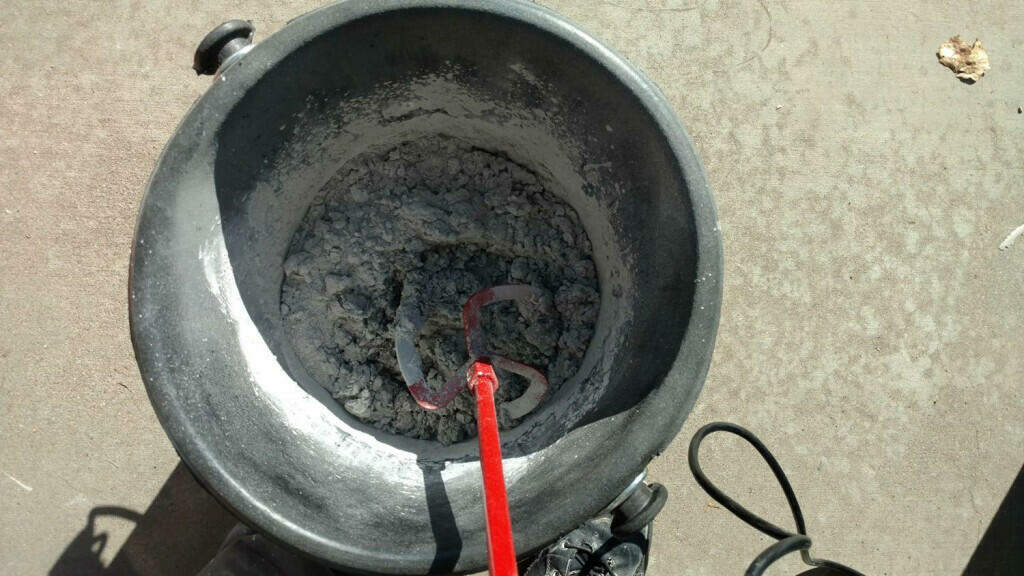
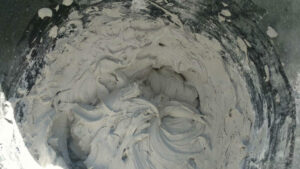
Start by pouring water into your bucket. This cuts down on the amount of airborne particles. If you put the powder in first, then add water, you’ll have a large cloud of dry mortar floating around when you begin mixing, and it will be more difficult to get all the dry mortar mixed up, as it will stick to the sides of the bucket. Add the mortar to the water, mix, add more mortar or water as needed to reach a fairly thick consistency – about the creaminess of thick peanut butter. You want the swirls at the top of the bucket to stand up without slumping or disappearing (see the photo).
Most manufacturers recommend what seems like an excessive amount of time to mix mortar, five or ten minutes. This is a LONG time to mix mortar, but it will help achieve the required blending and saturation of the individual molecules of cement and additives in your mix. Most professionals will only mix long enough to get a consistent mix of the powder and water. Ideally, you should stick to the recommended time, but, realistically, it won’t likely happen. Just be aware of this and always mix a bit longer than the time you feel may be necessary.
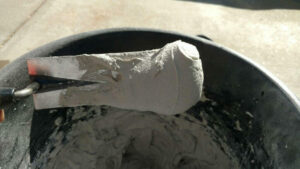
It is completely fine to add more mortar or water at this stage to reach the desired thickness. Do this during the initial mix rather than adding more later in the process. Adding more water or mortar after the slaking stage will considerably weaken the mortar. The mortar should be thick enough to stick to the trowel when you turn it upside down. If it drips off then it’s too thin, and you need to add more powder to the mix.

Slaking
The slaking stage is very important! It is a key issue when determining how to mix mortar perfectly. Slaking simply means letting the mixed mortar sit, untouched, for ten minutes or so. It is critical to allowing the chemical makeup of the mortar to work correctly. Not doing so, and using it immediately after the initial mix, will lead to the mortar getting stiff and unworkable fairly quickly. Then, the mortar won’t bond or cure correctly with the tile. Slaking also provides the maximum working time once the mortar is fully mixed.
Most modern modified mortars have powdered additives (usually polymers of some sort) added to the dry mix. Chemically speaking, these additives, like the cement, get activated through hydration, but they work a bit differently. When adding water to the cement, the mix begins to grow crystals and that’s how mortar gets its strength. The longer the cement is exposed to water, the longer the crystals grow. The longer the crystals grow, the stronger the cured product will be.
Once you add water to the additives, the molecules in the additives will absorb it. Think of a molecule of the additive like a cotton ball. The outer layer of the additive will be hydrated, but the inner portion will still be dry. Slaking provides the additive enough time to become completely saturated.
If you do not put the mortar to slake, the mix will have dry polymers. The dry polymers will leach water from the cement and cause it to stiffen up quickly. If the cement does not have sufficient water to continue growing the crystals, the crystal growth and curing process essentially stops. Therefore, not allowing the mortar mix to slake causes it to get stiff quickly, which weakens the mortar and creates issues with bonding. Lack of crystal formation in the cement leads to an insufficient bond to the tile and substrate. Allow the additives to dissolve fully to have a proper mortar mix.
Final Mortar Mix
Once the mortar slakes, move on to get the final mix by distributing the additives evenly into the mortar. This process helps spread the polymers and water throughout the mix to produce a consistent, properly blended mortar during and after the cure time.
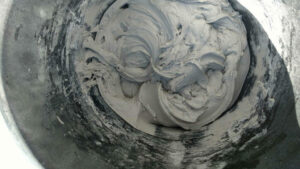
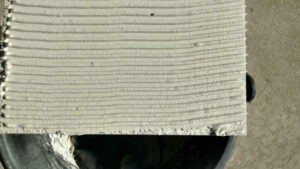
Do not add more water or powder to the mix at this stage! Excessive water will only spread out the mix. There is already water between the mortar molecules, separating them from each other. The farther apart the molecules are when the crystals begin to grow, the harder it will be to achieve the interlocking crystal formation of the cement, which is where the strength of the mortar comes from. If the crystals cannot fully interlock with one another, the final product will be weaker. By the way, this is also why you don’t want excessive air trapped in the mortar mix. If properly mixed, the mortar should have standing ridges without slumping when spreading it with the trowel.
So, how to mix mortar the right way? Just remember this:
- Don’t add too much water. This will weaken the mix.
- Mix slowly to trap the minimum amount of air in the mortar mix.
- The mortar should be fairly thick, like thick peanut butter.
- The thickness and consistency of the initial mix should be the same consistency of the final mix.
- Slaking is necessary!
- Do not add more water or mortar mix after the mortar slakes.
- Know the working time of your mortar and pay attention to when it begins to stiffen up.
The right mortar mix is critical to achieve a successful tile installation with the most durable bond. As you can see, it is not that simple to know how to mix mortar correctly. When done properly, it makes a world of difference.
Do you know other pro tips about how to mix mortar for tile installation? Comment below!
[Interested in mixing mortar like a pro? You better get the right tools!]

Thank you for sharing the valuable information.
It is our pleasure to share valuable information with all our professionals. Thank you for following and visiting our blog!
when using sluter ditra can I put a skim coat of mortar down at the end of the day and motar on top of that the following day?
There’s no need to lay a first layer and then a second one. You can start laying your tile with the first layer.
I had tile guys lay tile down on the shower walls. I noticed he put globs of mortar behind the tiles. It looked like the foam you use for insulation. What do you suppose he used. It was very thick and strong.
Hello Sandy. It doesn’t sound like this installer did the installation the way we would normally recommend. Normally we would recommend using a tile adhesive, which wouldn’t look like foam, and we would recommend combing the adhesive on the wall or floor and backbuttering the tile, rather than applying the adhesive in globs.
Great info.. love the fact you don’t just give the how or what to do but actually explain why and what is happening .. great valuable info. Some of the best reads I’ve seen on the topics.
Thanks so much for reading!
Pls name me the materials used to mix mortar for moasic pool tile
Hi Mohamed. You should only need the mortar itself, an electric mixer, and water.