
Home renovation projects are on the rise, now that Covid-19 pandemic is forcing everyone to spend more time at home. Many homeowners are willing to lower these cost of renovations by doing the work themselves, eliminating labor costs. Fall is around the corner and tiling a fireplace is a great tile installaiton to start and get practice for easy DIY improvements.

Tiling a fireplace is completely cosmetic, making this project a low-risk endeavor and great for beginners. While the risk of losing money on materials and time exists, if done correctly, tiling your fireplace can save hard-earned cash.
So, how exactly do you tile a fireplace correctly?
Read on to learn how to tile a fireplace so that you can learn some DIY skills and save money along the way.
How to tile a fireplace for beginners…
Many folks opt to paint their fireplaces instead of tiling because of the skills, materials, and effort needed. But, tiling your fireplace gives your home a unique and stylish appeal that can improve your home’s resell value.
It’s important to note that not everyone has the skills and tools needed to complete a complicated home renovation project such as remodeling a kitchen. Some jobs simply need the professionals, but with the right knowledge and guidance, many folks are able to complete smaller projects such as tiling, painting, and carpeting. Follow this step-by-step guide to learn how to tile your fireplace the right way.
1. Measure
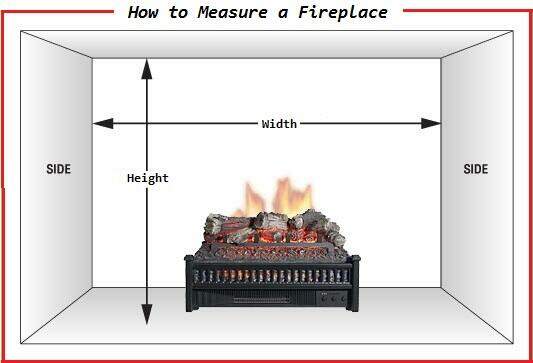 Measure the area of your fireplace you intend on tiling. This may include just the surround and hearth or the hearth as well. Measure the width and height of each portion of the firebox. Then multiply these measurements together to get the square footage you need to tile.
Keep each measurement on hand as these will become important in the design and ordering phases.
2. Design Research
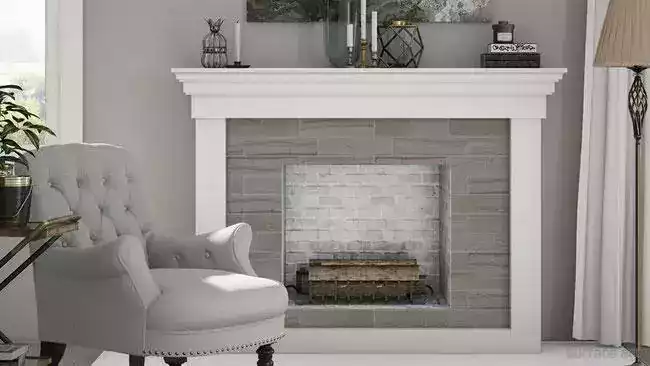
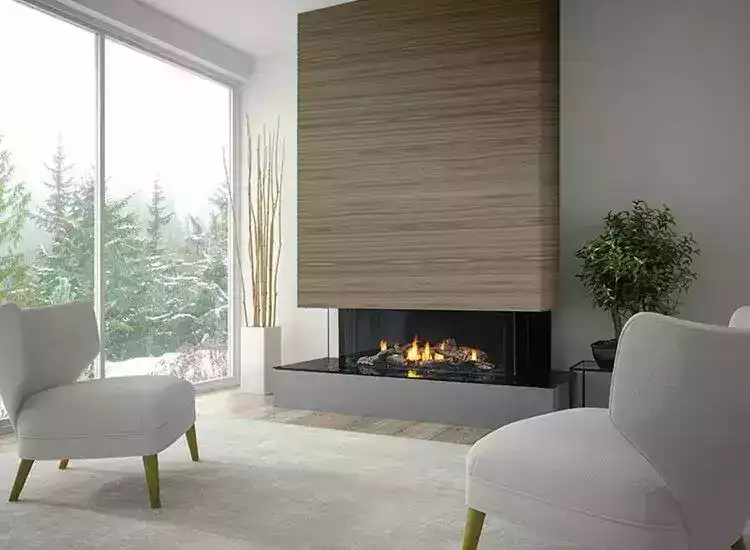
With your measurements on hand, begin researching tile designs. Surf the web for trending fireplace tiling jobs. Find tiled fireplace design that matches the scope of your own project when possible.
If you intend on selling your home in the near future, then it’s also a good idea to select a neutral fireplace tile. Neutral tones and design patterns are more appealing to the masses, which improves your home’s marketability.
When researching design patterns, note how the designer centered and structured their tile. When designing your fireplace, you’ll also want to spend a great amount of time planning the pattern so that the tiling looks professional and cohesive.
3. Plan
Based on the size of your fireplace, you want to select an appropriate design. For example, if the sides of your fireplace are 7″ wide then a tile 10″ wide floral designed pattern would not be a good match. A 10″ tile with an intricate design might be great for a larger fireplace, but would cheapen the look of a smaller fireplace since parts of the tile would need to be cut.
 However, if you plan on tiling with a simple neutral toned tile, then a wider tile will work as well. These tiles will simply need to be cut down to size to match your design needs and vision. The most important part is to always keep your design and size of your fireplace at the forefront of your planning.
Plan out how many rows of tile would fit on your fireplace by taking into account the height of each piece. It’s also a great idea to draw out your tile designs before purchasing materials. This will give you a better idea of exactly how the tiles will fit and where to place them to achieve your desired look.

4. Materials
You’ve designed your fireplace using the measurements of the firebox and the tile, so now it’s time to purchase materials. You can purchase materials online or at a home store. Purchasing materials at home store, however, allows you to see the quality and look of your materials so there are no surprises later on.
When purchasing the tile, add on an additional 10 to 15% to the square footage needed to tile your fireplace. This allows for any mistakes or imperfections in the tile to be accounted for before you start applying any tile.
Other materials you’ll need for the tile application phase are a wet saw, tile adhesive, a notched trowel, and spacers depending on your tile design. For proper design implementation, you’ll also need a level, a square, and a pencil to mark measurements.
If you need an adhesive surface to apply the tile to then you’ll also need cement board. Cement board will also need to be cut and installed prior to laying down any tile work.
If your fireplace surface is brick you’ll need to all create a smooth surface using thinset before installing any tile. The thinset will need to dry overnight before any tile can be applied.
For safety, especially when operating a wet saw, you’ll need safety goggles and protective gear.
5. Prepare
Before you begin applying and cutting tile, you should lay out your design once more with the tiles on hand. You’ll want to do this again after you cut the tile as well to ensure that your measurements are correct and your desired design pattern is achievable.
Make sure that the tile matches your overall room design and vision for your fireplace. If you’re not satisfied with the tile in-person then return it and start fresh.
At this stage make sure to cover any surfaces with a tarp you don’t want to get dirty such as the hearth and surrounding woodwork. Remove the fireplace’s mantel and trim work if possible to avoid damaging it while laying the tile.
6. Cut
Since you’re now 100% sure about your design pattern and tile, it’s time to cut. When using a wet saw, you need to make sure that the blade is wet at all times to avoid chips and mishaps. 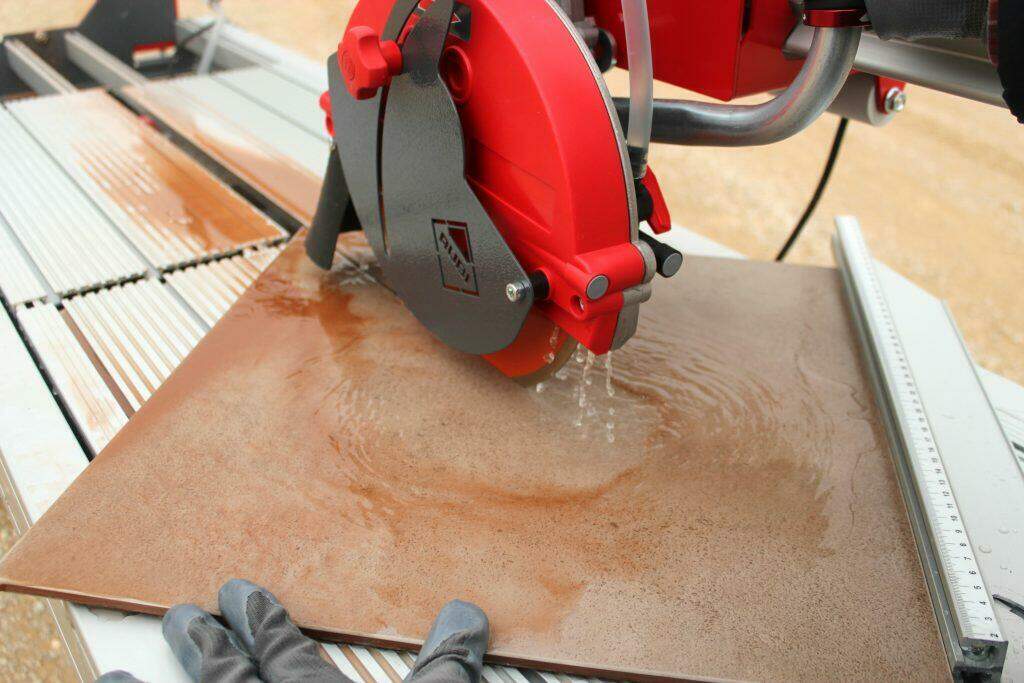
You’ll only be able to use a portion of the tile once you cut it so make sure to double check your measurements before cutting to eliminate tile waste. It’s okay for measurements to be slightly off, however, since the trimmed ends will be placed towards the outside of the firebox where it will be covered with molding.
When using the wet saw, make sure to move the tile through slowly. Pushing the tile through slowly avoids chips and keeps you safe. Make sure to always keep your fingers away from the blade at all times.
Consult your wet saw’s instruction manual for further safety and operational tips.
7. Applying the Tile
Always start your tiling pattern from the bottom up.
Mix together your tile adhesive and ready your notched trowel. Have your design either laid out or handy so that you follow your design pattern exactly.
On the back of the tile, apply your adhesive mixture using the notched trowel. The back of the tile should be completely covered with the adhesive mixture. Then, use the notched trowel to create consistent tracks. 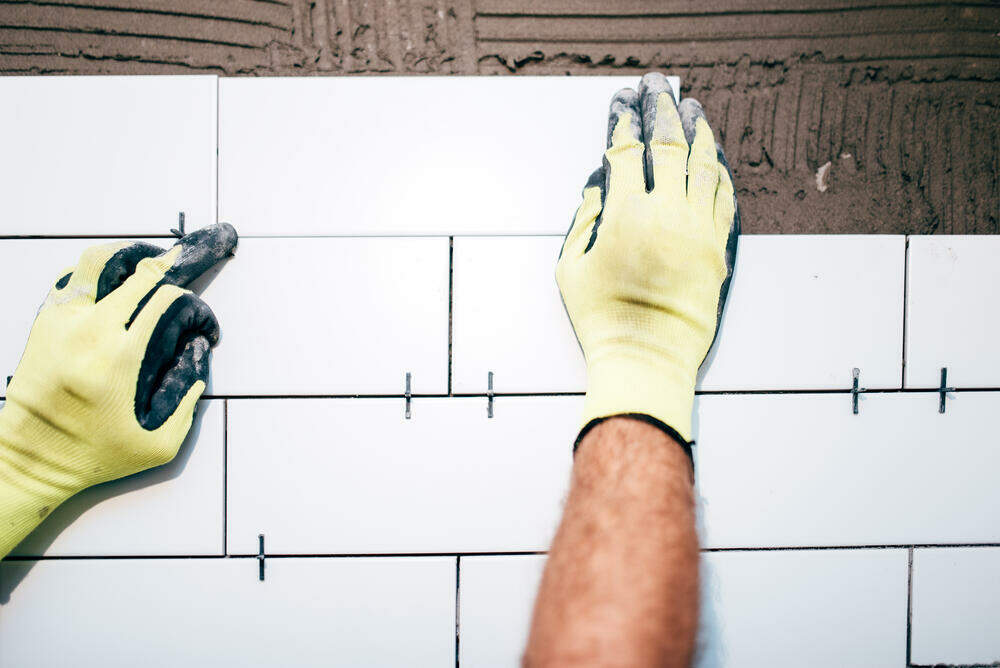
Then firmly apply the tile to the firebox surface. Wiggle the tile slightly so that the tracks adhere to the firebox surface in its desired position. If you intend to grout in between your tiles then you will also place spacers in between each tile. Most experts recommend grouting to avoid the possibility of tiles cracking in the future.
Use your level at this time to ensure that all pieces are completely straight.
Continue adhering your tile using this same method. Remove any excessive adhesive mix using a wet rag as you move along. Make sure to consult your design pattern frequently to avoid making any mistakes.
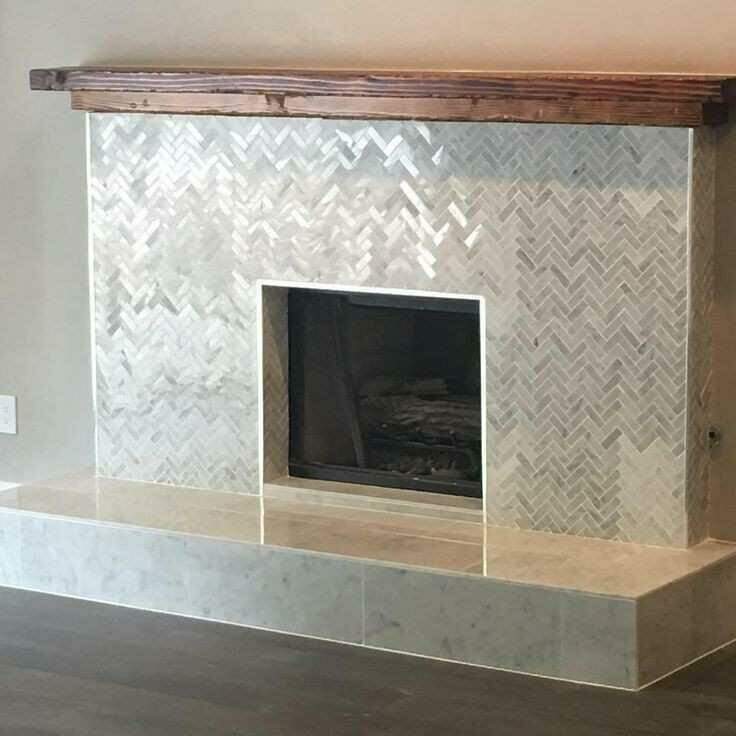
When you reach the upper larger portion of your firebox start placing tiles first in the center and then alternating from left to right. If your tile is heavy, you may also need to start with the upper portion of your firebox and install a temporary ledge so that the tile dries securely in place.
As you get to the top of the firebox, you may find that you need to cut your final pieces along the top of the tile.
Allow the tile to dry overnight. If you plan on grouting, then this step will be completed after the tile has properly set and dried.
8. Grout
Applying grout will be your final step. Follow the instructions of the grouting mixture. Cover any tile the grout may stick to with painters tape.
Use a grout float at an angle to apply the grout and pack it in between the spaces. Then use the edge in a diagonal motion to remove the excess grout from the front of the tiles.
After removing the excess grout allow one hour to dry. Then, wipe away any remaining grout residue using a wet rag or sponge using a circular motion. Let the grout dry overnight and then apply to caulk to the outer edge between the tile work and the mantel.
Avoid building a fire for at least 2 days.
Knowing how to tile a fireplace is a useful and cost-friendly skill to learn. Make sure to always move swiftly as you tile to prevent premature drying and uneven tilework. Once you are done, you are sure to wow your friends and feel like a DIY superstar!
Does tiling a fireplace sound like too much work? Then don’t be afraid to hire a professional or ask for help!

Post a comment