
Precision is the goal when you want your new tile installation to look amazing. If you’re getting started on a new flooring job and vying for a gorgeous uniformity and a high-end look, your biggest friend can be found in the tiniest piece of plastic – the tile spacer.

It goes underappreciated by DIYers and professionals alike, but the tile spacer is one tool that can make all the difference in reaching tiling perfection. We’ll explore why and how you should use tile spacers to get the quality you deserve.
Why You Need to Use Tile Spacers
When you’re setting tile, you’ll need to maintain a certain space between the tiles for the grout. You’re going for symmetry and a professional finish, so the uniformity of the tile joint will have a huge impact on your success. One minor error can upset an entire new flooring installation.
A tile spacer is the best tool to use for creating clean, consistent layouts. It may be tempting to use substitutes, or no spacers at all, but even rectified porcelain tile needs a slight gap. The hard plastic construction of tile spacers makes them easy to remove and rigid enough to create tight, consistent spaces between tiles.
Tile joints need to be at least 1/16″ wide to maintain their structure. As tiles warm and cool, they need space to expand and contract. If you keep them too tight, the pressure they’ll put on each other can cause cracking and buckling.
Tile spacers allow you to get the precise gap you need across an entire installation. When used correctly, you’ll reduce the amount of “tile shifting,” and your finished pattern will be even and free of imperfections. For wall installations, they’re essential to keeping gravity from displacing your tile as it sets.
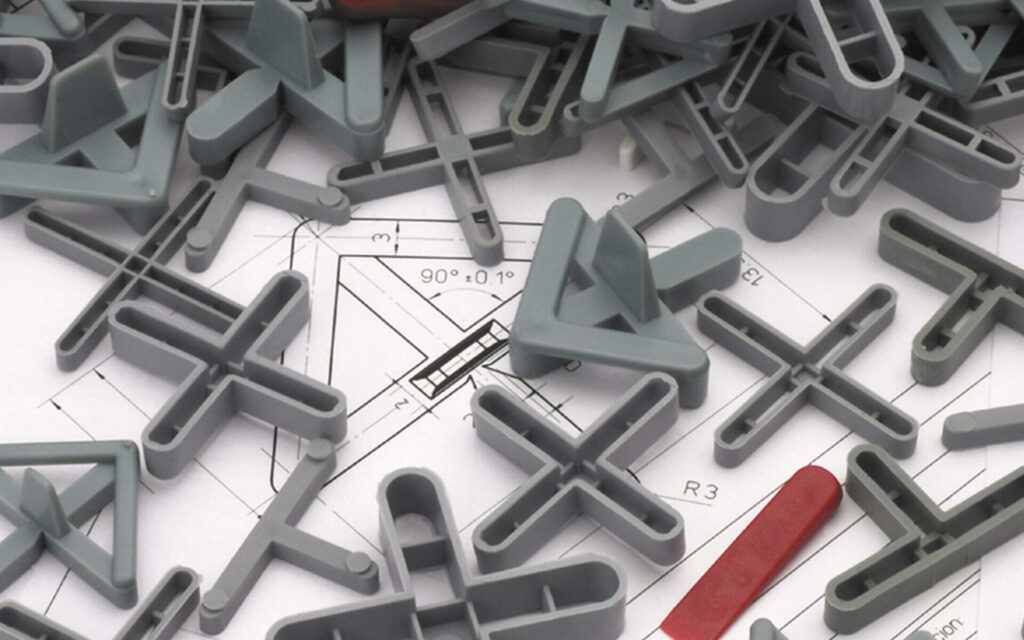
Tile Spacer Styles
Tile spacers may seem simple, but there has been a lot of thought and innovation put into them over the years. Depending on the type of tile material, format, and an installation pattern, different spacers will make work easier and of higher quality.
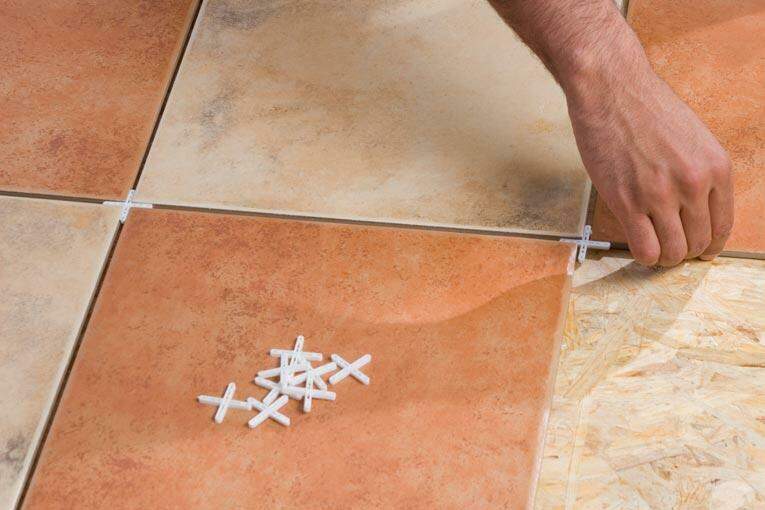
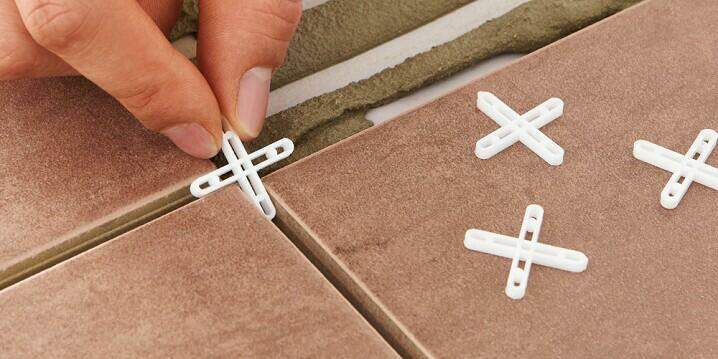
X-Shaped Spacers
The X-shaped spacer is one of the most widely used and versatile spacers. These spacers are best used for tiles that meet at the corners to form a checker pattern. You can place them where the corners meet to ensure each tile is spaced equally.
Large-format tiles generally need additional tile spacers between them, and you can still use X-shaped spacers to maintain that space. Using the “tombstone” method, stick one end in between two tiles so that the other three projections stick up above the surface, making it look like a tombstone. The downside to this method is that you have to use a lot of spacers down the line.

Tavy Spacers
Tavy spacers are a different version of the X-shaped spacer that includes a plastic ring connecting the four ends. The added ring makes it easier to remove from the adhesive before you grout. One side of the spacer has two protrusions, so you insert them in the line between two tiles like the tombstone method with X-shaped tile spacers.
The main advantage of the Tavy design over many X-shaped models is that it’s easy to remove from mortar, which is a crucial step when using spacers. With RUBI X-shaped spacers, you can leave them in the adhesive and grout over them. By staying in the installation, spacers reinforce the grout to prevent cracking from expanding tiles.
The RUBI spacer saves you time and money by limiting how many you have to remove. At the same time, it lowers the chance of tiles shifting as they set, resulting in more precise spacing across the entire installation.
T-Shaped Spacers
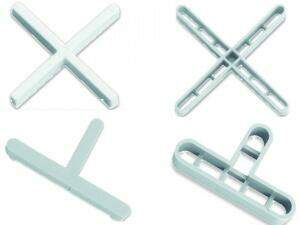
X-shaped and Tavy spacers aren’t practical when you’re installing tile flooring in an offset layout or need to set gaps at the edges of the floor. A T-shaped tile spacer, which has three extensions instead of four, fills the gaps to give you perfect brick or subway tile patterns. Rubi T-shaped spacers sport the same innovative hollow design as the X-shaped spacer. Save time by leaving them in your installation, giving you reinforced support for structural shifts and expansion.
U-Shaped Spacers
Flat U-shaped spacers, or “horseshoe” spacers, are commonly used for wall tiles that run in offset patterns, like metro tile. RUBI horseshoe spacers are ideal for putting between vertical tiles because you can insert two ends rather than just one, as you would with an X-shaped design. The flat surface holds them in a stacked position and they pry out easily once the thinset dries.
Wedge Spacers
Like horseshoe spacers, wedge tile spacers work well for getting even countertops and wall tile patterns. The RUBI wedge spacers are a flexible option because you can move them in or out of the mortar to adjust the height and work with curvatures.
RUBI TWINFLEX®
The RUBI TWINFLEX® spacers are next-generation spacers for several applications. The one-size-fits-all reusable spacer can replace T-shaped, X-shaped, and horseshoe models, making it perfect for installing tile flooring or wall tiles. TWINFLEX® tile spacer was designed for usability and accuracy.
The translucent design makes it easier for you to view the installation and keep the vertices in line. Pair that with the easy-to-remove shape and you have one of the most versatile and user-friendly designs available.
Using Tile Spacers
The grout width primarily comes down to preference. Still, there are guidelines and recommendations to follow to ensure a clean aesthetic and sturdy layout. Tile spacers come in a range of sizes from 1/16″ to 3/8″, and the right width will depend on the cleanliness and size of the tile.
The quality of the tile and edge consistency will determine the workable grout size as well. Natural and kiln-fired tiles have more edge variation, requiring at least a 1/8″ width, while smooth-edged tiles can get as close as 1/16″.
Room size and shape should be considered along with the tile size you use. For example, smaller rooms can look bigger when you use smaller spacers between the floor tiles.
When the room’s walls are off-square, you can opt for larger grout lines to reduce the appearance of the imperfection. Large grout lines will cover slight variations in tile height (lippage) better than thin lines as well.
You’ll reduce the need for small cuts as you go up in spacer size. Even adding an extra millimeter to the gap can significantly shorten the installation time.
Save Time and Effort With Tile Spacers
Before settling on a tile spacer, do a dry run with different spacers to see how the tile will work with various grout widths. Pre-testing will ensure you have the materials you need and that you’ll achieve the look you want.
No matter what you do, don’t cut corners on your installation. Using RUBI’s premium tile spacers, you’ll save time, effort, and headaches trying to get the flawless look you deserve. Shop our tile spacer collection and find the perfect setting for your new flooring or home renovation project.

Post a comment