
If you’re one of the many Americans choosing to complete a home improvement project and you want to use wet saw technology, you might be stressed about how complex can it be to do this properly. Even though you’ll save money by doing the project yourself, you might worry that it will cost you more if you damage the tile or your home while completing this project.
Did you know that, according to NerdWallet, homeowners spent over $500 billion between 2017 and 2019 on home improvement projects, including tile installations? Additionally, by mid-August 2020, 61% of homeowners had taken on these types of projects since March 2020.
That’s why we’ve put together this wet saw tile cutter guide. In it, you’ll learn everything you need to about using one properly.
Finally, you can use this technology right, completing your project while saving money. Read on to learn more.

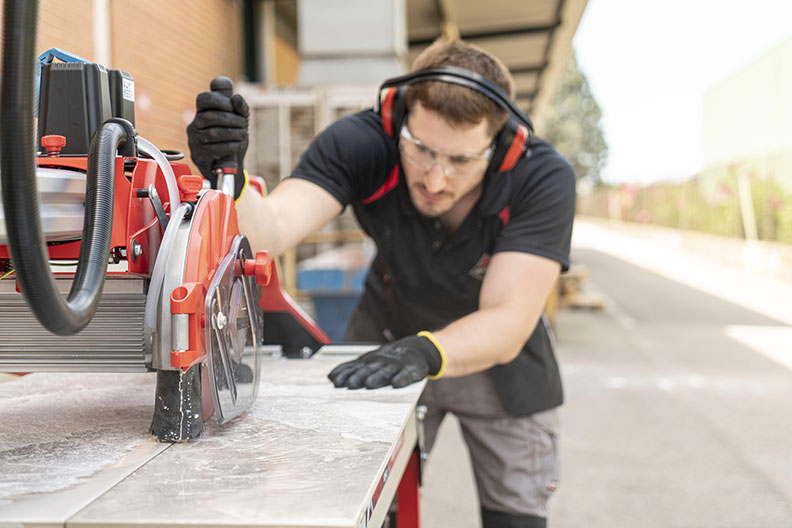
1. Wear the Right Protection

Before you get started with using the wet tile saw, you need to wear the right protection to keep yourself safe from debris and other potential dangers.
Make sure you wear hand gloves, a face mask, and goggles.
2. Prepare the Wet Tile Cutter by Connecting It to Water
Whether you’re using the best wet tile saw you’ve found for sale or you’ve chosen to get a wet tile saw rental, you need to prepare it properly so you’re using it safely. To do this, you’ll need a water source. Most wet saws come with a water pump and tank, also known as a collection tray, so usually all you have to do is fill the tank and turn the pump on.

You can use the water that’s already in the collection tray, but if you don’t want to, you should empty it and refill it with fresh water, which is the more recommendable course of action.
If you choose to use old water, make sure the water pump has a filter in place. Otherwise, you could end up with water that contains unwanted particles.
Always make sure that the water is passing through the cooling system onto the tile before you begin cutting. If the pump is not working or there is an obstruction that stops the water from flowing, then you won’t be cooling your diamond blade and, depending on which blade you’re using, you might ruin it or the tile you’re cutting.
3. Prepare the Wet Tile Cutter by Connecting It to Electricity
Now, you’ll prepare the wet tile cutter by connecting it to electricity. This is the same rule for every wet tile saw, whether you’re using a 10-inch wet tile saw, or any other type of saw.
If you’re able to place the saw right by a power source or connect it to an outlet that has 120 voltage, do this. Because it’s a dangerous situation to have water near electricity, you need to create a drip loop when connecting your wet tile to the electric source.
When you create a drip loop, you’re placing the loop lower than the outlet and the saw. This prevents the dangerous situation where water drips along the electrical cord and toward the main power. RUBI’s tile saws have water recycling systems to minimize dripping and always design the cable used the power the machine in a safe location.

4. Store Wastewater in the Right Place
When using the wet tile saw, you could easily end up making a big mess, getting the water everywhere. No matter how efficiently your tile saw recycles water, some of that water is bound to get sprayed away from the machine, so it’s best to do your wet cuts outdoors.
5. Turn On the Water First
Before you turn on the wet tile saw, you need to turn the water supply ON first. What happens if you forget to turn on the water? You could end up creating a lot of damage to your wet tile cutter. Thankfully RUBI wet saws turn the water pump on automatically when you turn on the cutter.
After you turn on the water, adjust the water flow correctly by adjusting the water lever and faucet.
6. Check the Water’s Flow on the Saw
Before you start using the wet tile saw, you need to check how the water flows on it. If it isn’t flowing on it the right way, the saw won’t work properly. The whole point of having water flow over it is to reduce the heat generated by friction, which will keep your tile as well as the blade from being damaged.
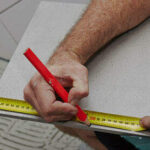
7. Mark Where You’re Cutting
Before you cut the tile with the saw, you need to mark where you’re cutting. This way, you won’t accidentally cut the wrong area. To make the mark, use a grease or lead pencil. To maintain a straight line, using a scale helps.
Be careful while you do this. If you mark the wrong area, you’ll end up cutting the wrong part of the tile.
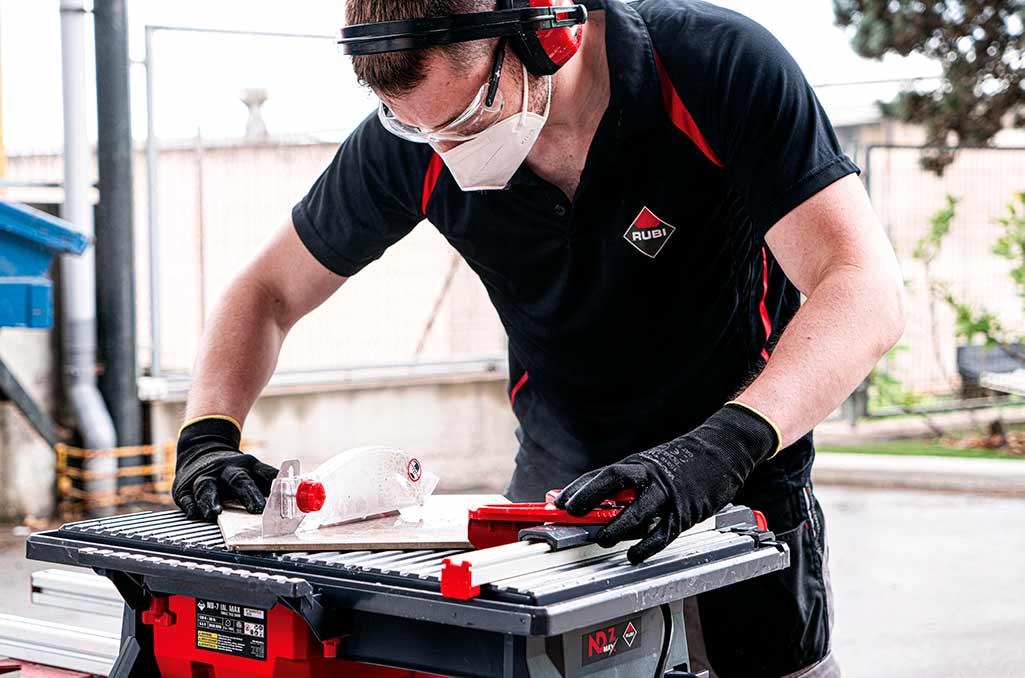
8. Keep Your Hands at the Right Distance
One of the most important tips when it comes to cutting tile with a wet tile saw is keeping your hands at the right distance. Never have your hands near the line of the blade; always keep them on the sides of the wet tile saw.
Additionally, don’t hurry while you’re cutting the tile. In addition to being safer, this will also make your cuts more accurate.
9. Observe the Blade When You Turn On the Power
At this point, you’re finally ready to turn on the power. As you turn on the wet tile saw, observe the blade. The water should be dripping while the blade rotates at the correct pace. If anything looks wrong, turn off the saw and check that it’s working properly as well as that the blade is correctly mounted and secured.
This will protect you and keep you from making any unwanted damage to the tile. If you notice that there’s a part that isn’t working or you don’t know what’s wrong, call up a professional. Fixing the saw yourself could be dangerous.

10. Begin Cutting
Once you’re ready to start cutting, be aware that the proper way to cut the tile is slowly and smoothly. If the wet saw isn’t cutting smoothly, chances are there isn’t enough water going through the wet tile saw and you need to adjust the flow accordingly.
If adjusting the flow doesn’t work or isn’t an option on the machine you’re using, stop your work, check that everything is connected properly, and readjust the water as needed. After you’ve observed the movement of the blade like you did before, start cutting again.
If there’s still resistance, there might be something wrong with the wet tile saw. In this case, call up a professional so they can fix it for you.
11. Check the Bucket Regularly
While you’re using the wet tile saw, you should check the bucket regularly for any impurities in the wastewater and most importantly to ensure that there is still enough water. As you cut, water will get splashed away from the machine, resulting water loss. So you need to check periodically if replenishment is necessary.
If the impurities start getting into the tubes that moved the water from the tank to the blade, they might get stuck, and this could negatively impact the sawing process. If you notice them, turn off the saw and disconnect all the electricity first. Then, take the bucket or water tray away from the machine to empty it. Return and start over again, taking all the precautions we’ve already reviewed beforehand.
12. Clean Regularly
In addition to checking the buildup of impurities in the bucket regularly, you also need to clean the area regularly. This way, you won’t accidentally slip on any water, knock against any piles of tiles, or stumble because of debris build-up.
If any of this were to happen, you could end up hurting yourself with the saw.
By cleaning regularly, you’ll avoid these types of dangerous accidents.
13. Be Safe
When Finishing Up When you’ve finally finished cutting the tile, you should shut off the wet tile saw before shutting off the water. Watch the blade, wait for it to stop spinning, and then place it safely to the side. Now, you can shut off the water.
Next, make sure the area is dry and unplug the electrical equipment from where you’ve plugged it in. Finish cleaning up, being careful to not accidentally knock into the blade (placing it somewhere safe away from the area will help).
Need More Information?
Now that you’ve learned about the best practices and tips for using a wet tile saw, you might need more information. Maybe you want to learn about what the best wet tile saws are for your project. Or maybe you’re looking for other tile renovation projects.
Whatever information you need, we can help. At RUBI, we’re experts when it comes to tile cutting and home improvement projects. To learn more about how we can help, check out our tips and tricks now.

Post a comment