

It’s estimated that the average American spends nearly 90% of their time indoors. That means the living room is more than just a place to relax and entertain guests. It’s also a reflection of your personality and style. Choosing the right tiles for the space can make a huge impact on how it feels and how others perceive your home. To get you started, this blog offers tips on how to select tiles for a living room. We’ll also go over the several factors to consider when choosing tile to make your living room renovation a success.


Types of Tiles for Your Living Room
One of the most important factors to consider is the type of tile to install in your living room. The good news is that you have numerous options to match your design aesthetic, budget, and functional needs. The most popular options for the living room include ceramic, natural stone, metal, mosaic, and porcelain tiles.
Porcelain Tiles
Porcelain tiles have very low porosity, making them highly water-resistant and durable. They come in a wide variety of styles and can mimic materials like wood, marble, and other stones.
Porcelain also offers great versatility for contemporary to rustic living room designs. It stands up well to heavy foot traffic and resists scratches, fading, and stains. While more expensive upfront, it lasts longer than ceramic.
Ceramic Tiles
Glazed ceramic tiles provide a glossy, decorative surface for living rooms. Unglazed ceramic has a matte finish that gives more traction.
Whatever your preference between the two, you can further customize your design with various shapes, colors, prints, and finishes. Ceramic is also affordable, but more prone to chipping than porcelain.
Natural Stone Tiles
Elegant natural stone like marble, travertine, slate, and granite is great for luxurious updated flooring. It adds timeless beauty, texture, and value to a home.
However, it stains easily, needs resealing, and can crack and chip if not cared for properly. Terrain variations in the tile grain can also make installation tricky.
Metal Tiles
For contemporary coolness, metal tiles in copper, stainless steel, bronze, nickel, and other metals infuse industrial flair.
Metal tile installation is labor-intensive and expensive but creates a living room focal point. It’s also good for radiant heating. Be prepared to polish regularly though to reduce tile scratches.
Mosaic Tiles
Tiny mosaic tiles allow for wonderfully creative laying patterns when configured in meshes or sheets. From Mediterranean style to contemporary geometric designs, mosaic tile floors make art for your feet and focal point living rooms.
Complementing Colors and Textures Already in the Room
Once you’ve decided on a tile type, it’s time to think about how it will complement the existing colors and textures in your living room. The key is choosing tiles that blend seamlessly with the surrounding furniture, walls, and decor.
If your living room features a bold, vibrant color scheme, neutral-colored tiles will do. They’ll complement the existing decor without overwhelming the space. Similarly, beige, white, or light gray tiles allow bolder paint colors, furniture, and accents to take center stage.
For a room flooded with natural light, consider darker tiles. Hues like brown, black, or deep red will give the space some dimension.
Don’t be afraid to play with texture as well. Pair sleek porcelain plank tiles with cozy linen sofas and rustic wood tables for eclectic style.
Scale also matters. For instance, small mosaic tiles suit vintage chic interiors with delicate furnishings. On the other hand, larger format tiles match perfectly with oversized contemporary sectionals.
Underfloor Heating Needs of the Room
If planning to install underfloor heating, you need to take this into account when choosing living room tiles. Prioritize tile materials that conduct and retain heat effectively, like ceramic and porcelain.
They absorb ambient warmth from the subfloor and re-release it steadily in the room. The same goes for stone tiles like marble and slate, as well as metal tiles. On the other hand, glass and mosaic tiles reflect heat rather than absorb it.
Consider investing in tiles specifically labeled for radiant floor compatibility. These are more resistant to cracking and delamination due to continued heating and cooling subfloors. With the right tile choice, your toasty living room tiles will contribute supplemental warmth on chilly days.
Uniformity of Tile Pattern and Grain
Consistency is key when selecting tiles with distinct patterns or graining for your living room floor. Inconsistent tiles detract from the elegance of the space.
Natural stone tiles like marble and slate contain unique veining and texture variations. This can make it hard to create a seamless look. Inspect tile samples to ensure consistent colors and flow of patterns.
The graining in wood-look porcelain planks also varies. Arrange panels strategically so grain differences aren’t too noticeable.
For geometric patterned tiles, ensure ratios and scale align from one tile to the next. Mixing tile batches or boxes during tile installation minimizes patchwork appearance. Or opt for solid color tiles with no variations.

Plan for Transition Areas
It’s essential to plan how the new flooring will transition into the adjoining spaces. Any area where the new tile meets a different floor covering requires a transition edge or threshold strip. Without it, the floor quickly leads to trip hazards, damage, and accidents.
Transition strip moldings are specially designed to protect the juncture points of two different floor types. They provide a smooth and gradual slope between higher and lower floor coverings. They also manage changes in flooring heights, effectively preventing uneven joints.
Transition strips also help preserve the durability of wheeled furniture and cleaning equipment. Some of the best options include reducer strips, T-moldings, and end caps.
Whatever your preference, be sure to take measurements and incorporate them into the tiling plan. This will demonstrate attention to detail.
Equipment You’ll Need
The equipment you’ll need for this project should factor into your choice of living room tiles. Being prepared with the right tiling tools ensures that the installation goes smoothly and serves you for a long time. When choosing your equipment, look for brands that are known for their quality and durability.
That said, below is a closer look at the tools and equipment you’ll need:
Measuring and Marking Tools
Laying and spacing tiles accurately rely on having quality measuring and marking tools on hand. Invest in a durable 25-foot steel tape measure that won’t bend or warp when running long lines. Stainless steel rulers and 4-foot leveling sticks maintain straight edges.
Ensure your tiles are properly aligned with a right-angle square and triangular marking tool. This is especially important when dealing with irregular layouts, fireplaces, and bay windows.
Cutting Tools
Cutting tools suited for the tile material is essential for custom-fitting your living room layout. Quality manual tile cutters handle porcelain, ceramic, or glass while keeping tiles aligned.
Sturdy tungsten carbide scoring wheels score and break tile along precise lines. Specialized nippers cleanly trim protruding L-shapes and corners one nibble at a time.
For natural stone or large format tiles, always opt for renting a wet saw rather than risking uneven shattering.
Adhesion Tools
A quality notched trowel is the tool of choice when it comes to applying adhesive. The key is to choose the right-sized notches in the steel blade. For instance, you’ll get great results with a 1/4″ square notch for ceramic mosaics. Similarly, opt for a 1/2″ rounded edge when installing flooring like large porcelain pavers.
Remember to replace any worn trowels regularly. Otherwise, they’ll drag uneven lines and compromise the bonding strength. Multi-surface thin-set mortar sticks reliably to both subfloor and tile without shrinking.
Spacing and Tapping Tools
You want to ensure that your tiles are properly spaced with flawless grout lines. This is where durable plastic spacers come in. Place them strategically as you lay each tile to maintain even gaps.
Size up spacer thickness to 1/16″, 1/8″, or 1⁄4″ based on tile format and type for ideal lines. Keep spacers in place for 48 hours. Once the adhesive dries, remove spacers before applying sanded grout where necessary.
To set tiles securely and level within the grid, gently tap plastic or rubber mallets across the surface rather than hammering to prevent cracking fragile materials like glass or natural stone. Proper spacing and force distribution keep room tiles looking sharp.
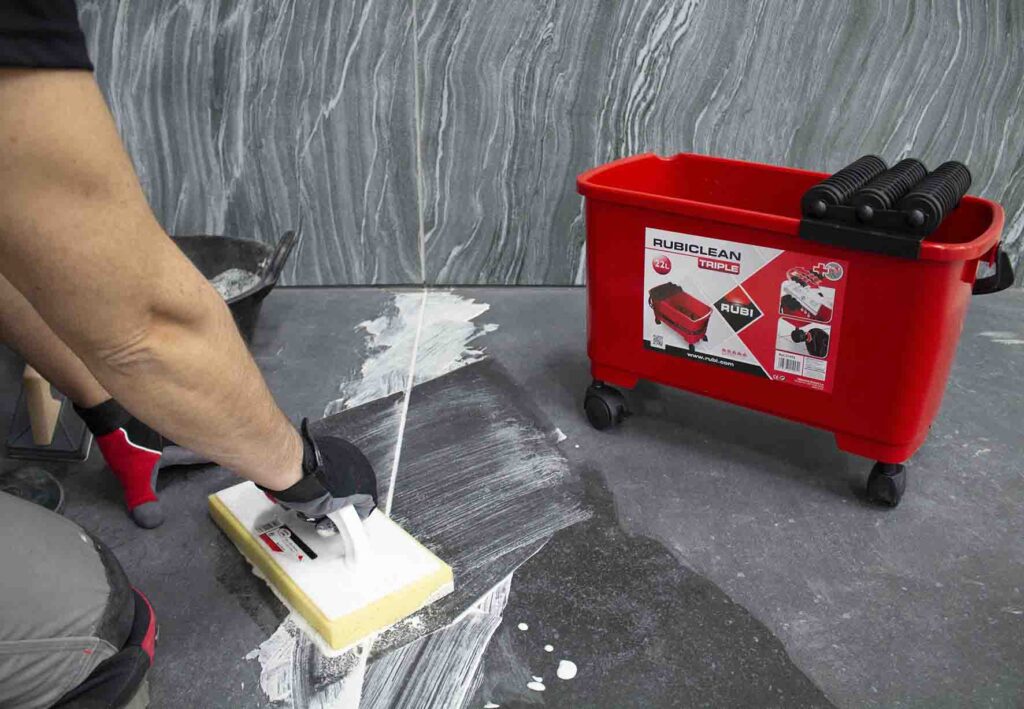
Grouting and Finishing Tools
Applying grout fully into joints relies on hard rubber floats with beveled edges, forcing the mixture down. Carefully clean off residue diagonally across tiles using handheld dense sponges designed to avoid scratching high-gloss surfaces.
Follow with barely-damp finishing sponges over the entire floor to polish and shape joints nicely. Use any remaining grout mixture on minor edge gaps before curing.
Once dried, apply manufacturer-recommended sealants with soft cloths. Maintain the protection by reapplying the sealant at least once a year.
Knowing How to Select Tiles for a Living Room is Crucial
But so is working with the right tools. That’s where Rubi comes in. We make quality tile installation tools to ensure your renovation project goes off without a hitch. From measuring and cutting to spacing, we have it all.
Now that you know how to select tiles for a living room, it’s time to order the tools you’ll need for this project. Browse our selection of tile installation tools today!

Post a comment