

Doing a tile installation in your house can increase your home value. If you want to make a profit when selling your home, keep reading. Tiling the floor can be tricky. Especially if it’s your first time. In this article, you will gain knowledge and a guide to help you get started. If you don’t know how to tile a floor, by the end of this article, you will!

Types of Tiles
Make sure that you have the best type of floor tile for you. This could be ceramic tile, porcelain tile, glass, marble, or granite tile.
Ceramic tile is truly versatile and can be used for many things. It is relatively affordable and can be used in a bedroom, kitchen, bathroom, or front entryway.
Porcelain tile is a fancier version of ceramic tile. These tiles are more expensive and more durable than ceramic tiles. They are best used for backsplashes and floors.
Glass tile is a bit trickier and complicated. Although it is very difficult to stain, glass tile primarily has two uses. It is used for shower tiles and backsplashes.
Marble tile is extremely fancy and will cost a lot more than the previous tiles. Marble is a beautiful stone that makes for a great tile. Although it is expensive it can be amazing as an entryway tile or for a bedroom.
Granite tile is a hard tile that does not chip or crack easily. Don’t worry too much about granite as it is mainly used for countertops or entryways.
Slab tiles are made completely out of concrete and are often extremely heavy and dense. They’re best used outdoors depending on the style you are going for and can be cut using a power saw and should be done outside.
How to Tile a Floor
A tiled floor gives a home added beauty. Along with the added beauty comes an easy-to-clean surface!
There are several ways you can tile a floor. Make sure to select the method that makes the most sense for your home.
If you are wondering how long does it take to tile a floor, the answer varies based on the size of the floor. Another factor is the level of expertise of the tiler. If this is your first time, it is safe to say it will take a few days.
It will take time to remove existing flooring, measure, install the tile, and allow the mortar to set. You will not be able to walk on the floor immediately, so make sure that you are allowing time for the tile to be set in place.
Preparation
The first things you will need to prepare are your tools and materials. As with any job, good and thorough preparation will normally lead to a complete job with minimal failure.
You will need to gather several items in order to start laying tile.
Tools needed include a level, measuring tape, hammer, chisel, floor scraper, and rubber mallet. That’s not all.
You will also need a utility knife, drill, caulk gun, nail set, and eye protection. For a full list of needed tools click here.
Once you have gathered your tools, you will need to gather your materials. Materials needed include the floor tile, tile spacers, grout, grout sealer, silicone caulk, and the tile membrane.
You will also need to have a thin-set mortar, cloths, and grout haze remover. For a full list of materials needed, click here.

Subfloor Preparation
One of the most important steps of the tiling process is to prepare or install your subfloor. Depending on the state of the floor you are replacing, you may have to install a new subfloor to make it level and sturdy.
If you are beginning with a blank canvas of a subfloor, you are in good shape. If not, you will need to remove the old tile that you want to replace with a chisel.
You will then need to use a floor scraper to eliminate the existing mortar. Be sure to wear eye protection when doing this step.
You need to ensure the subfloor is even. If you do not make sure it’s even, the project will not turn out how you want it to. Use your level and measure in more than one place.
Installing the Tile
Now you are ready to start laying down the tile. Measure all dimensions of the floor you are trying to tile.
This way, you will be able to ensure you have the right amount of tile. Buy 5-10% more tile than you need just in case a piece breaks or something unexpected happens.
Begin to put down your thinset mortar. This is what will essentially hold your tiles in place. The thinset will hold the tile membrane which will hold your tiles.
Unmodified thinset mortar works best for tiling projects. The thinset will create a strong bond and hold between the tile and the subfloor.
Step-By-Step Guide for How to Tile a Floor
It’s time to get on the floor and start tiling. Follow this checklist for how to tile your floors!
Step 1: Put Tools and Materials in the Room
Make sure that you have everything you need in front of you. You don’t want to leave your utility knife somewhere when you need it. Have everything as close by as possible and make sure to remember where you put certain things.
Step 2: Cut the Tile Membrane
To stop the mortar from drying, cut the tile membrane before applying the mortar to the floor. Make sure that you cut the membrane to the exact size of the floor so there are no spaces left between the membrane and the wall.
With a pencil, trace along the edges of the membrane so you know where to fill in your mortar.
Step 3: Spread the Mortar
You will need to mix the thinset here. Apply the thinset little by little so it doesn’t dry. You will need to install the membrane while the thinset is still damp.
Spread the thinset very evenly with your trowel. Make sure to avoid lumps or obstructions in the thinset.
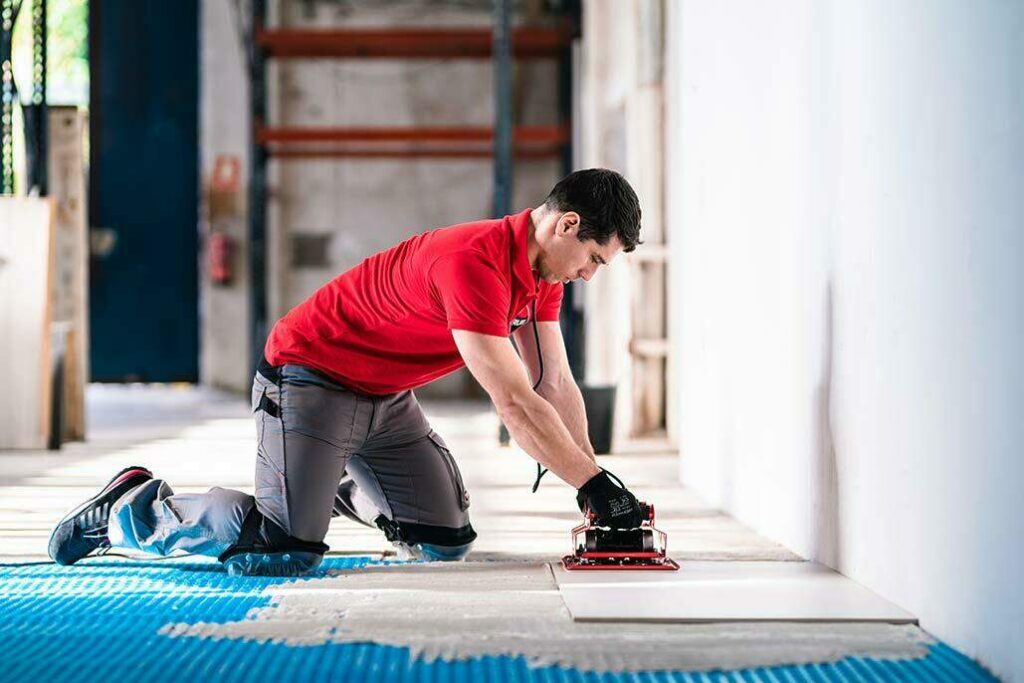
Step 4: Tile Membrane
While the thinset is still damp, put down the tile membrane. You will need to put it FLEECE SIDE DOWN.
To keep installing the tile membrane, keep applying more thinset. Again, you don’t want to put all the thinset down at once. It will dry and you will have to scrape it up to put down a new layer.
Step 5: Cover the Tile Membrane Cracks
Odds are, your tile membrane won’t cover the entire floor with one massive piece. There will be cracks between different pieces.
You need to cover this up. The best practice is to use waterproofing tape or another water-resistant covering.
Use the water-resistant sealer of your choice between the membrane and the wall. Caulk could be a great choice if you have finished walls.
Step 6: Map Out the Tiles
You don’t want to start laying the tiles and immediately hate the design. You should place the tiles in a good starting position and start creating the design that works best for your design.
Line the tiles up and make sure that you have proper expansion gaps. Use reference lines to remember what you want to put where.
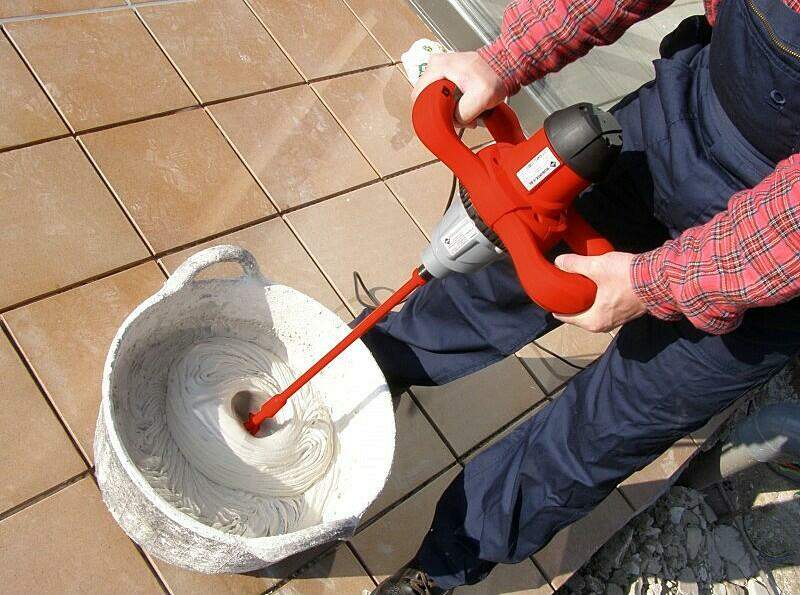
Step 7: Mix Your Mortar for Floor Tiles
Mix more of your thinset mortar. You will want this batch to have a thinner and almost creamy consistency than the other batch.
Begin applying mortar section by section. Make sure that the mortar stays damp for the tile. Do not apply the mortar to the membrane all at once.
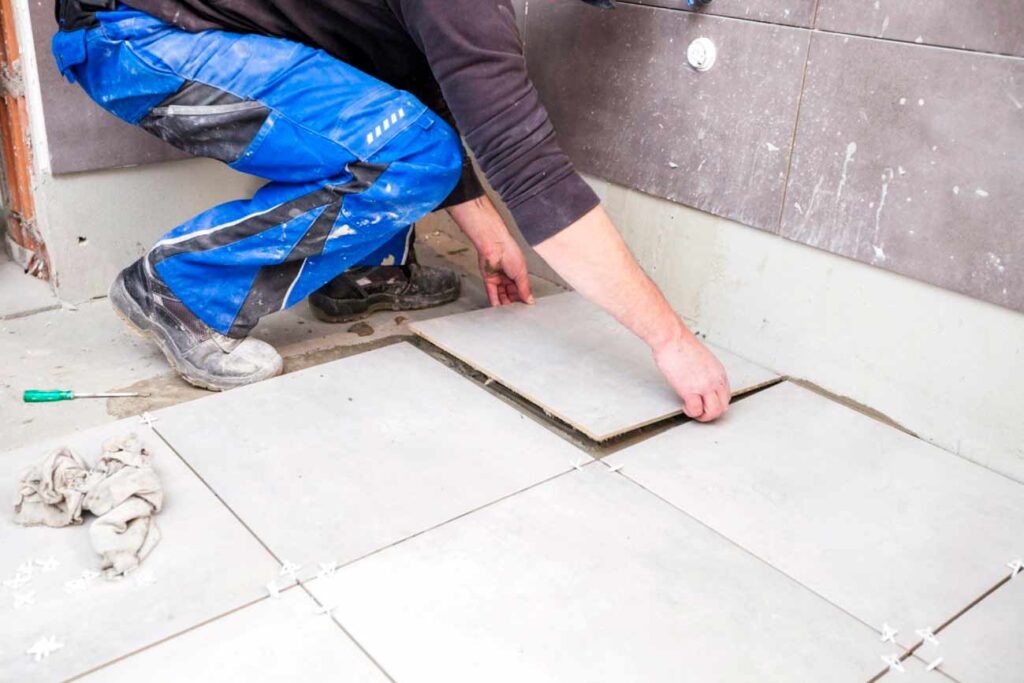
Step 8: Lay the Tile
Start laying down the tile in the same place that you wanted to start in. Make sure to follow the pattern that you mapped out previously to avoid any changes or missteps.
You will need to use spacers between each tile while you lay them down. Check tiles to make sure that they are starting to bond with the thinset. While laying down the tile, make sure to use your level and make sure the tiles are straight.
If you need to, cut the tile using a tile cutter, wet tile saw, or tile hole saw. If you have something you need to work around, measure it out on the tiles, draw the specific lines, and cut off the excess.
Step 9: Let the Mortar Set and Apply the Grout
After you have finished laying your tile and everything looks good, let everything sit for 24 hours. After that period, you can start to apply your grout.
Remove the spacers between each tile. Then, use a rubber float to press the grout into the seams.
Spread the grout diagonally as this will be the best way to distribute the grout. Remove all excess grout and wait 20 minutes to clean up the grout lines with a wet cloth.
After you clean the grout off, wait 72 hours to begin walking on the new floor. Grab your grout haze remover and begin cleaning any residue off the floor.
The last step is to use silicone sealant in the space between the edge of the tiles and the wall. Let that sit, and you are done.
Start Your Project Today!
Installing a new floor can increase the value of your home. It can also make your home much more functional. However, tiling can be difficult. You will need to create a good plan to follow and maybe seek the help of someone who has tiled before.
Have fun and remember to be safe!
If you need more advice, tips, and tricks for installing tiles, check out our website.

Post a comment