
Now more than ever first-time buyers are struggling to get on the property ladder. Most will either look for a new build which come with their own host of problems, or an older property which needs some TLC. Many are choosing the later option and learning how to tile to make those all-important renovations such as replacing ceramic tile in certain areas of their new home.
Whether you’ve just moved into your new house, or you’ve been thinking of taking on some tiling for a few years, it can be stressful not knowing how to remove your tiles properly. In this blog we talk about all the steps needed to take when replacing ceramic tile.

1. PREPARE PROPERLY
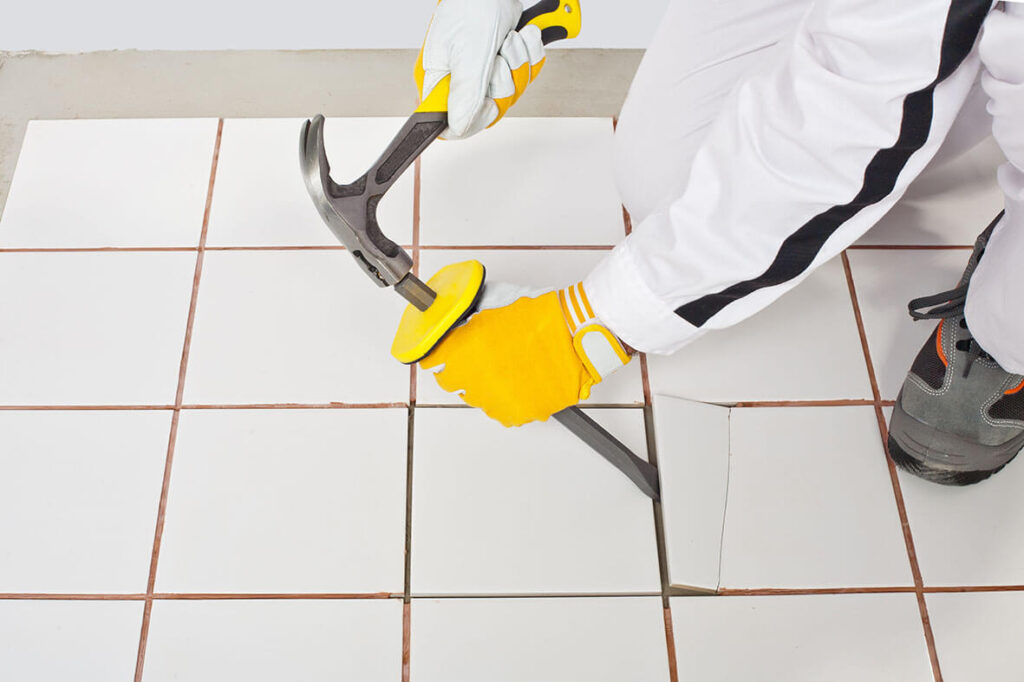
Before you start the process of removing the original tiles and replacing them with new ones, it’s important to prepare. Make sure you have the right protection, such as safety goggles, earplugs, heavy-duty gloves, and a dust mask.
You’ll also have to prepare the space itself so that you don’t damage other parts of the room while you’re working.
To get started, remove all furniture from the room. Then remove any doors, door frames and trim with the help of a hammer, drill, and pry bar. This way, they won’t get covered in dust or damaged while you’re replacing the tiles.
You’ll also want to use plastic sheets. Any open doorways should be covered with them, so dust won’t spread into other areas of your home.
Additionally, protect any objects you can’t move in the room, such as fireplaces, shower trays, the sink, or the bath. This will keep them from being damaged if any pieces of tile fly and hit them when you’re working. You can use cardboard to cover these areas.
2. REMOVE THE TILES
The next step is the fun part: removing the tiles!
When it comes to replacing ceramic tile, a lot of factors can depend on what type of tiles and floor you have. You might need to use a tile removal tool or ceramic tile removal machine. If you’re able to, you can pry each tile by using a chisel, placing it at an angle under the tile edge.
Then, as you remove the tiles, make sure you have an area to place the removed tiles. Ceramic tiles can have extremely sharp edges, especially if they have been chipped or broken in any way. You can easily hurt yourself accidentally if you don’t take precautions.
Removing the First Tile
It can be difficult to remove the very first tile, so it’s a good idea to look for one that’s loose. It will be easier to remove, and once you’ve removed that one, you can remove the ones around it.
If you can’t find a loose tile, the best thing to do is carefully smash a tile. You can do this with a hammer or sledgehammer. When you’re using your hammer or sledgehammer, do so with care. You can always start off with a softer swing and work your way up to the right amount of force to break the tile. You’ll be surprised how little force most tiles need to break!
If you are going to remove ceramic tile from concrete or another surface, the last thing you want to do is damage the area below. Structural damage to the floor can create problems with the subfloor.
Once you’ve carefully used the hammer or sledgehammer with just the right amount of force to break a few tiles, see if you can pry up the rest of them. This way, you’re less likely to do a large amount of damage.

3. USE YOUR FLOOR SCRAPER
Once you’ve removed a certain number of tiles, the rest will be easier to remove. As a result, you won’t have to use a chisel or the back of your hammer to pull out the tiles. All you do is pry out the tiles, and at this point, they should come out more easily.
If using a floor scraper, keep in mind that these work both face down or face up. Using it the right way will make it much easier for you to complete your task.
4. REMOVE THE GROUT AND ADHESIVE
After you’ve taken the tiles off and put them to the side, remove the grout and adhesive that’s still attached to the sub-floor by using a masonry chisel or hammer.
If you’re lucky, the grout and adhesive will be easy to remove. You might even be able to pull it off by hand with ease. However, it might be hardened, and feel almost like concrete. In this, case, the tools you have will come in handy.
This is an important step you need to take when replacing ceramic tile. It’s also important if you’re planning to re-tile the area or put down another type of flooring.
5. MAKE THE FLOOR SMOOTH BEFORE REPLACING CERAMIC TILE
Now that you’ve removed the tiles, you need to prepare the floor so you can start replacing the ceramic tile. First, you need to make the floor smooth. This will make laying the new tiles much easier.
First, use your hammer to remove any adhesive residue that has hardened. To do this properly, smash up areas that are around 2 or 3 square feet.
This will make it possible to completely remove any of the leftover adhesive. Then use a shovel or scraper to get these pieces out of the way.
If the adhesive is being stubborn you can take a grinding cup to the concrete floor to help remove it and smooth it down. In extreme cases you might need to get a new sub-floor.
ADDITIONAL STEPS FOR MAKING THE FLOOR SMOOTH
Once you’ve taken up the old tiles, you should inspect the floor that you are now working with. Depending on the underlayment’s condition and the requirements for setting the new tiles, you might need to remove the underlayment. Keep in mind that you should do this if the current underlayment is seriously damaged.
If it’s made from plywood, you should replace it. This is because plywood is no longer considered to be a suitable sub-floor when installing tiles.
To get rid of the sub-floor, cut the underlayment with a circular saw into manageable sections. Note that the thickness of the circular saw blade should be set at the same thickness as the pieces of underlayment you’re cutting.
Finally, remove all the debris and dust. Once you’ve done this, you can install a new subfloor if needed. If not needed, simply use a stripper to smooth down the floor, after which it should be ready for tile installation.
6. PREPARE THE FLOOR FOR REPLACING CERAMIC TILE
Replacing ceramic tile can be a long process, but now that you have started to prep the floor for the new tiles, we can move forward.
Start by measuring your floor to figure out how many new tiles you’re going to install. Do this by measuring your floor’s length and width. Then, divide that amount by the square footage each tile covers.
Depending on which tiles you’re considering, this number can vary. Generally speaking, you should get 10% more tiles than you need. This can be helpful if any of the tiles are broken or break while you are working, or if you make mistakes.
Once you’ve bought your tiles, dry lay them to get an idea of what the floor might look like and plan any cuts that are needed. For help on how to cut your tiles read our blog here. Now you’re ready to install the new tiles.
7. INSTALL THE NEW TILES
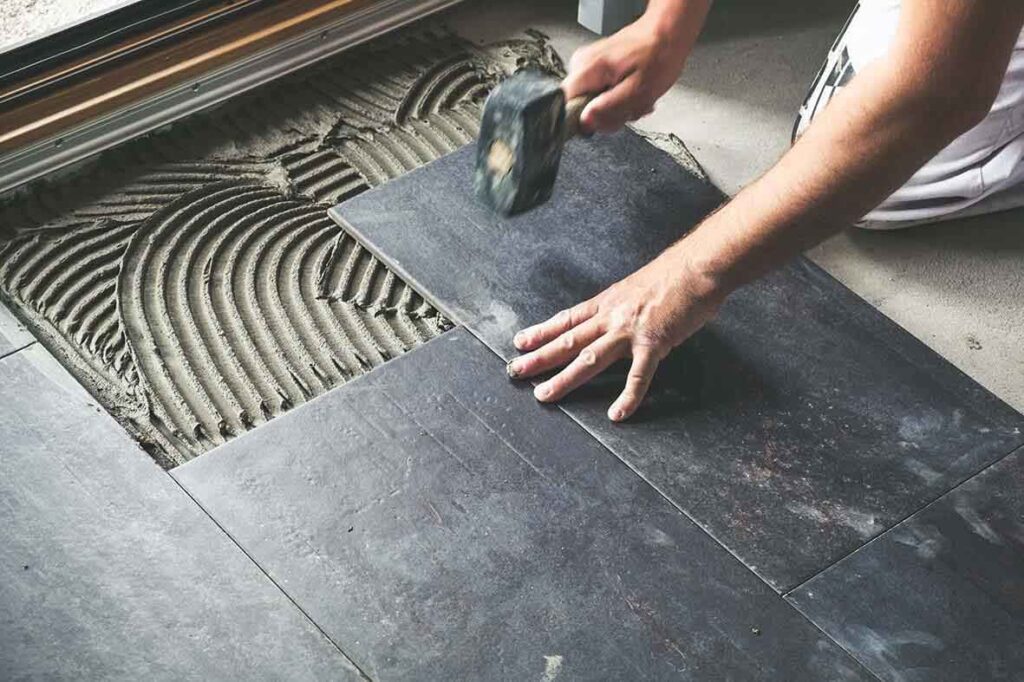
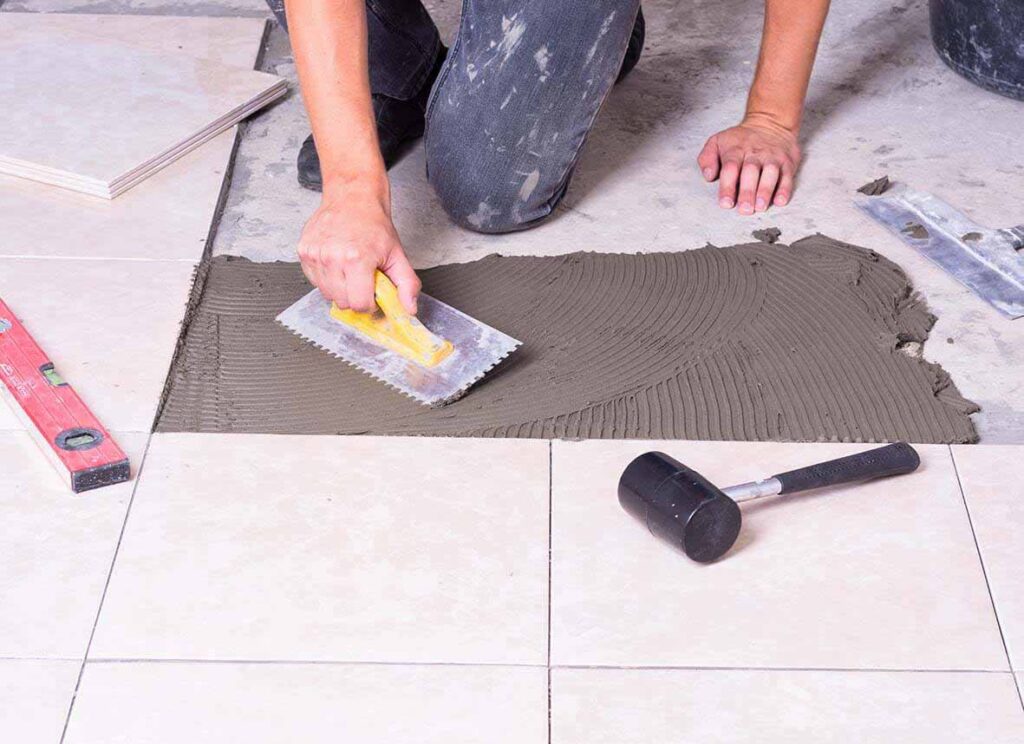
To install the new tiles, take your thinset and place it on the floor, using a trowel to spread it out. Work on a small section at a time, you don’t want the adhesive to dry before you’ve had a chance to work with it.
Using the notches on the trowel, create lines in the thinset which go in the direction of the short edge of your tiles. All these trowel lines should be straight and going in one direction to help eliminate any air pockets and to get a full coverage and strong adhesion to the tiles. Once you’ve done this, you can start placing the new tiles on the thin set.
Place each tile down carefully, using a suction cup can help get your tiles in place. Then move it slightly, wiggling it, so that it will stick. A rubber mallet can help set it at the very end.
Do this with each tile until you’ve set them all. If there are any issues, remove the tile immediately and fix its placement, as the thin-set can dry quickly.
Once you’ve finished laying the tile and allowed it to set, you can place some grout in the joints between each tile to finish off the project.
NEED MORE INFORMATION ON REPLACING CERAMIC TILE?
Now that you’ve learned the steps you need to take when replacing ceramic tile, maybe you need help choosing the right ceramic tiles for your project, or want to find the right tile cutter for you. Whatever information you need, we can help! At RUBI, we’re experts when it comes to tile installations.
We also offer lots of tips and tricks on how to install tiles. Check out our blog for more helpful tips and tricks.

I have floor that has been treated wrongly by the passed oner . Could you come and price this for me .my telephone number is 07445 594004 please give call