Tiling is a skilled job that requires a good amount of planning, but we are here to help you get the best finish. Whether you’re tiling a full bathroom, a kitchen splash back, the shower floor or any small areas that require more skill such as a fireplace, we’re here to give you the best advice & information on how to tile that will help you achieve a great result.
In this blog, we’ll take you through all the important things to consider when planning your tiling and how to tile. All from prepping the surface, to the types of tools you’ll need and the different methods for tiling the floor, walls and other areas of a project.

INDEX
1. How to tile
3. How to Tile According to the Room
4. How to lay specialised tiles
5. What are the different tile patterns?
How to tile
Step 1: Choosing the material
Tile is one of the most popular materials used in both kitchen renovation and bathroom renovation.
In recent years, its popularity has in fact continued to grow, becoming a frequently sort after material in all areas of the house. Due to its cost-saving potential and ability to rejuvenate a room with its beautiful colours, patterns or textures.
When it comes to deciding on the type of tile you want, it can often be a difficult decision, with an array of different materials, each with their own benefits & disadvantages.
It’s also important to think about where you plan to place your tiles. If you are planning on tiling your hallway or kitchen, these are areas with a lot of footfall and therefore require a material that is durable.
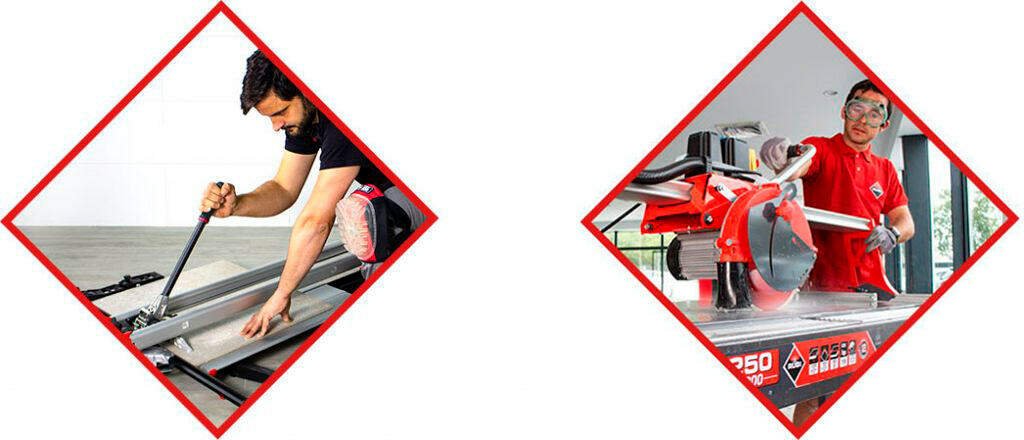
Step 2: Cutting Ceramic Tiles
When cutting your tiles, depending on the material you need to cut you’ll need to use a tile cutter either a manual cutter or an electric cutter.
Typically, manual cutters are used for cutting standard ceramic and porcelain tiles. With electric cutters used for natural stone and more extreme tiles such as 20mm porcelain.
Step 3: Preparing the surface
Before you start, it’s important to make sure the surfaces you’ll be working on are clean, dry and most importantly flat.
If you’re replacing wallpaper for tile, first, strip back the wallpaper to the plaster. Remembering to fill in any holes or cracks that you find with a suitable filler, then coating with primer. Once this is completely dry, you are ready to start tiling!
Step 4: Mix the adhesive
One of the most important parts of learning how to tile successfully, is in getting the adhesive mix right. It’s important to know how to mix adhesive correctly in order to achieve the strongest bond possible and a long-standing installation.
An improper mix of adhesive may cause issues to your installation or can even halt the entire project, causing tiles to become dislodged or uneven.
When it comes to mixing your adhesive, the best advice is to read the instructions the manufacturers put on the bag. There are many different types and brands of adhesive, which all have varied instructions and measurements to achieve the perfect consistency for their adhesive.
When mixing, continue to mix your adhesive to reach a thick consistency, similar to peanut butter.
You want the mix to be thick enough to apply to the wall without dropping too much. While still being workable enough that you can manipulate the tiles a little after applying them to the wall.
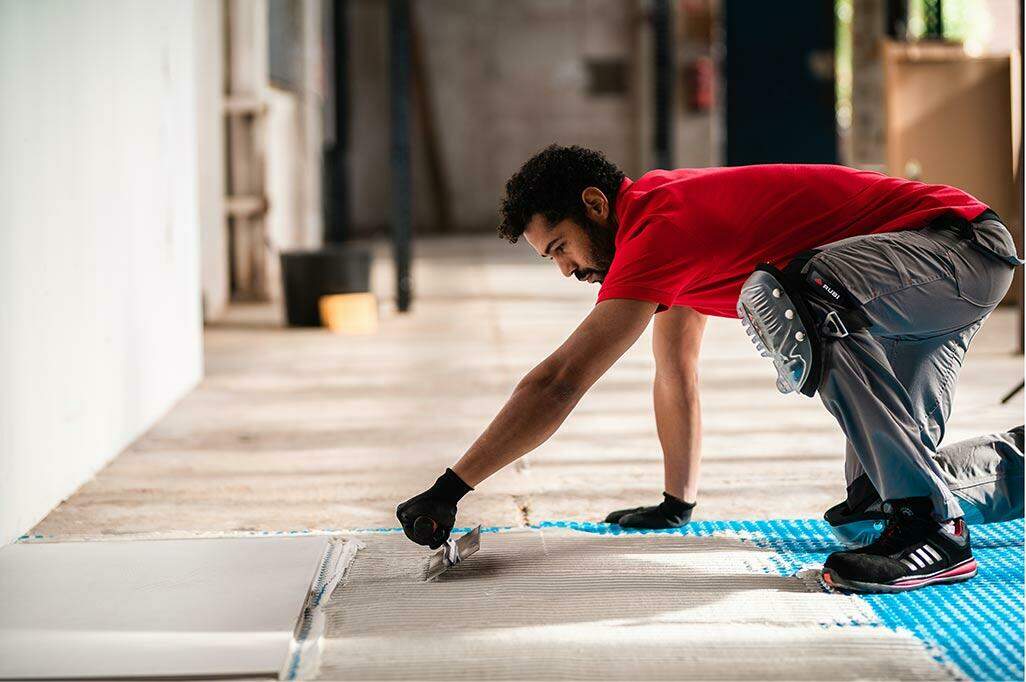
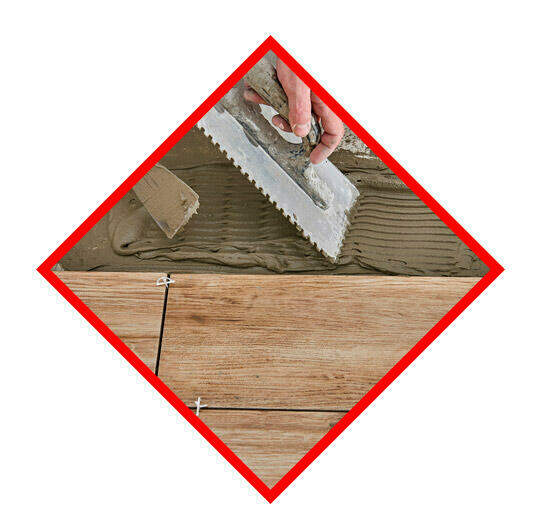
Step 5: Apply the adhesive
When applying the adhesive, it is essential for there to be minimum 85% total coverage beneath a tile for dry area placement (such as dry floors, fireplace etc.) and 95% coverage in exterior and wet areas (such as showers, bath surrounds etc.).
It is also important to remember when learning how to tile, when applying the adhesive, to comb it in straight lines using a tile trowel.
Applying the ridges in straight lines not only allow the adhesive to collapse more easily when laying your tile. This also helps to remove more air from the adhesive, thus ensuring a stronger bond between the tile and adhesive.
Step 6: Laying the ceramic tile
When it comes to finally laying your tile down, make sure that you ‘back-butter’ your tile with adhesive. Back buttering is extremely effective in increasing the bond of the mortar on the floor to the mortar on your tile.
Particularly when working with large format tiles, this also ensures a stronger bond to the tile & substrate.
Tools Needed for Tiling
It is important to choose the right tiling tools for the construction work, depending on the use and the phase of the process.
By choosing the correct tiling tools we’ll decrease the amount of time needed to complete a project. The tools won’t be damaged by the materials, neither would we.
Adhesive
In our guide how to tile, creating a strong bond between the tile and the flooring or wall is the next step in achieving a durable, lasting, successful tile installation.
It is important to choose the appropriate adhesive for the tile you’re using for your project. The size and type of the tile are important in helping to determine which adhesive is best as well as the type of substrate you’re tiling onto.
You should also take into consideration the colour of the adhesive and grout you’re choosing, using similar colours. If the joints aren’t kept extremely clean, this can marble the grout.
Types of adhesives: what to consider
Selecting the wrong adhesive for your project, can lead to a number of issues such as de-bonding of your tiles or cracking, which will cause financial pain both in recompense & repair.
When choosing your adhesive, there are two different types of tile adhesive to choose from, ready mixed pastes & powdered adhesives.
- Ready mixed adhesives can be used straight out of the tub and in fact dries at a slower rate than powder adhesives. It is most suitable for tiles no larger than 60x30cm or areas such as kitchen splash backs where the levels of moisture are lower.
- Powdered adhesives on the other hand, need to be mixed with water, achieving the right consistency which takes a little more time and effort. However, unlike ready mixed, powdered tile adhesive can be used for tiling in all sizes and areas including floors, wet rooms, bathrooms and are even suitable to use outdoors.
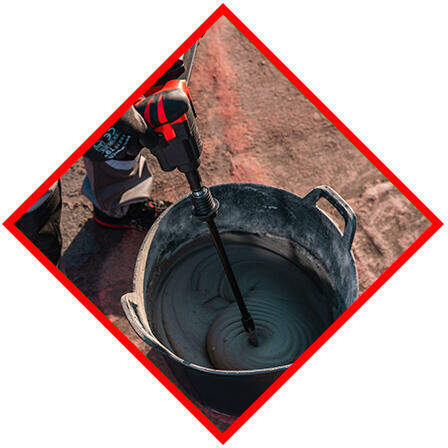
Electric mixer
Getting the right adhesive mix of one of the key aspects of a successful tile installation.
Mixing your adhesive correctly and to a good consistency will enable you to achieve a strong bond and overall a long-lasting installation.
A mixing drill and paddle are fundamental to achieving a good consistency every time with minimal time and effort. Electric mixers not only significantly reduce the effort of mixing adhesives, grouts & levelling compounds. But their variable speeds can help with mixing larger quantities of product.
It’s important to note when using an electric mixer, when pausing to add more adhesive or water or once you’ve got your adhesive to the right consistency. Make sure to transfer the paddle to a second bucket of clean water and mix to clean the paddle.
This will save time when cleaning your mixer later, and will prevent the adhesive drying and sticking to your paddle.
Leveling systems
Levelling systems are devices used when installing tiles, to help remove the differences in level & tile lippage that can arise between two or more tiles.
These systems will help promote a better bond with the tile and adhesive and ensure a flat surface. This will prevent tile lippage and removing the added time, effort and overall cost on a project to fix these problems if they arise.
Levelling systems are usually made up of two to three components:
- A clip which is embedded into the tile adhesive, between your tiles to create your grout joint between tiles.
- A wedge which is used to apply sufficient pressure between tiles, preventing any from being higher than the other.
- A levelling tool allowing you to apply the correct pressure to the clip and wedge to achieve a flat surface with minimal effort.
SPATULA AND TROWEL
Before you begin applying your adhesive and laying your tiles, you must decide which tile trower size you will use.
When considering the trowel size to use, you must make the decision based on the size and type of tile you’re laying.
Each type of tile may require a different sized trowel. It’s important, no matter the size of you tile to get the right amount of adhesive on the back of the tile to ensure the tiles stick to the wall or floor.
As a general rule, the larger the tile, the larger the notched trowel you should use.
When making this decision, there are two key trowels to choose between: a u-notched trowel or a square-notched trowel.
SUCTION CUPS FOR TILE INSTALLATION
Suction cups are an essential piece of equipment for tiling work. Particularly with the evolution and increasing demand for large-format tiles, the use of suctions cups has become increasingly necessary.
They are specifically designed for the handling and loading of materials, allowing you to lift and place heavy tiles with a smooth or rough finish with greater ease.

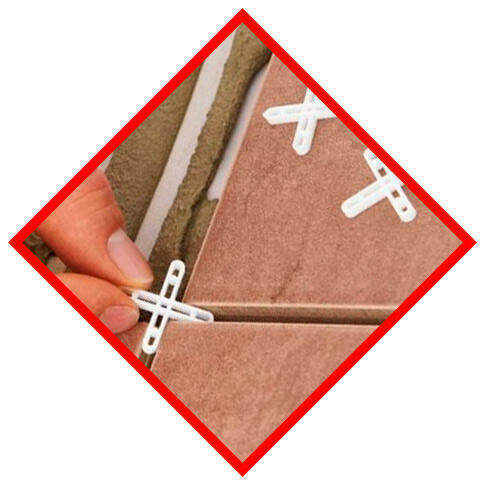
CROSSPIECES, JOINTS, T’S
Floor tile spacers should be used between each tile when laying to ensure regular spacing and an even finish when it comes to grouting your tiles.
RUBI tile spacers come in different widths ranging from 1mm – 10mm based on the size of tile you are laying and effect you are looking for.
Once you’ve applied your adhesive to the floor and placed the tiles on top of it, simply place spacers at each corner of your tiles. Do it pushing the tiles together until the spacer is fully pressed up against each corner of each tile.
When estimating the number of tile spacers you’ll need for your project, you will need one spacer per tile including the 10% extra in case of damages. It’s worth noting however, to always getting a little bit extra, to account for any breakages or spacers that go missing.
PROTECTION ELEMENTS

Learning how to tile without proper protection, can leave yourself open to acute injury or long-term health effects.
Wearing protective gloves can provide barrier protection against abrasions and cuts. As well as providing extra grip when handling tiles, further preventing any accidents.
Your eyes are extremely sensitive and vulnerable to a number of simple hazards when tiling such as dust or chipping when cutting tiles. Using eye protection such as safety glasses will ensure you protect your eyes from potential injury.
Tiling is a trade that requires precision and years of experience to master.
It’s also a trade that requires you to spend long periods of time kneeling on the floor, constantly bearing loads and repetitive movements. Investing in protective knee pads is essential to the job.
You may also consider an ergonomic seat if you work on a lot of flooring for better positioning and comfort when tiling.

HOW TO TILE ACCORDING TO THE ROOM
HOW TO TILE A FLOOR
When laying floor tiles, the two most important things to consider is making sure your surfaceis correctly prepared to tile on and finding your midpoint.
A common mistake when laying tiles is the selection of the wrong adhesive or bond type for your material.
Using the incorrect adhesive with your tile will stop it bonding well, impacting the longevity of your installation.
When tiling the room, you should typically start from a central point in the room and work your way out to each corner. As most rooms aren’t perfectly square, if you start from the edge of the room, you could end up with a real mess.
This also allows you to not only tile more effectively, tiling out of the room so that you finish by the door. But by starting in the middle of the room, the tiles are laid to best suit someone’s line of sight when walking into the room.
It is however, useful to dry lay a row of tiles (placing your tiles on the ground without adhesive) to make sure your last tile doesn’t need to be cut by more than half or require a very thin cut to finish.
If this is the case, we recommend shifting your layout so your new starting point ends with even cut tiles. This will leave you with a cleaner finish and a better aesthetic on completion.
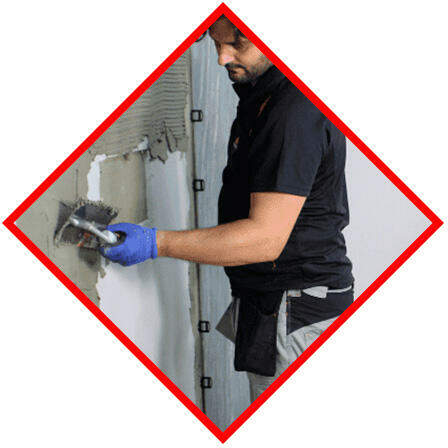
TILING ON PAINTED WALL

Preparing a wall for tiling is the first step we should take in account. Painted surfaces are generally unsuitable for tiling. Commonly used paints such as emulsion painted surfaces must be removed before tiling.
This is due to emulsion paint being water based, meaning when adhesive is added on top. It will reactivate it causing a very weak bond which could have a disastrous effect on your installation.
Once you’ve removed the paint and cleaned the wall, you will need to score the surface with a scraper or sanding the surface. This is done to create small, rough grooves that help your adhesive grip to the wall when applying it.
The rougher you make the surface, the stronger the tile adhesion will be. Once you’ve prepared the wall as so, you are ready to begin tiling.
HOW TO TILE A KITCHEN FLOOR
Porcelain or ceramic tile are the popular choices when deciding on how to tile a kitchen flooring. Due to kitchens being a high-traffic area, porcelain is the better choice. It is a lot more durable than ceramic tiles and are both easy to clean and are low maintenance.
Similarly when looking at how to tile a floor, it’s important to start with measuring and finding the centre of your room. When tiling your kitchen, it’s often useful to pull your cabinets and appliances out before tiling.
This will remove added work of having to cut your tiles around cabinets and leave you with a cleaner finish with much less effort.
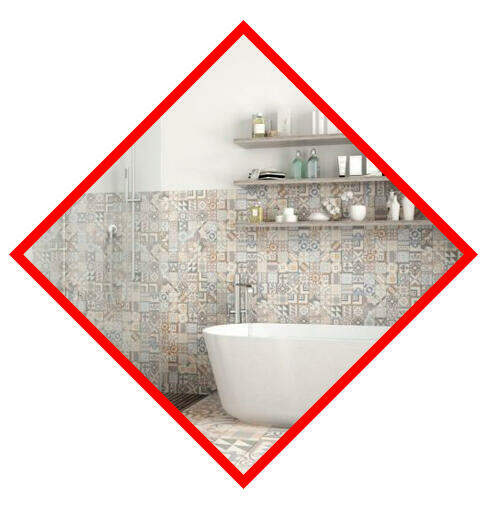
HOW TO LAY BATHROOM TILE
When laying bathroom tiles, it’s important to prepare the substrates properly.
The current British standards state that you need to fully tank wet rooms and the wet areas of bathrooms to ensure that the walls and floor are completely waterproof, as tile adhesive is only water-resistant.
Choosing a tile adhesive that won’t be affected by added moisture is also very important. Therefore flexible or epoxy adhesive are the best options when tiling your bathroom.
- Flexible adhesive provides a very strong bond and is resistant to moisture and mold growth, making it the best option for tiling bathroom floors and any tile in wet areas.
- Epoxy tile adhesive comes in three-components that are mixed together right before use. Relative to flexible, epoxy provides a highly durable bond strength and is resistant to water.
It’s also important to use an anti-fungal grout to protect your grout lines from the added moisture that builds in bathrooms.
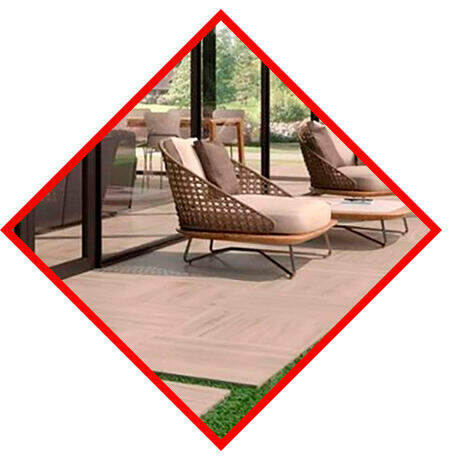
HOW TO LAY PORCELAIN TILE OUTSIDE
External porcelain tile has become a lot more commonly known and prevalent in the past couple of years. There are many benefits to choosing porcelain for tiling outside over more traditional materials such as cement, stone and wood.
For one, external porcelain is very strong and hard-wearing, often being double the thickness of standard indoor porcelain. Due to its strength, it also offers a lot of additional benefits like being frost proof, scratch resistant and load bearing. It can also be cut, allowing them to be fit for steps, upstands or different shaped patios.
HOW TO LAY SPECIALISEDTILES
HOW TO LAY FLOOR TILES ON CONCRETE
If properly planned, concrete can be a great base for a tiled floor.
Floors can often become uneven over time due to moisture and cracking. So before laying your tile it’s important to make sure that your floor is clean, dry, any small cracks or holes have been patched up. Also most importantly, making sure the concrete is level.
Once you’ve confirmed these, apply a primer to the entire surface of the floor, making sure to work it into the pores of the concrete.
You will then mix and prepare a floor levelling compound to help waterproof the surface, smooth and strengthen the concrete and make sure the surface is fully level.
Once this has dried, you are ready to mix your adhesive and begin tiling!
WOOD EFFECT TILES
Wood-effect tiles are a very durable and easy to maintain, making them a great alternative to traditional hardwood.
They are however not completely flat, with wood-effect tiles having a slightly higher centre. You must prepare the floor properly and lay the tiles in quarter or third bond to reduce lippage and achieve a great finish.
Make sure to remove any deviation in the floor, outlining any variations in the floor’s height to account for this when you begin tiling.
Lastly, the secret to a successful tile installation is the importance of getting the right adhesive consistency.
Taking the time to achieve a perfect blended mix will help you to achieve a strong bond between your floor and tile, leaving you with a long-lasting installation.
TILING OVER UNDERFLOOR HEATING
Underfloor heating can cause a number of issues for you, if not tiled onto correctly. From damaging the wires when troweling, to tiles cracking due to heat expansion.
When adding your adhesives, it’s best to use a flexible adhesive, as this will cope with the regular changes in temperature and sub-floor movements.
Using a self-levelling compound over the wires will protect them when troweling the adhesive and avoid any potential damage caused to the wires when troweling.
This also mitigates future risks of damaging the wire. If in the future a tile needs to come up or you want to replace your tiles, you have a much lower chance of damaging the system as it’s separately enclosed.
When it comes to tiling, make sure to trowel your adhesive properly to avoid pockets of air, as this can cause the tile to crack.
WHAT ARE THE DIFFERENT TILE PATTERNS?
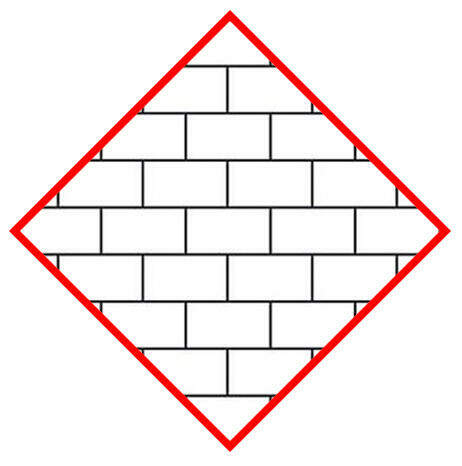
BRICK BOND
The most traditional tile laying pattern, typically seen with brick and mortar, laid to create a patterned effect.
This is often designed as 50:50 brick bond or 70:30, which is known as a staggered brick bond.
STEPLADDER
It is a vertical brick bond, used to help create an illusion of height in a room.
This design has grown in popularity when laying large format tile, however it is still used for small format tiles as well.
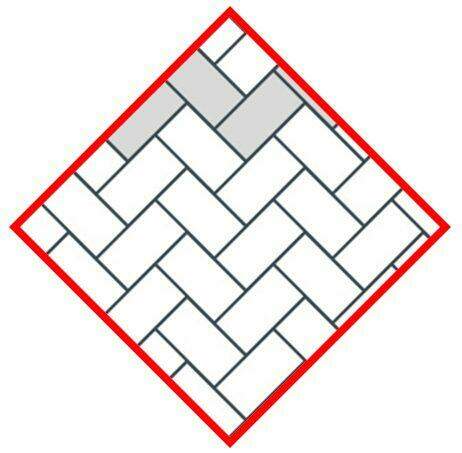
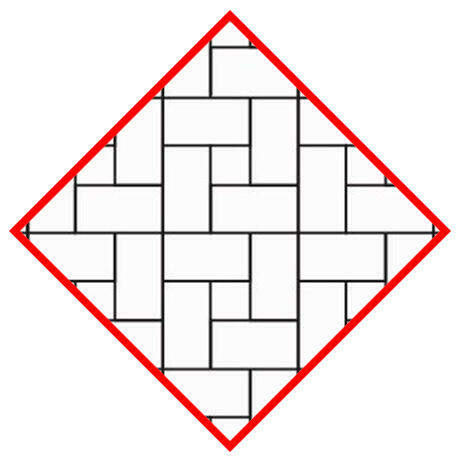
HERRINGBONE
Herringbone is quickly becoming a pattern that everyone demands in their new renovations. This classy pattern is an arrangement of rectangles, one cut tile laid facing one direction and the second tile laid pointing in the opposite direction in a 45-degree angled V shape. This is a particularly tricky pattern to accomplish, so it’s good to get a professional in if needed, to get this installed to look the best.

LINEAR
It is a simple design, creating a modern grid pattern by laying square or rectangular tiles in a straight line.
Often the colour of the tile is contrasted to the colour of grout in order to help make the pattern stand out and catch the eye.
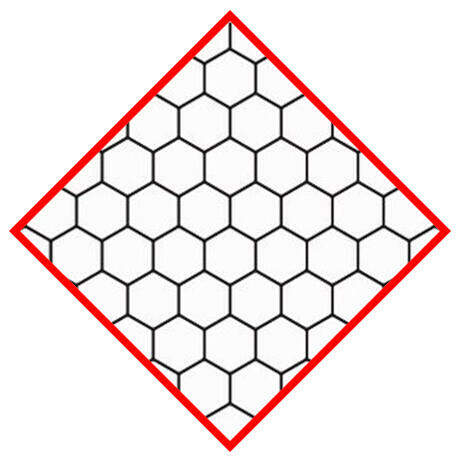
HEXAGON
Tile patterns give an unusual yet stylish backdrop to the rest of your room decor. This style of pattern is used both for small and large format tiles. With small format tiles, you could use a hexagonal mosaic sheet, rather than laying them individually. This will both keep the aesthetic of your design, while saving you a lot of time to setup.
MODULAR
Patterns are great for creating a unique and interesting design on your walls or floors.
Using several different tile sizes, they are slotted together over a repeated pattern to give your design structure, while catching the eye with it’s unique pattern.
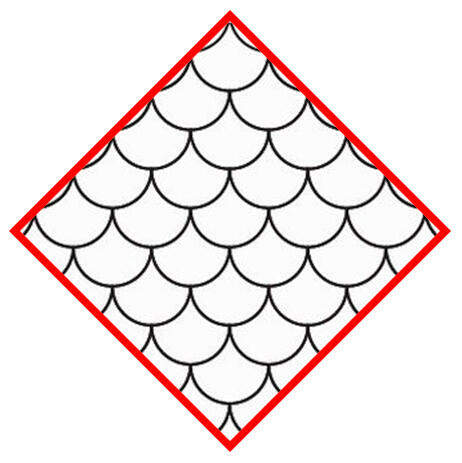
FAN
Fan or sometimes referred to as fish scale tiles, are slowly making their way into more modern interiors.
The design has a Moroccan feel when laid upside down. They’re an extremely eye-catching design that’ll make your bathroom or kitchen splashback stand out.
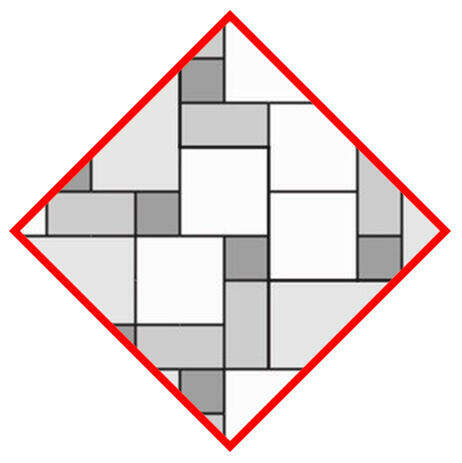
WINDMILL
Windmill with the right tile is a great way to make your wall or flooring a focal point of the space. The design is quite simplistic, using four rectangular tiles to create a square shape with a smaller tile (usually a different colour) placed in the middle. This can be done either using two different tile shapes or worked by cutting down a tile to fit between the rectangular tiles.
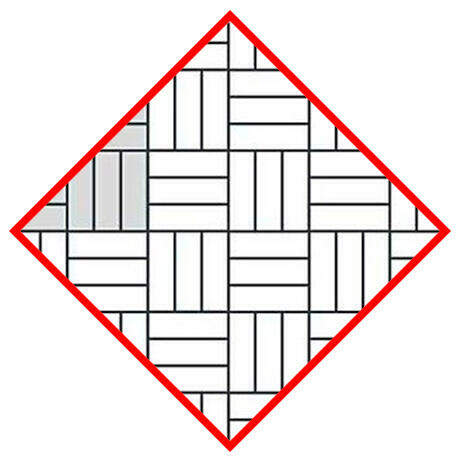
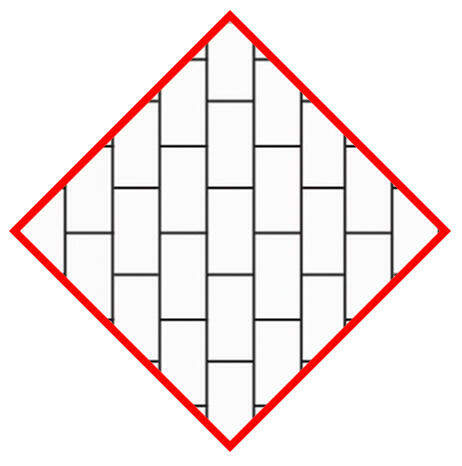
BASKET WEAVE
This is an incredibly simple laying style but appealing both on the eye and on the tiled room itself. This pattern is achieved by simply laying three tiles vertically, then three tiles horizontally, then three vertically, then three horizontally and so on. On your next line of tiles, the vertical and horizontal order are switched up to add variation and create this striking pattern.
SQUARE & DIAMOND
For a more rustic and traditional look, stack your square tiles in a grid pattern. You can achieve a diamond design by simply laying the same tiles at a 45-degree angle. By laying both patterns with the same tile, you can create a subtle interest that doesn’t draw too much attention away from the main elements of your room. It’s a beautiful look for a kitchen backsplash or a great way to make your floors look wider.
If you found our guide on How To Tile useful, check out or other articles or tiling tips here.
Keep me updated
Great after study
Your careful information provided to the readers has been appropriate and useful.I for one greatly appreciate it.
Starting out tiling as a hobby and will like to learn all it takes to be successful
You have done and have being doing a very good job, may God bless you more!
Good quality accessories and tools can be very helpful for tiling process. Powerful adhesive, leveling plan and system etc. play a very important part. Thanks. Keep it up!
Xtra Step 12mm Laminate Flooring Warrington
Dear Author, Your blog on tiling is a treasure trove of information, offering a comprehensive guide from material selection to intricate tiling patterns. Your emphasis on surface preparation and adhesive mixing is crucial for a successful installation. I especially appreciate the detailed explanation of different tile patterns like herringbone and windmill, which can truly elevate the aesthetics of any space. Your blog is a valuable resource for both beginners and experienced tilers alike. Thank you for sharing your expertise!
Amazing procedures
This guide is incredibly detailed! I appreciate the step-by-step instructions and the inclusion of tips for avoiding common mistakes. It’s reassuring to know I can refer to this when I start my tiling project.
How to use tiles
Your guide on tiling steps, materials, and methods for different rooms is very informative. I appreciate the attention to detail in selecting the right tile for each space. Adding some troubleshooting tips for common tiling challenges would make it even better. Keep up the great work!
I need tools of tiles and how to buy it
Great blog! How to Tile: Steps, Materials, and Methods According to Room is a comprehensive guide that takes the guesswork out of tiling projects. By breaking it down room by room, it helps readers choose the right materials and techniques for each space—whether it’s a kitchen, bathroom, or entryway. Super informative and practical for DIYers and pros alike!
the instruction is educative and workable